Friday, March 30, 2012

Review: Amazing Animals by Design

One of my son's favorite activities as a toddler was going to the Indianapolis Zoo with his grandparents.  He had a well-trodden  path from the shark petting tank to the dolphin show to the elephant exhibit.  It was so pleasant then when he mere observed the wonderful animals that God created.  Now that Schnickelfritz can read, trips to the zoo are a little like walking through a mine field.  We never know when the signage will blow up the theory of evolution in our faces.  Too bad we can't visit a zoo like the one in the book Amazing Animals by Design.

John, Sarah, and their parents are spending the day looking at various animals at the zoo: giraffes, elephants, ostriches and big cats like the caracal (which can jump 12 feet up in the air and knock birds out of the sky for dinner). 

At every stop, zoo workers explain to the family how the animals have been designed  to live in their environment, to obtain food, and to protect themselves.  Over dinner that night the family continues to discuss how these animals were not cosmic accidents and more importantly, neither are we.  We have been specially designed in God's image and equipped with skills and talents to be used for his glory.

Amazing Animals by Design is only 24 pages long--certainly within the concentration time limits of little ones   eager to head to the zoo.  Right now it's available through Tate Publishing as a paperback ($8.99) or a PDF download ($7.99).  After its official release on April 3rd it will be available on Amazon and other online retailers.  I want to be sure and mention the the author, Debra Haagen, is one of my Homeschool Crewmates!  This is her first children's book to be published so CONGRATULATIONS Debra!

You can read what other crewmates think of Amazing Animals by Design by clicking here.

Disclaimer:  I received a free PDF copy of Amazing Animals by Design for the purpose of completing this review.  I received no other compensation for my honest opinion.

Thursday, March 29, 2012

F is for Freddy the Pig

You would think with my son's obsession with all things Hank the Cowdog, that John R. Erickson had invented the idea of farm animals talking to each other.  My Schnickelfritz has apparently forgotten the little runt pig Wilber we read about in Charlotte's Web four years ago.  The idea has also been the theme of television shows like Mr. Ed.   Hmmm, talking animals, a pig and Mr. Ed...if you diagrammed these ideas they would all intersect at a point labeled Freddy the Pig.    More than 75 years ago Walter R. Brooks (who later invented Mr. Ed) wrote a series of books about a farm of talking animals in upstate New York:  Hank the horse, Jinx the Cat, Mrs. Wiggins the cow and Freddy who emerged as the star of the series.

Not only do these animals talk amongst themselves, but in the wonderful world of children's fiction they also communicate with humans and nobody blinks an eye.   And it goes far beyond just talking--Freddy runs an animal travel agency, a bank, a newspaper, a detective agency, and a political campaign.  He writes poetry, becomes a magician, and learns to fly a plane. 

We were introduced to the series through Jan Bloom's Who Should We Then Read?   Mr. Brooks had garnered Top Author status in this compilation of 140 writers with a Christian worldview.   By coincidence, the same time I purchased this reference book Overlook Press had just  reissued hardback versions of all the Freddy books in honor of his 75th anniversary.   Unfortunately for Overlook, today's youth has a taste for vampires, werewolves, wizards, and post-apocalyptic death games.  The books didn't sell well and ended up at Half-Price Books, where I snatched up as many as I could.

Freddy is a character from a kinder, gentler age.  Ladies still wear hats and gloves.  In one of my favorite books, Freddy and the Popinjay, a robin earns money to pay for his new glasses (he was so near-sighted he mistook Freddy's tail for a worm) by posing on a lady's hat during a wedding she was attending.  The worst problem involves stopping a bully from hitting the animals with rocks from his sling shot (the answer is find him a friend to play with). 

That's not to say they aren't bad guys in the stories.  Freddy's chief nemesis is Simon the rat who lived under the barn stealing corn until he's banished from the farm.  He still finds ways to cause mischief in several of the volumes.  There are also humans that try to put the animal newspaper out of business or cheat Mr. Bean their farmer/owner.  It's nothing that a clever pig can't handle though.

If you kids like to listen to audiobooks, several titles have been read by Mr. John McDonough.  He reads in such a pleasant and soothing voice that it's easy to lull my son to sleep at bedtime.  Here is a complete list of Freddy books (colored titles have audio versions as well).
  1. Freddy Goes to Florida, 1927 (Originally titled To and Again)
  2. Freddy Goes to the North Pole, 1930 (Originally titled More To and Again)
  3. Freddy the Detective, 1932
  4. The Story of Freginald, 1936 (Originally titled Freddy and Freginald)
  5. The Clockwork Twin, 1937 (Originally titled Freddy and the Clockwork Twin)
  6. Freddy the Politician, 1939 (Originally titled Wiggins for President)
  7. Freddy's Cousin Weedly, 1940
  8. Freddy and the Ignormus, 1941
  9. Freddy and the Perilous Adventure, 1942
  10. Freddy and the Bean Home News, 1943
  11. Freddy and Mr. Camphor, 1944
  12. Freddy and the Popinjay, 1945
  13. Freddy the Pied Piper, 1946
  14. Freddy the Magician, 1947
  15. Freddy Goes Camping, 1948
  16. Freddy Plays Football, 1949
  17. Freddy the Cowboy, 1950
  18. Freddy Rides Again, 1951
  19. Freddy the Pilot, 1952
  20. Freddy and the Spaceship, 1953
  21. Freddy and the Men from Mars, 1954
  22. Freddy and the Baseball Team From Mars, 1955
  23. Freddy and Simon the Dictator, 1956
  24. Freddy and the Flying Saucer Plans, 1957
  25. Freddy and the Dragon, 1958
This summer if your looking for some "just for fun" books that can be enjoyed by boys and girls, see if you can't find Freddy at your local library--the smart ones will have held onto these titles.  In the meantime, check out Ben and Me to see what others have come up with for the letter F.

Photobucket

Wednesday, March 28, 2012

History Rollin' Down the Tracks

Schnickelfritz and I always try to view the steam trains when they pass through town (and judging by the crowds, so do a lot of others).  This train was special for a number of reasons.  First, it's the first one to pull through since Fritz's grandpa moved to town and they could go see it together.  Second, this train was carrying a group of Civil War reenactors to the 150th anniversary of the Battle of Shiloh. 

We barely parked  when we heard the whistle blow and saw a plume of black smoke rise from behind the trees.  The 844 pulled into the station decked out in red, white and blue bunting.

The workers spent the entire twenty minute stop with air ratchets and grease guns maintaining the drive rods.  Fritz's Papa was giving us a play by play of what they were doing.  (He had seen the  this train last fall when it overnighted in St. Louis and had a chance to talk to maintenance crew).  We weren't allowed to get very close this time.  The railroad tracks in the foreground were "live" and we had two freight trains pass by while the 844 was in town.  The second actually stopped before reaching the station.  I don't know if they were worried about hitting an onlooker or if they just didn't want to block the view of the 844 pulling out.   Unfortunately, the old train needed a little more work before it could leave so the freight train started up again.  The kids on our side of the tracks made a game of jumping over the shafts of sunlight that appeared between the cars.  The long train had picked up considerable speed before it had passed by and it was impressive to feel the ground shake and the breeze it created.

Once the "new" had passed by, the "old" blew it's steam whistle and began to chug away.  There were several passenger cars full of men in Civil War uniforms.  In the past, uniformed conductors with shiny brass buttons waved to the crowd from the viewing platform on the final car.  This time there were two generals--one from the North and one from the South and then a flatcar full of cannons!

 
If you'd like to see if a steam train is headed to your town you can find their schedule at Union Pacific's website.

Tuesday, March 27, 2012

Let's Make a Lapbook: Planning


I'm planning on squeezing in Exploring Creation with Botany this summer.  We skipped this book in the series and I want to do it in the summer when we can actually grow some things.  I realize that I could purchase the Notebooking Journal for this title or one of several commercial lapbook kits, but I've decided to make my own and I'm taking everyone along for the ride.  We'll learn together (hopefully not from mistakes) how to plan and design a lapbook.  I developed my own planning page and you can download your own copy here.
Lapbook Planning Page


 Today I'll be reading through the first chapter and deciding what to include.  The obvious place to start is with the vocabulary words.  Apologia makes this very simple by printing them in BOLD text, but they've also formatted a few other words this way (and I don't think my son needs more than 8-10 vocabulary words) so I'll be selective.  For example, the words kingdom, phylum, class, order, family, genus and species all appear in bold but the text really never explains what a phylum is.    These terms would be better used in a mini book explaining taxonomy.  The text also bolds the words xylem and phloem but then mentions they'll be covered in a future lesson so I won't include them now.  The planner page I created has space for twelve words so I may list some and cross them off later.  For lesson One I found the following:

  • Botany
  • Biology
  • Classification
  • Binomial Nomenclature
  • Vascular
  • Angiosperms
  • Gymnosperms
  • pod
After addressing vocabulary,  I look for the author's hints about what key information my child should be learning/remembering.  So far all the Young Explorer Series books have had chapter sections titled "What Do You Remember?"  These are usually a list of questions--our job is to translate that into a mini book form.  Some questions simply ask for the definition of a term (we've already taken care of that in our vocabulary section).   A better mini-book topic is "Why do scientists use Latin?"  I write the question on my planner page.  This is a simple, 1-unit book.  I'll write the question on the front and try to include a picture (maybe even scan the Roman boy from the book) and then Schnickelfritz can write his answer inside.  Other concepts may need two parts, like comparing/contrasting the human vascular system to a plant vascular system.  I'm still trying to come up with a plan to cover the seven levels of taxonomy but I've put a little sketch in the mini book template area as a starting point.


Once I've got my list of mini books, I can search the Internet and my saved files for mini book templates that will fit the bill,  but we'll save that for another post...

Sunday, March 25, 2012

Extracurricular Means Extra Fun

I had a little giggle when I read this week's Blog Cruise question:  What extracurricular activities do your kids enjoy?  To my mind "extracurricular"  means outside the realm of school.  I don't know if all homeschooling moms think like me or just the ones that have to log hours, but I'm forever finding ways to count all our activities as school hours.  I will list a few of the less academic activities my Schnickelfritz enjoys.

Upwards Basketball 

This was Fritz's third season to play basketball (of course we count it as P.E.).   After four weeks of practices they play an 8 game season.  This is a Christian-based organization--each practice has a brief devotion for the teams and there is a gospel message for the fans at half-time of each game.  The best aspect of Upwards is that all players get equal playing time.  My Schnickelfritz doesn't read my posts so I can safely share with you that he's not the best player on the team despite the Indiana blood pumping through his veins.  In a competitive league he would probably be a bench warmer.  It's too bad they don't give out points based on enthusiasm--he cavorts up and down the court though he rarely touches the ball.  I've seen other players with physical handicaps like a degenerative spine.  The boy often lost the ball as he dribbled because he couldn't bend over, but he was never harassed when it happened and the other players always made sure he got another chance with the ball.    Each team assigns colored wrist bands to each player (I don't think the boys ever picked up on the fact that this is done based on ability) and you are only allowed to guard the player with the same color.  This way the best players are matched against one another.   The Upwards organization also offers soccer and flag football for Kindergartners through sixth graders.  You can find a league near you at the Upwards website.

Orienteering

If you're looking for an activity the whole family can enjoy together I whole-heartedly recommend orienteering.  Consider it part cross-country, part geography lesson, and part Easter egg hunt.  We take part in the monthly events of the St. Louis Orienteering Club--in the summer the meets are usually at county parks and they move to the larger state parks when the vegetation dies down in the fall and winter.   You begin each race with a map...


The center point of each circle marks the spot you will find an orange and white "control" flag. When you arrive at a specific area a clue sheet will help you hone in on your target.  The controls are all numbered and it's important to make sure you've got the right control as they are often several courses of varying difficulty being run at the same time.  At this particular event we were running neck and neck with three boys after control #8.  One of the boys shouted he knew where the last control was because he'd seen it before the race began and they headed towards the river--but that control was for the white course.  Fritz and I snuck over to control #9 and were headed to the finish line when we passed the boys headed to opposite direction after realizing their error.

 Attached to each control is either a paper punch or an electronic device that will record your find on a "dibber" you wear on your thumb.  Competitions can take two formats--in the example above you needed to follow a specific course and find the controls in order.  The fastest time wins (we placed second in this race).  In O-meets the controls are scattered in every direction and you are given a time limit to find as many as possible.  Controls that are well hidden or further away may be worth more points.  If you exceed the time limit points will be deducted.  Highest points wins. 

This is really a thinking sport--reading the topographic lines one the map, plotting a course, etc.  Will the straightest path be fastest or will the steep terrain slow us down?  And you don't have to run it like a race.  This Meramec State park meet was a particularly gorgeous October day and there were several families with kids on dad's shoulders just hiking along the course.  You can look for a club in your area at Orienteering USA.

Royal Rangers


Fritz earning his Gold Trail Award
 I always wanted Fritz to be involved in a scouting program and found Royal Rangers accepts boys in kindergarten.  He's learning all the typical scouting things like using tools, fire safety and camping but the program also has a Christian aspect.  According to the national website "Royal Rangers is a mentoring program for future men.  We provide Christlike character formation and servant leadership development for boys and young men in a highly relational and fun environment.  Our mission is to evangelize, equip, and empower the next generation of Christlike men and lifelong servant leaders.For advancement Fritz must earn two Bible merits (each based on a single book of the Bible) for every skill merit. 

I know the cruise topic is extracurricular activities but I can log so much of the merit work as regular school hours.  Fritz created a whole notebook on American presidents that counted as history.  Bird Study and Instect study fit in with our Flying Creatures of the Fifth Day.  Next year he'll be earning his astronomy and space exploration merits as an extension of our Apologia Astronomy study.

God's timing was perfect,  Fritz turned 9 last November and finally became eligible to go camping and this summer is the big 50th anniversary Camporama--which takes place in our home state, down near Branson.

When Fritz advances to Adventure Rangers, I'm hoping he'll want to participate in a special off-chute of RR called Frontiersmen Camping Fellowship.  Here men and boys practice the skills of our pioneer forefathers--shooting black powder rifles, camping in primitive shelters, etc.  He's already earned several of the necessary merits--First Aid, Compass, Ropecraft, and Toolcraft.  You can find more information about Royal Rangers and Frontiersmen Camping Fellowship at theie national websites.   

We do have several more activities I could mention--karate, chess club, and 4-H.  I suppose we do more than most because I want Fritz to have the opportunity to interact with other kids (there's that whole socialization issue).  If he were away at school all day and then involved in all these things I would say that it's too much, but he and I are home together most of the time.  BE sure to visit the Blog Cruise and see what activities other Homeschool Crew families enjoy.  

Thursday, March 22, 2012

E is for Easter

You can tell what time is approaching the minute you enter Walmart--pastel colored candies, chocolate bunnies, and baskets of all shapes and sizes.  Easter is coming.  It doesn't get quite the same build up as Christmas which seems to appear in stores around October.  Frankly, I'd rather have more time to think about Easter coming because it means winter is over and spring is here.  Still, I usually end up leaving the store perturbed that the world is celebrating a myth that brings gifts to good little boys and girls rather than Jesus who offers the greatest gift of all to a world of sinners.  For the purpose of fitting in with the "E" letter of the week for Ben & Me's ABC challenge I need to call the day Easter, but the activities I'm suggesting are really to celebrate Resurrection Sunday.   I know the actual day is still a few weeks away, but some of these ideas will require a little prep time.

Make a Resurrection Garden

This picture appeared on my Facebook news feed.  I've been trying to track down the originator but I've found it on several blogs and Pinterest boards.  If it's yours, let me know so I can give you credit.

The design uses a large terracotta base and a smaller pot (buried) forms the empty tomb.  Cover the pot with soil and grass seed.  Find a large stone to cover the entrance--I'll admit the smooth stone looks better than the rough ones I can find in my yard.  We may need to head down to the creek to look for our stones.  The crosses can be lashed or hot glued.   All in all, a rather inexpensive project. 


Make Resurrection Rolls or Cookies


from MommysIdeaBook.com

This next idea doesn't need to be started so far ahead.   Both involve a hollow treat that reminds us of the empty tomb.  The cookie is  meringue-based so it may not appeal to everyone but it's easy to Google the recipe and Bible verses to read while making the cookies.   I found a PDF version at MommyIdeaBook.com . The cookies have to be left in the oven overnight so there is some planning ahead to be done.  If you've forgotten until Easter morning or if the cookie doesn't appeal to you, the rolls may be a better option.  You can use you own bread dough or if you don't bake your own bread you can get a tube of crescent rolls.  Dip large marshmallows in melted butter and then in a mix of sugar and cinnamon.  Then wrap bread dough or a crescent roll around the marshmallow--TIGHTLY!  The marshmallow will melt and coat the interior with the sugar mixture.   Lori Viets of Breadclass.com has a video of the process.

Make a set of Resurrection Eggs

Okay, I'll admit I enjoyed hunting for Easter eggs as a kid.  My cousins and I would take turns hiding them in different rooms at Grandma's house when the family gathered for Easter Dinner.  It is still possible to make the event lead us to think about the true story of Easter instead of a hippity-hoppity bunny.  Last year Schnickelfritz made a set of Resurrection eggs in Sunday School.  All you need is a dozen plastic eggs, a permanent marker, and a few odds and ends.   Think of 11 objects from Palm Sunday through the crucifixion and keep a numbered list with corresponding Bible passages (here are a few ideas).

  • A leaf can represent a palm branch
  • A thorn from a rose bush or other thorny plant (we have raspberry canes) can represent a crown of thorns.
  • A few dimes can represent the 3- piece of silver. 
  • A piece of sponge representing the one dipped in vinegar
  • A piece of purple cloth
  • Cloves to represent the spices to anoint the body
  • Nails
  • A toothpick decorated with paint or markers to resemble the spear in his side
  • Make sure to leave one egg empty

If you want to include something for which  you don't have an object you can always print a small picture from an online source--maybe a picture of a lamb to represent Passover or sacrifice.

Use the marker to write numbers on the eggs to match the Bible passage list.  The empty egg will be number 12.  Save the eggs after they've all been found and open them in order and share the Gospel story as you go.


Photobucket

Be sure to visit Ben and Me and see what "E" topics the other bloggers have come up with.

Thursday, March 15, 2012

D is for Dam

Please note the spelling--I'm not cursing here.  Last month (for my birthday) Schnickelfritz, his grandparents, and I went to Alton, IL for a day trip.  I've already posted about our stop at Lewis and Clark's Camp Dubois (look another D)  museum.  Now I'm going back to share about our morning at the Melvin Price Lock & Dam and the Great Rivers Museum.   I have to confess growing up near the river and I've often been near the dams for viewing eagles in the winter (the water is never iced over so they can fish), but I've never toured either before.  Boy, did I miss out on a real treasure.

The museum is divided into themes--the nature area has stuffed and live examples of the birds, fish, and other animals that make their home in the river habitat, the historical areas cover the river used as transportation from Native Americans through the steamboat age, and the technology areas deal with the lock and dams and navigating barges along the river.


One of Fritz's favorite exhibits was the wall with the composite satellite map.  At the bottom of this photo is the confluence of the Missouri and Mississippi rivers. 


Here Fritz and his PaPa are attempting one of three possible challenges to virtually navigate a barge on the river.  The three monitors show the Eads Bridge (the oldest bridge crossing the Mississippi just north of the St. Louis Arch) approaching and they need to watch for strong currents trying to push them into the pilings.  (You'll note Fritz has already turned over duties to his grandpa who used to be in the Coast Guard and actually knew what he was doing).  The two other missions were to guide a barge through the locks and to steer around an oncoming barge headed downstream.  Those of you who are used to fast-paced video games may think the slow speeds of this simulation would be easy, but I assure you it's not!  You can't believe how long it takes a 1/2 mile long barge to respond to steering controls.  I caused millions of dollars worth of damage to the virtual lock in several attempts before I switched to the easier approaching barge scenario. 


There are 29 dams on the Mississippi river and believe it or not, they have nothing to do with flood control!  Their purpose is to create long pools if you will, with at least a 9 foot depth to allow for barge traffic.  According to the signage, without the dams portions of the upper Mississippi would only be 3-4 feet deep.    At this interactive display Schnickelfritz needed the water to be above the marked line in between each dam (the water actually flows under the raised portion, not over the dam).

All this information helped prepare us to tour the dam and locks that afternoon.  We had been shooting for the first tour of the day but arrived too late.  You know how you sometimes wonder why God doesn't let you keep your time schedule?  Well in our case it meant we made the afternoon tour when we actually got to see two 15 section barges lock through going downstream and one Coast Guard vessel putting out channel buoys go through the secondary lock headed upstream.  The morning tour saw nothing.  We took an elevator to the top level--90 feet above the water, and walked over the two locks to a viewing room.   This room had pictures of the locks being built, a cutaway view of a tugboat, and a working model of the locks.  Fritz could push the buttons to make the water level go up and down and open and close the gates at either end.


This particular tugboat seemed quite luxurious.  There was even a large stainless steel bar-b-que grill on the side and a little container garden on the deck.  Our tour guide informed us that most crews work 30 days on and 30 days off so this really is a home on the water.  The cook happened to step out and waved to us as she checked on the grill.

I have to day both young and old were impressed by the massive scale of everything and the precision.  After making a wreck with the virtual barge I had a great respect for the captain working with less than two feet of clearance on either side.  The tour is handicap accessible, but if anyone is afraid of heights or just doesn't want to go, there are also monitors in the museum where you can watch the traffic.  There are also two movies that they will show on demand--one about the lock and dam and one about eagles (which often winter in the area).  And it's all free!!

That tackles my D for Ben and Me's ABC Challenge.  Be sure and click here to see what others came up with.

Friday, March 9, 2012

Eureka! I've found free science resources.

I don't think anyone loves a bargain more than a homeschooler.   We tend to have bigger families and most of us are not working or working fewer hours so we can be home with our kids.  Last month the Missouri History museum offered free admission to their Mastodon exhibit and over 800 homeschool kids showed up!  I'll be making a list of other cruiser's resources but I wanted to mention of few of my own.

We've been using Apologia's Young Explorer series for science all along.  I know most of us are eager to dive into the lessons with their eye-catching illustrations and conversation-style text, but have you ever gone back to read the introduction?  Each book  has the website and password to access additional files and information specifically for that text.   This is where I got the idea for our paperclip model of the solar system.  In order to visualize the distance between the sun and planets we had to count out paper clips and line them up down the hall.

From the wall we have Mercury, Venus, Earth and Mars-- a total of 15 paperclip distance.


Then we started counting hundreds and hundreds of paperclips.  We used the 1 inch clips and we still ran out of room in our hallway--we had to turn a corner and keep going for Pluto (which is still a planet in my book).


But be sure to check out Apologia's site.  They have corrections for the various text editions, blank notebooking pages (much less sophisticated than their Notebooking Journal, but free), and plenty of links for photos, videos, more in depth articles, etc.


Fault Line

Speaking of notebooking, my second resource website will provide you with all the free clip art you could need to illustrate notebooks and lapbooks.   ClipArt ETC is an online service from Florida with free clip art for students and educators.  Since this post is about science I'll mention those categories first (the number of illustrations is in parentheses) :  Astronomy (143), Biology (3759), Chemistry (478),  Earth Science (755), Physics (1557), Animals (over 9800), Plants (5340).  Of course, there's much more than science here.  Other categories include American History, Art, Architecture, Flags and emblems, Music, and Sports & Recreation.  The illustrations are all black and white drawings. The famous people category reminds me a lot of the timeline figures from Homeschool in the Woods.

And finally I stumbled on this website when I Googled "free science resources."  The Science Inquirer has done all the work for you--their Free Stuff for Science Teachers page has links to hundreds of websites.  I don't know how often the site is updated--I did find a few dead links.  The categories are: Science Podcasts, Posters, email servers, Foldables, Bookmarks & Coloring books, Kits, Videos,  Lessons Labs & Demos,  Books & Newsletters, and Computer Stuff.  A quick perusal and I noted I want to go back and visit the Space & Astronomy-related games, the Virtual Biology labs, and the Crime Scene Investigator online game.   And that's just the Free Stuff page.  On other pages they've also got some great slow motion videos that capture a balloon popping  and a slinky being dropped.   and don't leave without looking and the digital microscope pictures like the one below.


Does anyone else feel like Cookie Monster is staring at them?  It's really a red-faced jumping spider.

Of course you'll want to check out everyone else's resources by clicking here.  I'm hoping to save several new favorites on my Internet browser.

Wednesday, March 7, 2012

C is for Campfire

It's week three of Ben & Me's ABC challenge and I find myself thinking throughout my day D is for Driving and G is for Groceries--always trying to think ahead to future posts.   On our tour of Onandaga Cave we saw a formation called the Queen's Canopy and I'm thinking "Great, I can scratch Q off the list."   

This week's C is one of our family's favorite activities--sitting around the campfire.  When we first looked at this house we noticed a bare spot in the lawn surrounded by rocks where the previous owners used it to burn their garbage.  We've literally taken it from trash to a real treasure.   Three seasons of the year you'll find us carrying out lawn chairs, a portable table, and cooking gear and spending an evening away from TV's and Internet.
It's one of our favorite ways to entertain.  Last year, we had a gorgeous fall day for Schnickelfritz's birthday and invited over several families to roast hot dogs and marshmallows.  The kids played in the leaf piles (it got really out of hand when the Toolman cranked up the leaf blower, but I digress....). Other times we'll keep the gathering smaller and I can cook supper in the dutch oven over the coals.  When we have other kids over I always pick up a pack of glow in the dark bracelets--the chemical kinds you have to snap and shake to activate.  The kids will play at the just outside the limits of the fire's glow but we can keep track of them by their bracelets.  Sometimes they'll catch fireflies or play hide and seek (the smart ones figure out they need to cover their bracelets).   If we bring out the recliners, we can lay back and watch the bats acrobatics while they catch dinner--well I guess it's really breakfast to a bat.  Then we'll watch the stars pop out one by one.

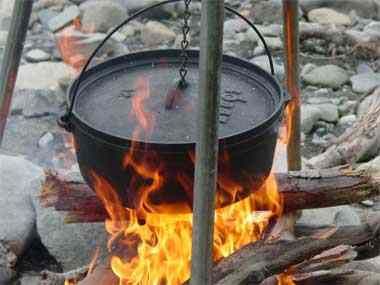
We've really stepped up our campfires a notch or two since we took several Dutch Oven cooking classes from the Dept. of Conservation.  They've had some that focused on desserts, one that covered a whole meal, one that presented other ways of campfire cooking--foil packs, stick cooking, etc.  You can cook practically anything in a Dutch Oven.  How do you think our pioneer ancestors managed?  Check out Craigslist to find your first oven.  We scored a 14 inch model for a mere $20 bucks.  Sure it was rusted, but the Toolman cleaned it up with a wire brush attachment on his drill.  We reseasoned it and it's as good as ever (makes great nachos and even venison chili to feed an army).  This is one of my favorite recipes from the Conservation Dept's handouts.

Creamy Chicken Enchiladas

2 pounds cooked, chopped chicken
1 (10 oz)  package frozen chopped spinach, thawed
1/2 C thinly sliced green onions
2 C sour cream
1 C plain yogurt
2 T flour
1/2 t cumin
salt to taste
1/2 C milk
8 o diced green chili peppers (drained)
12-24 flour tortillas (soft taco size)
8 oz grated Monterrey jack cheese
diced tomatoes (optional)
sliced black olives (optional)

Combine chicken with spinach and onions, set aside.  In a separate bowl combine sour cream, yogurt, flour, cumin and salt.  Stir in milk and chili peppers.  Divide sauce in half.  Combine chicken mix with half the sauce.  Divide filling among tortillas and roll up.  Place in Dutch oven in layers.  Spoon remaining sauce over enchiladas.  Bake for 25-30 minutes.  Sprinkle with cheese and let stand for 5 minutes.  Garnish and serve.

Want more recipes?  Try googling "Dutch oven gathering" to see what other enthusiasts have created.  If you have RFDTV you can catch the Campfire Cafe  or Cowboy Kitchen for step by step instructions.

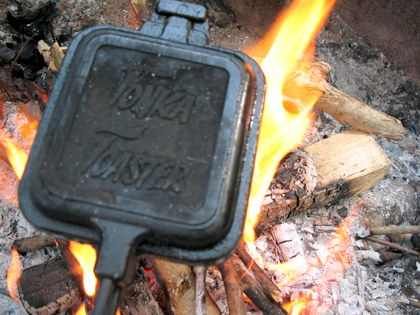
If a Dutch oven intimidates you, you might want to look into Pie Irons.   The typical recipe will call for two slices of buttered bread next to the outer surfaces of the iron.  Then you can complete your sandwich with sandwich with savory or sweet fillings:  pizza fixings, taco meat and cheese, peach pie filling, chocolate pudding and marshmallows.  The Rome company makes round and square irons, even a double iron and you can find prize winning recipes at their website.   You can often find pie irons at Walmart, but these don't have a good fit and loose irons can mean scorched food.  I'd go to a real outdoor/sporting goods store to get a quality set.

If you're planning a "stay-cation" this summer, or if you'd just like a little more quality family time,  a campfire is the way to go.  Curious what everyone else came up with for the letter "C"?   Check out the links here.

Sunday, March 4, 2012

You Can Keep Your #2 Pencil

This week's Blog cruise question is "Do you administer standardized testing in your homeschool?  Why or why not?"  You can probably tell from my snarky title that we don't test in our home.  My reasons are based on two anecdotes I'd like to share.

To begin, we used to live in the state of Indiana where all public school students were required to take the ISTEP exam at several points in their academic career and pass it as a junior or senior in order to graduate.  Before I homeschooled, I worked in the accounting department of a not-for-profit organization.  One day a co-worker, knowing I had to have a good math background, asked me if I'd ever heard of "Front End Rounding."  I confessed that the term was new to me but I assumed it must have something to do with estimating an answer before actually solving a complex problem.  She proceeded to tell me just how wrong I was.  She had been helping her elementary age son with his math homework.  He had a sheet of paper filled with numbers to be rounded.  She applied her own math knowledge and helped him to round place values containing 0-4 down and 5-9 up.  When they finished the son said "I don't think we did this right," and he showed her the instructions sent home by the teacher.  Per the instructions, you only look at the "front end" of the number and change everything else to a zero--so 499 would be rounded to 400 not 500.   My friend helped her son change his answers to comply with the instructions but she had a few questions at the next parent/teacher conference.

Why was the teacher instructing his students this way?  Because that's the way the ISTEP test handled rounding.  So the state of Indiana was teaching students how to pass the ISTEP but fail at life--at least fail when it comes to determining how much carpet to buy or how much paint to cover the walls.   The goal of my son's education is to prepare him to succeed in life, not score in the 99th percentile.  We study topics that will never come up on a standardized test and don't cover those ridiculous things just because they will be tested. 

 Our second tale comes from my mother's nursing school friend.  Their test to become LPN's had the same multiple choice, fill-in-the circle format.  After the test the friend admitted that when she didn't know the answer she would look at the sweep second hand on her watch.  She would choose her answer based  on which quadrant of the watch face the second hand lay--between 12 and 3 was an "A", between 3 and 6 was a "B."   She ended up passing the test but I wouldn't want her taking care of me in the hospital.  "Let's see,  what pills were you supposed to have today?  Well if my second hand is near the 2 I'll give you the blue ones,  if it's near the 7 I'll give you the yellow ones."   I can remember taking standardized tests and being told I wouldn't be penalized for guessing so it is possible if not probable to pass one without knowing any of the material at all.

I guess the bottom line to testing is that I don't need it to know what my son knows...I work with him every day in school.  I can tell when the light bulb goes off in his head and I can tell when I need to try a different approach because he's just not getting it.  I don't need to know how he ranks compared to other students.  Andrew Pudewa of Institute for Excellence in Writing says that those kind of test results can only lead to false pride (if he scores high) or false self-criticism (if he's average or below average).

At some point, long down the road,  I'm sure we'll need to take the PSAT or something similar to prepare Schnickelfritz for college admission tests.  Some of the other participants in this week's Blog Cruise may have an entirely different take on the subject.  But for us right here and now, you can just keep your #2 pencil.

Thursday, March 1, 2012

B is for Butter making

Here we are in week 2 of Ben & Me's ABC challenge.  The hardest thing about the letter B is choosing from all the possible topics--biology, botany, the Bible, baking bread (that should earn bonus points for using B twice).  I ended up choosing to share how I make butter because I've got a lot of cream on my hands and that's what I need to do today anyway.

This is not about a hands-on experiment to show kids how butter is formed.  For that I'd just shake the cream in a jar (good energy dissipation  exercise for the kids if you know what I mean).  We get three gallons of raw milk fresh from a nearby dairy once a week--that means a lot of cream.  By putting our milk in wide-mouth gallon jars, we're able to see and skim off the cream as it rises to the top.  We happened to have a friend give us these  1-gallon jars but we've also found gallon jars by buying pickles at Sam's Club--you'll just need to clean them thoroughly.   I just use a soup ladle to scoop off the cream and pour it in a quart sized mason jar.  You'll know when you've hit the milk layer because it appears darker than the cream.  I collect the cream from each gallon as we need to drink the milk, each time adding to the quart jar I keep in the fridge.  If you've got plenty of butter on hand, it's also possible to freeze the cream.  I've had no problem using it for butter or ice cream later.

I used to try using my Bosch mixer with the whipping blades to make butter (someone else online has the instructions) but I only had one success and many failures.  Since I've switched to making butter in the food processor I've had a 100 percent success rate.  The day I'm going to make butter I set the quart jars on the counter to bring them to room temperature.  This step isn't absolutely necessary, I've actually made butter while there were still ice crystals in the cream.  It does speed up the process if the cream is not so cold.  I made butter in 2 min. 26 sec. with room temp cream.  Cream out of the fridge can take 5+ minutes.

Here's the start of our process--a mere two cups of cream in the Cuisinart.  Why so little?  Well look at the next picture.....


I've actually made whipped cream at this point and its more than doubled the volume I'd say.   We've got to keep going.
Near the beginning of the process.


The cream edges away from the center
 As the butter forms you'll notice changes in both the sound and look of the cream--the pitch gets higher and you can hear the splats on the sides of the bowl.  Looking at the side of the bowl you'll start to notice swirls of darkness spinning around which I assume is shadows from the butter clumps.  If you look through the feeder hole you can see the cream moves further away from the center post.  I've hear it's possible to over churn the butter and return it to a liquid so you probably don't want to stray too far away from the kitchen, but I've never actually had that problem.


   Here's what we end up with, but it's not butter yet.

  Here I'm straining off the liquid.  DON"T THROW IT OUT!!!  What you've got is REAL buttermilk.  It's thinner than the cultured stuff you can buy at the store so it may take a while to get used to drinking it.  I use mine as the liquid for pancake batter, biscuits, and muffins.  (A great resource is Sue Gregg's books on the blender batter method of baking.  She uses buttermilk to soak whole grains).

Now comes the one part I dislike about making butter, and frankly it takes the longest.  You have to wash  the butter to remove all the excess liquid.  Don't be tempted to skip this step.  Leaving the buttermilk in the butter may cause it to go rancid quickly.  I dump my butter in a large bowl and begin pressing  it against the sides.  You'll see droplet of liquid escaping from the butter solids.  I spray the whole batch with COLD water from the sinks sprayer (can you guess why you don't want to use hot water?)  Then it's rinse and repeat, rinse and repeat.

    When you start the liquid will be opaque like the buttermilk, but don't bother saving this--it's been diluted.


Here I'm almost done.  This liquid is actually rinse water more than squeezed out buttermilk.  See how much clearer it becomes?  Now you have unsalted butter.  While it's still so soft and creamy you can add flavorings--salt, cinnamon and honey, chives, etc.  For this batch I used about 1/2 t. of salt.  I started the day with just shy of three quarts of cream.  Now I have about 6-7 cups of buttermilk and 3 cups of butter.


Check out my latest find on eBay. This mold makes four standard-sized sticks of butter and even has ridges to imprint lines for 2 tablespoon portions.  The jury is still out on this gadget though--I'm having to learn how to remove air pockets in the butter so the measurements are accurate.  I'm also having a dickens of a time removing the butter after it solidifies.


The end results are sure worth it.  I served home-made butter at my family's Thanksgiving and my aunt just raved about how it tasted like what she remembered growing up on the farm.

Now don't forget to check out what the other bloggers have chosen for their "B" week at the Ben & Me blog.  I'll be busy trying to choose my "C" for next week.  Hmmmm,  chess, chemistry, coin collecting....
Related Posts Plugin for WordPress, Blogger...