Thursday, August 15, 2013

Making Shaped Books with PSE

Last week we spent five days introducing you to the idea of using Photoshop Elements in your homeschool.  If you missed any of those topics, here they are:

Quick Pages for Journaling/Notebooking

Multi-Layered Templates for Recordkeeping

The Type Tool for Flashcards and Labels

PDF Templates for Lapbooking

Extracting Images for Posters

When we last discussed lapbooking, we were relying on someone else to provide us with the shape of the mini-book and just adding our our text and images.  What if you want to make your own mini-book and what if you’re bored with simply squares or rectangles.  Let’s learn how to make a shape book next.  For our example I’m going to make an apple book for Johnny Appleseed.  I start by Googling an apple clip art image.

Here’s a good one and I can tell from the checkerboard pattern that the background is already transparent so I won’t have to extract the image.

Wow, look how big the apple was when I dragged it onto my 8.5X11 blank file.  I didn’t notice the image size when I was Googling.  I’m working with it anyway because it’s easy to make a large image smaller.  (If you start with an image that’s too small and try to stretch it out, it can look really pixelated).  I resize the apple by dragging on a corner and place it on the right side of my blank background.  Now I’m going to use Photoshop Elements Stroke feature to make the back page of my mini book.

You’ll see “marching ants” around the apple in the work area.

The new layer will appear above the old one in the layer section and the marching ants will still be around the apple (they’re really around the new copied apple).  Now click on Edit>Stroke (Outline) Selection. A new window will pop open.

We’re making the cutting line for the back of the mini-book so we want it to be several pixels wide and black in color.  I leave it centered so that when I cut down the middle of the line it will match up perfectly with the front side.  With your width and color set, go ahead and click OK.  There’s now a black outline on top of the apple, but we need to reverse the image. Select Image>Rotate>Flip Layer Horizontal.

Now the outline of the apple is a mirror image of the original.  If you try this and can’t tell the apple image from the outline, you’ve probably selected the plain Flip Horizontal instead of the Flip Layer.  Make sure the Move Tool is highlighted on the left hand side but DON”T use your mouse to move the outline shape.  We want to keep it on the same level as our apple so it will match up when we fold the book..  Instead use your left arrow key to nudge the outline over.  There should still be some overlap—this will be the fold of the book where the front and back stay connected. Too small an area and the front will likely tear off with use. 


See how the outline is on the face of our mini-book.  We don’t want that.  It’s easier to deal with than you think.  We just need to change the order of our layers.

Now there’s a portion of the red apple will appear on the back page of our book, but I don’t care since that side will be glued down anyway.  Here’s the image of the finished shape book after I’ve added my text.

Next week I plan to go into more detail about the Magic Extractor feature—using the zoom and changing brush size to get those tiny details.  If there are any projects you’d like to learn to tackle with Photoshop Elements, please leave me a comment.

Tuesday, August 13, 2013

TOS Review: Notgrass Company


Every year at a local Homeschool conference I spot a man dressed in a civil war uniform.  This year I followed him back to his booth and I can now identify him as fellow Missourian John Notgrass.   When  I stopped to admire the beautiful  textbooks (really, I’m calling a textbook beautiful) his family’s business the Notgrass Company,  publishes, I couldn’t wait for this review.  The America the Beautiful Curriculum Package  ($99.95) contains  three hardback titles and three softback books. 


This curriculum is designed for grade 5-8.  Since the writing skills can vary so much between these levels, the workbook is purchased separately.  The Lesson Review book is designed for 7-8 grades.  We used the America the Beautiful Student Workbook  ($11.95)  geared towards 5th and 6th graders.  There are also 10 books assigned for reading time: Across Five Aprils, Amos Fortune: Free Man, All-Of-a-Kind Family, and others.  Most are probably available in the library or you may order them for Notgrass Company.  You will most certainly need to order Katy written by Mary Evelyn Notgrass.

The two volumes (one per semester) of the main texts are divided into 15 units of 5 lessons each. Here’s what separates America the Beautiful from other history texts.  Each unit covers a period of American history, but the lessons themselves don’t just present events and people in chronological order.  One or two lessons in the unit may do that (referred to as Our American Story in the book), but other types of lessons are:
  • God’s Wonders – describing an amazing creation God placed in America.  Lessons include: the Great Lakes, Chesapeake Bay, Niagara Falls, and the Mississippi River.
  • An American Landmark—interesting sites, this time manmade.  Lessons include: The Smithsonian Institution,  Route 66 (in volume 2, but since it was close to home we skipped ahead), the Erie Canal, and the Gateway Arch.
  • An American Biography – a focus on one person who lived during the unit era.  Lessons include: James Audubon, George Washington, Noah Webster, and Samuel Morse.
  • Daily Life—learning how people lived an worked in the unit era.  I appreciated these lessons most of all.  The names and places we were learning about became fleshed out.  Lessons include: cattle drives, the Pony Express,  and working on a steamboat.
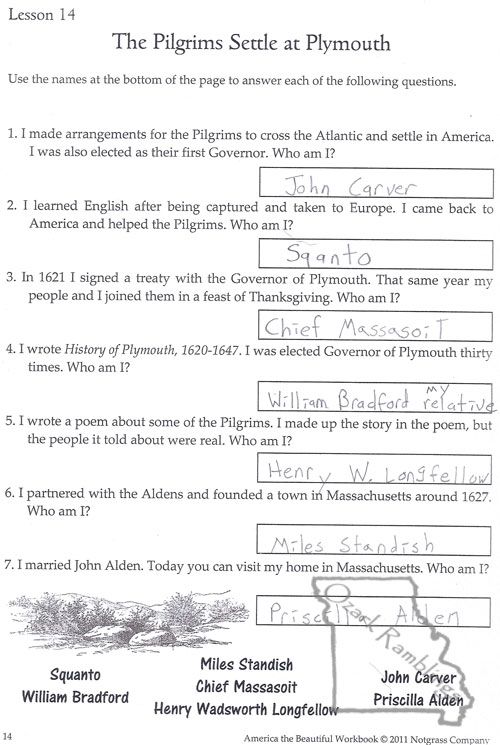
We read one lesson per day.  The end of the lesson lists the possible activities using the other books in the set, Bible study, or creative writing assignments.  Younger students may only do Bible Study and writing assignments twice a week.  An eighth grader may need to complete all the activities every day. Here is a sample of what we did for lesson 14 about the founding of Plymouth Colony (we are Mayflower descendants so we study Plymouth frequently).
Thinking Biblically:  William Bradford quoted from Psalm 107 so we read that passage and discussed what it meant to the Pilgrims.

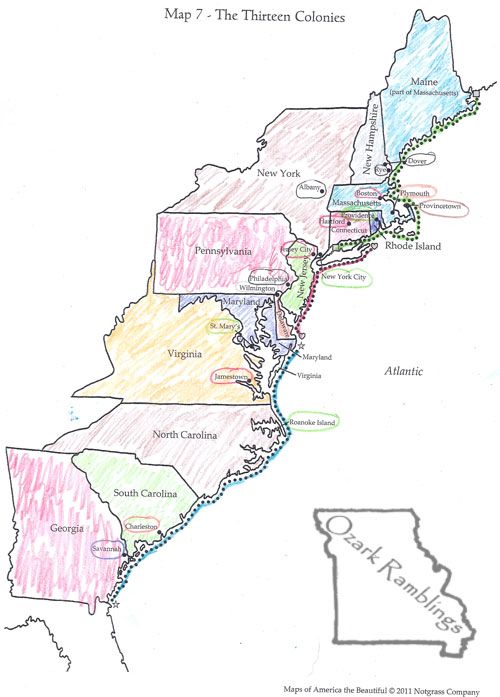
Map Study:  My Schnickelfritz loves studying maps and creating his own so he was very excited to see the package included a separate softcover book devoted to maps.  His enthusiasm waned as lesson after lesson all he did was color in shapes and circle names.   There was no plotting routes or drawing in regions of Native tribes or mountain ranges.  He didn’t have to label anything, it was already printed in the book.  In his mind the fun part of mapping exercises had been done for him.  

We skipped the Creative Writing assignments.  This review came during summer school and I didn’t press him to do his least favorite activity.  The activity was to write your own compact of ten things everyone must agree to obey.


The Timeline also comes in it’s own softcover book.  The years 1000 to 1499 are arranged by a century per page.  The years 1500 through 2019 are grouped by decade per page.   Every page has a coloring picture –not one of my son’s favorite activities.  A lot of events have been pre-printed, but  there are lined spaces where the student should add something (the number in parentheses refers to the lesson). The text book tells the student exactly what to write.

Literature assignments are done in the hardback We the People Book.  We read a passage from Of Plimouth Plantation.   It had been edited for modern spelling and length.  There were lots of ellipses, but in this case it was not to remove God’s name from our historical documents.  These passages were the most challenging work for my 10 year old son and often I read it aloud to him.


The Student Workbook assignment was to fill in the blanks using the names supplies at the bottom of the page.  Other lessons had crossword puzzles, multiple choice questions, word searches, etc.  The Answer key (another softcover book) had all the solutions for both the Workbook and the Lesson Review for older student. 

This unit did not have a reading assignment but beginning with Unit 4 we read Elizabeth George Speare’s classic, The Sign of the Beaver.  The was also no Vocabulary.  For Lesson 2 Fritz had to look up: descendant, immigrant, confederation, dense, and cache in the dictionary and write it out in a separate notebook we were keeping.

As much as I hoped we would like America the Beautiful, it just didn’t seem to click with us.   We loved the pictures, we enjoyed feeling connected to history when lessons involved things close to our home: the Gateway Arch,  Route 66, and the Mississippi River.  Still, my son felt the text, map study, and timelines were designed for a much younger student, even though he’s at the low end of the recommend grades.  If I were considering this curriculum for an older student, I would definitely have them look at some of the sample lessons online and see if they felt similarly.

Photobucket
 

Monday, August 12, 2013

Schoolhouse Expo–The Speakers


If I wanted to, I could get all our schooling materials over the internet or from catalogs.  The reason I go to homeschool conferences are the lectures and workshops.  So lets take a look at a few of the speakers with which I’m familiar that will be a part of this month’s Schoolhouse Expo.  Remember, you don’t have to sit in front of your computer the whole week (Aug. 19-23).  Your $24 ticket includes access to the recordings afterwards.


Diana Waring was the keynote speaker at the very first Expo I ever attended.  For her sake and mine I won’t reveal the year, but I’ll say we’re counting back by decades.  Her tape series, History Via the Scenic Route, showed me that the subject didn’t have to be like the boring textbooks I’d known.  We listen to her What In the World is Going on Here and True Tales of the Times in the car.  She will be speaking about Textbook Myths and How to Deal With Them  (Do you mean to say there can be errors in textbooks?  Say it’s not so!)  with another blast from my past…….


Dr. Wile was a fixture every year at the Indiana Association of Home Educators convention held in Indianapolis.  In fact, he lived just 20 minutes up the highway from me.  If he hadn’t been motivated to create a science course for daughter, we might not have the Apologia textbooks  for junior and senior high school loved by homeschoolers around the world.   Although he’s moved on from the company, he still travels to homeschool conferences convincing parents that they too can teach science through high school.  I’m sure he’ll have plenty to share on errors in science textbooks—such as why they still contain evolutionary evidence that was debunked years ago.


There’s no other way to say it—Jessica Hulcy is a hoot to listen to.  Even though we don’t use her Konos unit study curriculum, I’ve kept copies of her three volumes for ideas on projects and activities that fit with our studies.  I’ve heard her speak in person and I’ve got her “Keeping the Balance” lectures on VHS.  I’ve seen her teach co-op lessons in her home – in fact I should get them out for review.  I remember one scene with a raw chicken that had me rolling on the floor (the lesson was on bird anatomy).   On a personal note, I know Mrs. Hulcy was involved in a terrible crash several years back.  I’m glad to see she’s able to share her wisdom with other homeschoolers again.  She’ll be speaking on Multi Level Teaching.


I’ve never seen Adam Andrews at a convention, but he just spent 5+ hours in my home (via DVD) teaching me how to teach literature analysis to my son in a way that is both simple and yet effective.  And you don’t need to wait till you teaching Shakespeare—our first study was Mike Mulligan and his Steam Shovel.  I keep his list of Socratic method questions and his story chart visual aid nearby whenever we have reading assignments for school.  (You can read my review of Teaching the Classics here) .    His presentation The Art of Reading from Seuss to Socrates appears to be an abbreviated version of that DVD series.


 I have a copy of Mr. Pudewa’s lecture “Teaching Boys & Other Children Who Would Rather Make Forts All Day” on my MP3 player and listen to it OFTEN as I walk the dog.  I have to substitute “Jenga Blocks” for forts, but otherwise his description of my son is spot on.   We reviewed Teaching Writing with Structure and Style and the  Student Writing Intensive programs in 2011. Honestly, both have been a Godsend.  (Need any volunteers to review the Continuation Course, Mr. Pudewa?)  We can avoid the whole writer’s block issue but still learn how to craft a good story. 


Okay, maybe you’ve got you lesson plans for the year done and  your school supplies organized.  You concerns lie with the “home” portion of homeschooling. Don’t worry this Expo is still for you.   I’ve heard podcasts of Malia Russell talk about menu planning, freezer cooking, keeping the house clean, etc.  Even though I’ve been doing all those things myself for years, I always manage to pick up a new idea or two.


Wow, I’ve just brushed the surface with only 1/6 of the speakers at the Schoolhouse Expo.  Some speakers I know through review items.  There’s still Dean Butler with his Little House documentaries,  Marie Rippel and her All about Spelling series,   and Terri Johnson and her Sacajawea ebook.  Other speakers are new to me but I’m interested in their topic,  Davis Stelzl with be talking about Starting a Business in High School (we’re still a few years away), and Tyler Hogan shares Confessions of a Homeschool Graduate (we’re even further away).
Have I convinced you yet?  Wanna know how to get your ticket?  Just click on the button below.


Disclaimer: I am receiving a free ticket to the 2013 Schoolhouse Expo in exchange for promoting the event.

Friday, August 9, 2013

TOS Review: Bible Study Guide for all Ages

I let my son select the order for all our subject in school except one.  Bible study is first every day to remind us who should be first in our lives (and it doesn’t hurt that we pray for our schoolwork and getting along as part of the lesson).  I was very pleased to have the chance to try the  Bible Study Guide For All Ages .   As Schnickelfritz is now a 5th grader, we’d be using the Advanced Student Pages (5th-6th grade).  We also received a set of   Bible Book Summary Cards which can be used with all ages.        

The Advanced Student Pages ($5.95) come in a landscape oriented, legal size format.  The pages are loosely glued in so I’m assuming Mom keeps the booklet and removes the pages for the kids as needed.  Each lesson covers the front and back sides of one page.  There are 26 lessons in a book, representing one quarter.   There are 16 books, all priced the same, so a complete study of the Bible would take four years (doing 2 1/2  lessons per week or one page per day).


This Sample is the front side of the lesson.  The studies alternate between timeline and mapping activities.  The Remember It section is a refresher of all the prior lessons.  I don’t know if the Get Active suggestions are the same for all the levels since I just have one child but it would make sense for the kids to do the activities together since they will be covering the same topics each day (just with different student pages).  There were several activities that called for more than the two people we had available.

The back side of the lesson is always in cartoon format.  My son would fill in blanks, draw pictures, choose the correct dialogue, etc.  He loved the very visual format (and frankly it didn’t seem to him like he had to write much – always a good thing).  The lessons jump around in the Bible.  We started with Joseph, but then jumped to Daniel, and then the life of Christ.  You would need to stick with the lessons for all four years to cover the entire Bible.

Occasionally the lessons would ask us to learn the Bible Book Summary Cards ($24.95 for all 66).   These 8 1/2 X 11 cardstock pages have colorful clip art on one side to remind us of the book’s key points.  The back side has a narrative summary and questions to check retention.  The cards are not required but highly recommended.

Here is the one for Luke.

You can see some of the key points are the genealogy is begun with Adam and  Luke is one of the Gospels (signified by the center clip art).   At first I thought I’d used these cards as a game –guess the book from the picture.  I’ll be the first to admit there were a lot I couldn’t identify (like the minor prophets and Paul’s letters).  Better to study each picture and read the back summaries first.  You may be able to play the game with books you’ve already studied and just want to review.

My son did like the very visual nature of the lesson pages and he was able to do the work on his own.  He was definitely covering a lot of Bible facts – placing events on the timeline, finding cities on the maps, memorizing Jacob’s 12 sons,  learning the divisions of the New Testament books, etc.  My only concern was that the lessons were heavy on facts and light on critical thinking and apologetics.   For example, lesson 21 covers the genealogies of Jesus in Matthew and Luke.  The requirements ask what man begins the genealogy for both gospels, asks you to circle the king in both pictures, find the names of the 4 women mentioned in a word search, and put names in chronological order. But the genealogies can be a real sticking point for non-believers.  Many people question why the names don’t match up or even use this as their proof that the Bible contains errors.  There is no mention of this controversy or the fact that the genealogy in Matthew is recording Joseph’s family tree and Luke covers Mary’s. 

 I think we will continue to use the Bible Book Summary Cards, but will go with something meatier for our family study.

Photobucket
 

Day 5: Photoshop Elements for Classroom Posters

Day 5 copy
Welcome the last official day of 5 Days of Photoshop Elements for School (but come back next Thursday for a tutorial on making shape books ).  Ironically, we’re really going back to the beginning of my whole interest in digi-scrapping for school. It started last year when I read the post Faster than a Lapbook, More Fun than a Book Report! at Heart of Wisdom.   There were plenty of student samples to look at as well—covering science concepts, biographies, events in history, Bible stories and more.

Used with permission from Heart of Wisdom

At the time Fritz was studying Mystery of History and had 12 dates to memorize.  I really wanted to make those dates stand out in his mind so rather than just highlight a little timeline figure, I made  page-sized posters to put above our timeline on the wall.  When we were done, we attached the posters as extra flaps in our quarterly lapbooks.

I made the posters 8 1/2 by 11 so I could print them at home (my printer allows for edge to edge printing).  This really isn’t a bad size for a homeschool room – it’s not like I’m trying to show it to 30 kids at once.

MOmama_album's Dates to memorize slideshow album on Photobucket


 If you’ll look at the sample images, you’ll see that instead of framed pictures, I have objects like the scroll and the Vandal warrior appearing to be placed directly on the image background.  I did that through a process called selecting and extracting, which is the focus of today’s tutorial.  There are several ways to accomplish our task so lets start with one of the easiest.

For our first example let’s see if we can extract the Lewis & Clark compass from this image.

We are very fortunate that the background is all one color—there’s not even a shadow from the compass.  We can make PSE do most of the work for us.  After opening the image in the Editor, I’ll make a new blank file but this time I want the background color to be transparent so I click that box in the pop up window.  If I know the size of my image I can make the blank file the same size, if not, I can always crop it down later.  Next I’ll open my file of the compass and drag it from the Project Bin onto my blank file.


Now I’ll verify that the layer with my compass image is active and I’ll choose the Magic Wand tool from the left hand side.  It does look like a wand lit up at one end.  The mouse changes to a sparkly wand as well.  Now I click somewhere in the white background of the compass image. 

Around the outside edges of the white square and around the compass are little marching ants. 


Then it’s just a matter of hitting the Delete key.  I can save the compass with the transparent background for later or drag the thumbnail from the Project Bin onto the Lewis & Clark Poster I’m working on.


Of course, there are a lot of images that aren’t that cut and dried—like this image of Joan of Arc.
 
 
I’d like to just use Joan and her banner but leave out the distracting  gold background.  In this case the background isn’t a solid color so the Magic Wand won’t work. I’m still going to let PSE do most of the work, it just needs a little more guidance in what parts should stay and what should go.  I start a new blank file with transparent background and drag my Joan image onto it.

Now I’m going to select Image>Magic Extracter.   Joan’s image appears on a new work surface with it’s own set of tools.  I’m only going to mention the first two tools today.  There's a lot more detail like changing brush size, zooming in, getting back portions you didn't want removed, etc. but I'll save the details for another tutorial.


When I finish coloring over my image I use click on the Preview button and change this …..

 Magic extraction
To this!
joan-transparent
 
Which I can then drag onto my Date to remember poster.

I hope you enjoyed these 5 Days of Photoshop Elements for School and I hope you've learned something!  Come back next Thursday for a tutorial on making lapbooking shape books.

Summer Blog Hop

Thursday, August 8, 2013

Day 4: Photoshop Elements for Lapbooking

Day 4 copy
Perhaps you’re like me and have a kid in the house (probably a boy) who’d rather play with Jenga blocks than write.  I discovered that filling in mini books for a lapbook seemed far less intimidating and time consuming to his mind.  I shared last fall that I’d purchased a PDF file with lapbooks for the four quarters of Mystery of History because I was intimidated to create one on my own.  I wasn’t pleased with the images for the lap book pieces.  I wanted color images, etc.    I ended up using the files as a template but substituted more colorful images I found on the web.  As a bonus I could add dates for every person and event and add arrows and descriptions like in the Masada picture in the bottom row.  Photoshop Elements makes lapbooking a snap.

For this tutorial, I’m starting with a gift from HomeschoolShare.com for those who signed up for their emails—100 Pages of Templates You Can Type On. I’m not sure if this freebie is still available.  I’m going to be using the Four Flap (Horizontal) template on page 82 to make a life cycle of a butterfly mini book.

Begin by clicking File > Open and then the file with your lapbook template PDF.  In this case the file has many pages so a new window pops up so I can select the page I want.

 
When the image first appears, you’ll notice the background is a gray/white checkerboard pattern indicating transparency.  It will print just fine, but I find it difficult to look at while I’m working so I started  a new blank file (8.5X11) and drag the template onto it.  (You can review this step from Day One)


I started by adding text to the large flap on the bottom.  Remember you can change fonts and colors in the same layer.  (The lesson on text was Day Three)


Before I go on I should tell you that I didn’t score very well on those IQ tests where they show you a flat image of a box and you have to guess how it would look folded up in three dimensions.  I thought I needed to flip the text and images on the four small flaps so they would be right side up in my mini book, but I didn’t.  However there may come an occasion when you do need to flip and rotate so I’m going to show you the steps (since I’d taken the screen shots) even though they weren’t necessary for this mini book.  But there’s a lesson to learn from my mistake--until you’re sure your work is perfect, consider saving it in .psd format.  That keeps everything in it’s layers and you can come back and flip and rotate as necessary.  Saving in .jpg saves file space but it merges all the layers together and you can’t correct any errors.

I started by typing the words Egg,  Larva, Pupa, and Adult, each in its own layer in the four boxes.


Then I switched from the text tool to the Move tool and clicked on one of the words.  This put it in the broken line box where I could resize the word.  Then I clicked on Image > Rotate > Layer 180.  Make sure you choose Layer 180 and not the plain 180.  I did this for each word.


I had previously found clip art for each stage of a butterfly’s life.  I saved each image and opened the appropriate files in PSE’s editor. I dragged each picture onto my work area, resized it and then followed the same procedure to flip the image—ending up with this.


I know my introductory image also shows an apple-shaped mini book, but I’m going to save that lesson for my first weekly PSE Tutorial so check back next Thursday.  We’re ending the week tomorrow with a lesson on making homeschool classroom posters.  Please be sure and leave a comment on how you're finding these tutorials or what you'd like to learn to do. 
 

Have you checked out what the other Crew Member’s have been sharing this week?  Just click on the image below.
 
Summer Blog Hop

Related Posts Plugin for WordPress, Blogger...