Friday, October 5, 2012

Science Co-Op Week #4

This week was Levers & Pulleys in co-op class.  We always start class by watching the appropriate Science of Imagineering DVD only this week I couldn't get the dad-danged player to work.  I sent one of the other moms to find the minister's son, our resident A/V tech.  I was having to improvise and I'm not nearly as entertaining as Imagineer Asa.   Luckily, I had a demonstration on how pulleys make our work easier.  I had the two largest boys in class stand on either side of me, each holding one of Schnickelfritz's karate sticks and tried to pull them towards me.  I didn't make them budge.  Then I brought up the smallest girl in class.  We tied a laundry line to one stick and wound it back and forth between the two sticks.  The picture below gives you an idea--I couldn't take a photo while I was running the class...


If you try this yourself, use lots of rope and have the kids stand 3-4 feet apart.  That way they can be pulled towards each other without the risk of fingers getting smashed by the sticks.  Also, be sure the two helpers hold the sticks at the top and bottom with the ropes in between.  I didn't notice one boy had both his hands at the bottom and the first time the girl pulled, the ropes just slid off the top.

Thank goodness, after this the minister's son was able to hook up a new DVD player and we proceeded with the video.  (I just realized, I've never done a review of the Levers & Pulleys DVD so I'll have to share that with you later).

Our hands on experiment involved our other simple tool--levers.  I found it on a Cyberchase website and altered it slightly to suit our tight schedule.  Rather than give each group three different length levers I divided the class into three groups and gave each a lever of differing lengths.  The lever itself is made of foam board balanced on a dismantled binder clip.  The instructions call for Dixie cups, but I used the same cups as our fluids experiment and they worked fine.

To my mind this experiment worked backwards.  Rather than having a set load and seeing how longer levers made it easier to lift, the experiment used a set effort and saw how changing lengths allowed us to lift heavier loads..  We placed one penny in the effort end cup (which was placed in a down position).  Then the teams added one penny at a time into the load end until the seesaw shifted and lifted the effort end off the ground.

 Here's a better angle to see that the longer the lever the more pennies it took for the seesaw to shift.


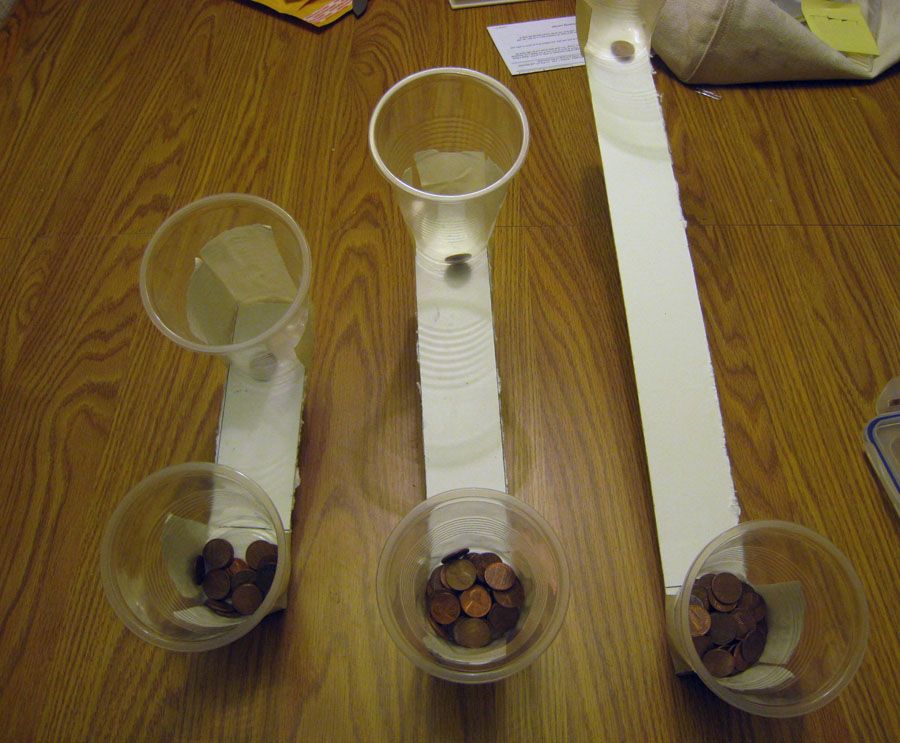
If you try this, make sure the kids place the fulcrum under the line and have them recheck it throughout.  Sometimes it would shift to under the load cup and then nothing would make it shift.  (I couldn't find a way to attach the fulcrum to the board without interfering with the mobility).

No comments:

Related Posts Plugin for WordPress, Blogger...