Friday, December 28, 2012

Counting on Co-ops - a look back

Photobucket Last Fall, during the Back to Homeschool Blog Hop, I wrote a piece about counting on co-ops.   I mentioned that we had participated in two in the past.  Truthfully, Schnickelfritz participated and I sat gabbing with the other moms.  Oh, I occasionally did a science presentation but for the most part I reaped the benefits without putting in the effort.  At the end of the post I mentioned that we had another co-op opportunity and this time I would be teaching a class based on the Science of Disney Imagineering Dvd's that we love.  For 10 weeks we spent the bulk of our Thursdays at a little church-based co-op.  So here are some of my thoughts now that we have a semester under our belts.

1. As much pressure as I feel making sure that I'm providing the best education for my son, it's that much worse worrying about providing for other folk's sons and daughters.  I agonized for weeks if the hands-on activities would be fun yet educational.  Would they be too hard or too simplistic.  I made up quiz sheets to help students remember key points as they watched the videos.  I think that most of the other moms felt this way too.  Schnickelfritz's Mapping the World by Heart teacher always had handouts and fun games for memorizing the names of countries.  The kindergarten class that met before mine had three hardworking moms organizing crafts every week. 

Studying friction on an icy slope
2. I was amazed at how draining  it was to be away from home for so long.  Fritz's first class started at 11:30, then we had lunch, two more classes, and then drove to the country to pick up our fresh milk.  We'd be gone for 5.5-6 hours including drive times.  And the organization involved--Fritz would need books and materials for three classes, I'd need a DVD and experiment supplies to teach mine, we had to pack lunches and I needed a cooler and containers for the dairy.   Just five years ago  I was used to being at work 8 hours every day, and I had to pack my lunch and all Fritz's things for daycare.  And  now I started dreading my Thursdays starting Wednesday night.  When we loaded back in the car after my science class finished it felt like TGIF.   Some of the other co-op teachers mentioned similar feelings.

Learning about levers
3. On a positive note, knowing our Thursdays were full of outside activities made me that much more committed to staying on track the other schooldays.  It was just the accountability factor I needed. If I ever felt like slacking in one subject, the first thought that would pop into my head was "You've already lost Thursday, you can't afford another," and then we'd forge full steam ahead.  I had already made most subjects fall into a four-day schedule (we did still do Bible and math on Thursdays before co-op).   


undefined
Eureka! We have a circuit
4. Schnickelfritz got a boost of self esteem when he saw he could keep up (even surpass) the older kids in his geography class.  It was listed for 5th-8th grade and he's only ten, but he has a passion for maps so the teacher gave him a chance.  I was pleased to see him behave and listen so well (I guess because he's interested in the subject matter) and he's often the only one who has completed the memory homework each week.  You try memorizing all the countries on all the continents sometime!   So far he's even been able to deal with his perfectionist tendencies when it comes time to practice drawing the maps--I'd expected him to be frustrated that he couldn't draw every boundary exactly right. 


My Hands-on Science class
The bottom line--I asked Fritz if he wanted to continue co-op next semester and he enthusiastically said "Yes!"  His Mapping the World by Heart class is continuing (we still have Asia and Africa to do).  He's switching from Prairie Primer to a boys' book club reading The Hobbit.   And because there we've been through all the Disney Imagineering DVD's and there aren't enough new kids to offer the class again, I'll be switching to a Championship Chess class.  I've already got all the books/DVD's and I made my own demonstration board--but that's another post.

So my look back on 2012 covered our first real co-op experience.  Other Crew members will have their own experiences to share.  Be sure to check out the first Blog Cruise of the new year, 2012: A Look Back  on Jan. 1st. 

Wednesday, December 19, 2012

Christmas Gifts from the Kitchen

As part of our church's Advent Conspiracy [ Worship Fully, Spend Less, Give More, Love All], rather than purchase gifts for Toolman's co-workers & our neighbors, Schnickelfritz and I make something for them in our kitchen.    Our friends will still  know that we appreciate them, but the money we don't spend at the store can be sent to provide fresh water around the world.  In the past we've made banana bread, blueberry jam, persimmon bread, and cereal snack mix (we try not to repeat ourselves).  Several recipients have diabetes so the typical cookie tray is out.  This year we decided to make a Southwestern Dip Mix recipe that I found on the Taste of Home website.

All the ingredients were available in bulk at Sam's Club.


I used a seive to sift the cumin and chili powder so that no one ended up with a lump of spice.


After stirring everything together I divided the mix into equal portions and placed them in snack- size ziploc bags.  Next I needed to work on decorating the bag.  First I measured the width of the bag.


Looks like 7 in. will cover the top


Then I used my Graphic Toolbox software to make a label that will fold across the top of the bag.  One side will have our Christmas greeting and the other side will give instructions for using the dip mix.  Make sure that you flip one of the pictures/text over so it will look correct when you fold the label.


I printed the labels on card stock, cut them out and scored them with a bone folder.  When I held them over the ziplock bag I could feel the thickness of the seal to make sure a placed the staple outside the bag itself.
The Toolman will be taking this batch to work tomorrow.


Saturday, December 15, 2012

A math lesson in couponing

First, let me be clear, if you're looking for tips on how you can be the next star of Extreme Couponing you've come to the wrong place.  I'm not organized or committed enough to score 90+ percent savings.  I also don't live in an area that doubles coupons.  There is a Schnucks 12 miles away that will double the first 15 coupons up to .50 which means at most I could save $7.50.  However I do think there are some tips that all of us can learn to use coupons more wisely.

For example, this week the Schnucks flier said they would TRIPLE the first 15 coupons.  They also had a good sale on ham so I decided to make the trip.  I had a few coupon circulars from the last two weeks in my newspaper pile so I began searching for the 50 cent-ers.  They were hard to come by--at least for things I would buy anyway.   I did find two yogurt coupons: one for $.50 off eight and one for $.40 off six.  So 14 yogurts went into the cart and I saved $2.70.  Let's look at the chalk board...


Now on the surface you would think triple coupons was a great thing, right?  I however keep a price book on things I purchase often and know that this same store often puts yogurt on sale 10 for $5.00.  And on any other week I can still have my coupons up to .50 doubled.  So let's look at that scenario on the board...


Wow, now I'm not feeling so thrilled about the Triple coupon deal.  I could have saved almost two dollars more by waiting for the yogurt sale to cycle around again.  The moral of the story is that coupons work best if they're matched up with a sale price.  Even if the store just took the coupons at face value I would have come out better--paying $6.10 instead of $7.10.  

I still bought the yogurt because I needed to spend $25.00 to get the deal on the ham  ($1.77/lb vs $3.98/lb) and the yogurts counted as $9.80 towards that figure (they didn't care whether I paid in cash or coupons).   I also track the price of ham because the Toolman likes it for sandwiches so I knew this was an extremely good deal.  Bottom line for me--coupons are good but a price book is better.

Thursday, December 13, 2012

Soup's On! -- Cheeseburger Soup

After a freakishly warm Thanksgiving, the weather's finally plunged down to the temps that make me want a nice pot of soup on the stove.  I've got another recipe for you today--

Cheeseburger Soup

1 1/2  cups water
2  cups cubed russet potatoes (either scrubbed or peeled)
2  carrots, grated
1 small onion, chopped
1/2  bell pepper, chopped (red or green for contrast, orange if you need to sneak in veggies for kids)
1 garlic clove, minced
2 Tbsp beef soup base granules
1/2 tsp salt
1 1/2 pounds ground beef, cooked and drained
2 1/2 cups milk, divided
3 Tbsp flour
8 oz Velveeta cheese, cubed

(Optional garnishments: crumbled bacon, shredded cheddar cheese, jalapeno slices)

In a large saucepan, combine the first 8 ingredients (in blue), bring to a boil.  Reduce to a simmer for 15-20 minutes or until veggies are tender.  Stir in beef and 2 C of milk and let it heat through.  Mix the remaining 1/2 C milk with flour until smooth; gradually stir into the soup.  Boil for 2 minutes until its thickened.  Reduce heat and add cheese, stir until melted.  Serve with garnishments if desired.


I suppose I should explain my philosophy of soup and cooking in general,  down here where I know my son won't see it and hopefully the Toolman stopped reading when he saw this was a recipe post.  The males of the family don't care for vegetable side dishes so I have to incorporate as many as possible into the entree.  Potatoes aren't a problem, the carrots and orange bell pepper are camouflaged by the cheese.  This makes the dish somewhat monotone for us.  If you're family isn't so picky, you can add some contrast with the bell peppers or add green onions.

Tuesday, December 11, 2012

Mystery of History 2 Lapbook

My son and I have been working through MOH Volume 2 this year.  For those of you unfamiliar with the product, there is a lot of built in review through cumulative quizzes and what the creator refers to as memory cards.  Each index card is supposed to list the lesson subject, date, and important facts.   I suppose I could have jazzed up the cards with a picture on the back side, but I was looking for something more eye-catching so my son might look at it on his own to refresh and review.  One day while visiting the Bright Ideas Press website, I saw that they offered lapbooks for sale.  Maybe this was what I was looking for.  Unfortunately I couldn't find any sample pictures either on their web store page or  the MOH Yahoo Group forum.  I took a chance and bought it blind.

Here is a picture showing how to assemble the official lapbook.


I'm glad to have the sample so I can organize the lapbook (note how they grouped the Jewish history lessons together and the Roman lessons together).   I was surprised/disappointed that the graphics for the minibooks weren't from the textbook.  I guess they couldn't get permission to use the Homeschool in the Woods images.  Instead most of the pictures looked like they were drawn by kids. There were also a few (only two in the first quarter) lessons that didn't have a minibook.  So using the sample pictures as a starting point, I decided to make my own lapbook pieces.  I scoured the Internet to find images ( I didn't have to worry about copyright issues) or used images from my purchased copy of History Through the Ages figures.  I used my Graphic Toolbox and Photoshop Elements to create my own minibooks or add color to the ones I used from the MOH lapbook.

Official images on top, my substitutions below

The results are much more colorful and I was able to make minibooks for the missing lessons (like the Golden Age of India) and put them on what would have been an unused flap.  I also added the posters I made for the Dates to Remember.  Here's our first quarter Lapbook....


Friday, December 7, 2012

A Frugal Fall Birthday

Well, it finally happened...my Schnickelfritz joined the ranks of us with two digits in our age.  I'm not going to try and figure out where the last decade went so fast.  Instead, I want to share how we celebrated.  I now there have been TV shows where moms outdo one another with the most elaborate and expensive shin-digs they can muster.  We didn't rent a bouncy house, hire a magician, or visit that pizza chain where you spend $50 to buy tokens and "win" a $5 prize.

A frugal party takes advantage of and plays up what you already have--in our case: the fall season.  Our assets were a fire pit,  a tractor and wagon, piles and piles of leaves....and a leave blower.

We'll start with the fire pit.  The temps were in the mid fifties but everyone was nice and cozy around the fire.  We had plenty of hot dogs and marshmallows for roasting.  (That saves me from having to prepare a lot of party food--make them do it themselves).  There was apple cider from some of our nearby orchards to drink.

The fall theme has been a standard for this November birthday, but new this year was a hayless hay ride.  The Toolman had bought a wreck of a corn crib style wagon at auction earlier this year.  After removing all the rotted wood he was down to metal frame.  He built a new bed with lumber from his father's saw mill and we replaced the tires with two we'd saved when the pick-up truck needed new ones.  A can of spray paint and we had a really nice looking wagon.  The first thing Fritz said when it was done was "Now we can have rides on my birthday."  It was a big hit,  the kids were bumped and jostled for the off-road portion of the trip and then traveled down the road to visit the horses.  When Toolman needed a break for hot-dog sustenance, the kids all sat quietly in the wagon waiting for the next ride to begin.


But the highlight for the last two year's has been the pile of leaves!  The kids ask when it will start, the parents want to know so they can watch.  There's no shortage of trees on our property and we can make great leaf fortresses.  And then it's a leaf throwing war--all the kids vs the Toolman.....and his leaf blower pack. 


The funniest sight last year was when one boy's baseball cap blew off...every time he reached down to pick it up Toolman was there with a gust of air to blow it out of reach again. 

I used to feel bad that my son couldn't't have a summer birthday--his friend always gets to host a party with a homemade water slide.  But now I wouldn't change a thing about our birthday salute to fall. 

Wednesday, November 28, 2012

Thanksgiving recipes

Wow, it's been a while since I posted.  I kept thinking I need to write something but then other things got in the way and I didn't come back to that thought until I was laying in bed.  But I'm here now and I want to mention a new recipe and a change to an old recipe that met with great success at the Thanksgiving table. 

First the old recipe--I shared it with you during the 5 Days of Preparing for the Holidays blog hop.   I had to make the Butternut Squash casserole dairy free for my aunt so I substituted margarine for the butter and apple cider for the milk.  I think I actually prefer it the new way.  So here is the updated recipe.

Butternut Squash Casserole (makes 2 qts)

Aprox. 3 lb butternut squash                                     3/4 C sugar     
3/4 C apple cider                                                      3 T flour
6 T melted margarine                                                1/2 t cinnamon
3 eggs, beaten                                                           1/8 t ground cloves
1/2 t vanilla extract                                                     1/8 t nutmeg

Topping (mix & freeze separately or make on serving day)

1/2 C crushed vanilla wafer cookies
1/4 C brown sugar
2 T melted margarine
 
Assembly Directions
Peel squash, remove seeds and cube.  Place squash in large sauce pan and cover with water.  Bring water to a boil, then lower temp, cover and cook 25-30 minutes.  Drain squash and place in mixing bowl.  Beat until smooth (for really smooth pulp use a food processor).  Add milk, butter, eggs and vanilla and mix well.  Combine sugar, flour, and spices and add to squash mixture.  Mix well and transfer to freezer container (you can use a gallon freezer bag).  If you make the topping today, mix wafers and brown sugar and put in a quart size freezer bag and attach to the squash bag.

Cooking directions
Thaw completely overnight.  Pour the squash into a greased 2 qt baking dish.  Cover and bake at 350 for 45 minutes.  Meanwhile melt 2 T of butter and combine with wafer crumbs and brown sugar. Remove the squash, sprinkle with topping.  Return to the oven and bake uncovered for 12-15 minutes.


Now to the new recipe--The man who made us petition to take the very filthy couch off his hands must have felt a little guilty because he also gave my husband a free smoker/roaster oven.  I've been dying to try and smoke a turkey and now I had my chance.
 
I used this Turkey in a Smoker recipe with a 12 pound bird.  Because I have such a large extended family, I also made a traditionally roasted turkey and conducted an informal taste test.  The smoked turked won hands down.  It was so much easier to prepare--I didn't have to brine it the night before, it was much easier to debone, the pan juices made an excellent gravy and I didn't even add salt.  This is the way to go.
 

Monday, November 12, 2012

Review: Vocal Coach

Back in my high school days when it seemed everyone was labeled and put into a category, I was one of the singers.  Between Concert Choir, Show Choir, Jazz Ensemble, Madrigals, school musicals and solo & ensemble festivals, I spent a dozen hours or more a week singing.  My Schnickelfritz inherited my love of music.  We used songs to memorize phonics basics, times tables, and the books of the Bible.  His Mapping the World by Heart class is using Geography Songs to learn all the countries.  One of my key gauges to his emotional well being is if I can hear him humming or singing to himself.

Through the Homeschool Crew, we've been given the opportunity to review a DVD set that will help him improve his singing technique and perhaps prepare for more formal music training.  Chris and Carole Beatty of The Vocal Coach have been training singers for over 40 years.  Since not everyone can travel to their Tennessee studio, they're willing to come into your home in the form of two DVD courses.  We received the Teaching Kids to Sing set.


The three disc sets contains:
  • Building Foundations That Last DVD (43:11) explains that singers are vocal athletes and covers posture, tone, breathing, and warm ups.
  • Essential Skills for Growing Voices  (31.38) helps the vocal athletes learn concepts like rhythm, dynamics, tempo, diction and tips to protect their vocal health.
  • The Accompaniment Tracks CD has samples of every warm-up and song from the DVDs, first with the vocals and then just the accompaniment track.
Obviously, the DVDs are short enough to view in one sitting but we chose to break them up into lessons, studying one concept each day.  Chris Beatty gives a 4-5 minute lesson and then teaches a song  (okay, one was a breathing rap) to reinforce and remember what you've learned.  My son was amused by his example of slouching ruining your singing voice and also clearly understood the visual aid of blowing up a balloon in a restrictive space vs out in the open.  I sang all the songs with him and even lay on the floor with him to practice diaphragmatic breathing.  True to his nature, I caught him humming some of the songs to himself in his free time. 

I even learned a few things in the vocal health lesson.  Did you know a singer can lose up to a gallon of water through his mouth during a concert?  I also learned a new, less damaging way to clear phlegm from my throat (something I've unfortunately needed this past week).  WARNING TO THE SQUEAMISH--there are several clips of actual vocal cords taken while someone is screaming and clearing their throats.  I've known for a while my son wasn't cut out to be a doctor, there's no blood but he was definitely put out at the thought of a camera going down some one's throat.

In our area, it seems like most homeschoolers choose violin if they're going to pursue any music lessons, but think of all the advantages of singing.  You're more likely to have early successes with singing than violin.  There's no instrument to buy or rent.  You'll never leave your instrument at home or forget it after practice.  You can perform alone or with an ensemble.

We will  review these lessons again before Schnickelfritz auditions for the local college's children's choir, but other than that I'm not sure we would view them over and over.  Perhaps the set is best suited to a choir director (church or co-op) who could lend the DVD to new kids who join. 

The three disc set sells for $44.99 and is targeted to kids from kindergarten through 6th grade.  The Vocal Coach also has a much more extensive DVD set that some of the other crew members reviewed so you may want to check that out if you have a serious singer in the family.


Photobucket
 
I  received a free set of Teaching Kinds to Sing discs  through the Schoolhouse Review Crew in exchange for my honest review. I was not required to write a positive review now was I compensated in any other way. All opinions I have expressed are my own or those of my family. I am disclosing this in accordance with the FTC Regulations.

Thursday, November 8, 2012

A Christmas Scrapbook

PreparingfortheHolidays

Oh how I debated about what to include in my Arts & Crafts posting.  I could have chosen the handmade ornaments the 4-H kids made to decorate a tree to be auctions for charity.  I thought about finding lots of cool ideas on Pinterest, but you can do that just as well yourself.  While we haven't gotten to the busiest part of the busy season yet, you might want to take on a new project for this year anyway.  So my craft project actually takes place  after Christmas.  Just make sure you take lots of pictures on Christmas Day and at the parties you attend.  Then on those cold winter days when you just want to stay inside, make a scrapbook page or two to help preserve those memories.

My step-mom bought me Christmas themed album long ago and it sat around in the closet until  I got married.  That's when I decided that I'd devote a two-page spread to each Christmas my husband and I (and anyone else who came along) spent together--starting with our previous Christmas when we were just engaged..  Ironically, I was attending a spcrapbooking party, composing Year 1's pages when I shared some symptoms with a friend and she suggested I get a pregnancy test.  She was right!  I knew Year 2's title would be Baby's First Christmas!  Someday, I'll pass this album one to him and I hope he'll treasure it the way I do.


I mentioned in Monday's post that I love sharing stories and memories about the ornaments we've purchased and made.  The same holds true, even more so, for the Christmas Scrapbook.  Sometimes the memories are bittersweet--looking through last year's pages I saw three family members that are no longer with us.  Sometimes it's about showing Schnickelfritz that yes, he was that tiny once but look how he's grown.  I even wrote about the time I woke up three weeks before Christmas to a puddle in the living room floor and how the plumber cut 16 holes in the wall looking for the leak (I can almost laugh about it now).


I always try to include one of our family Christmas cards in the spread.  Then I fill up the rest with photos of who we see, how the house is decorated, whatever.  You don't have to spend a ton of money either--buy scrapbook elements after Christmas when they're 75% off.  You may be able to find all the digital scrapbooking freeies you want online (assuming you have a program to manipulate and print them).  My album pages are 10 x 10 so I could arrange something and print it on 8x11 photo paper and then journal in the remaining 2 inches or add a ribbon or something.


So don't let those precious pictures sit in a shoebox.  Arrange them so you can share them year after year.


Wednesday, November 7, 2012

Gift Giving--Stop the Insanity


PreparingfortheHolidays

I know it's getting close to Christmas when certain commercials pop up on TV.  You know the ones--the Salad Shooter, the Clapper, and the Chia Pet.   Why is this the only time of year they show up?  Because they know there are people out there desperate enough to buy them because they feel obligated to give something to their cousin's neighbor's hairdresser whom they don't know enough about to buy a gift with meaning. 

Please understand, I'm not against giving gifts, I'm just upset when the real reason for the season can't be found behind the crowded malls, the commercials, the stores that push "holiday" shopping starting in October, and the credit card bills that will follow.  For the past four years, our church has participated in the Advent Conspiracy.  Just watch this video ....


We spend the four weeks before Christmas learning to Worship Fully, Spend Less, Give More and Love All.   If your church doesn't participate, you can download message and resources from the Advent Conspiracy website.  Their charity is Living Water, but you can give to  local shelters or food pantries and make a difference in your neighborhood.

In our home we make homemade gifts for the Toolman's co-workers, the neighbors, and co-op moms.  In the past we've made jams with berries we picked ourselves and mini persimmon bread loaves (picked the persimmons too).   They receive something to know we've been thinking about them, and I get to spend an afternoon in the kitchen with my son (we always watch Ratatouille first, to get him in the cooking spirit).   That's Spending Less and Giving More right there--I gave quality time to my son, I gave the work of my hands to my friends and other than containers I didn't spend anything. The loving all comes from taking the money I didn't spend on meaningless gifts and donating it to one of our church's programs--we sponsor children in Peru through Compassion International, Living Water, and an orphanage in Mexico.

As for Worshiping Fully, don't you think Christ is more honored when we share His love with others than in seeing who can pile presents higher under the tree?

Tuesday, November 6, 2012

Side Dishes from the Freezer

PreparingfortheHolidays

At some point before the end of the year, between decorating, homeschooling, keeping the house clean, and entertaining I'm sure you'll reach a point where you wished you had more hours in the day.  Well Santa's not sharing his secret of how he slows down time enough to visit all those homes in one night so we need some other tricks up our sleeves.  One of my favorites is preparing and freezing dishes ahead of time .  I assure you the recipes below are worthy of a place on your Thanksgiving or Christmas table--even though they come out of the freezer.

Butternut Squash Casserole (makes 2 qts)

Aprox. 3 lb butternut squash                                     3/4 C sugar      
3/4 C milk                                                                 3 T flour
6 T melted butter                                                       1/2 t cinnamon
3 eggs, beaten                                                           1/8 t ground cloves
1/2 t vanilla extract                                                     1/8 t nutmeg 

Topping (mix & freeze separately or make on serving day)

1/2 C crushed vanilla wafer cookies
1/4 C brown sugar
2 T melted butter

Assembly Directions
Peel squash, remove seeds and cube.  Place squash in large sauce pan and cover with water.  Bring water to a boil, then lower temp, cover and cook 25-30 minutes.  Drain squash and place in mixing bowl.  Beat until smooth (for really smooth pulp use a food processor).  Add milk, butter, eggs and vanilla and mix well.  Combine sugar, flour, and spices and add to squash mixture.  Mix well and transfer to freezer container (you can use a gallon freezer bag).  If you make the topping today, mix wafers and brown sugar and put in a quart size freezer bag and attach to the squash bag.

Cooking directions
Thaw completely overnight.  Pour the squash into a greased 2 qt baking dish.  Cover and bake at 350 for 45 minutes.  Meanwhile melt 2 T of butter and combine with wafer crumbs and brown sugar. Remove the squash, sprinkle with topping.  Return to the oven and bake uncovered for 12-15 minutes.


Shoe Peg Corn Casserole (makes 1 qt)

1 can Shoe Peg Corn                                                      1 can Cream of Celery soup
1 can French Cut Green Beans                                        1/2 C sour cream
1/2 C chopped onion
1/2 c sharp cheddar cheese, grated

Topping ( make on serving day)

1 sleeve Ritz crackers, crushed
1/2 C butter, melted

Assembly Directions
Combine corn, beans, onion, cheese, soup, sour cream and put in a 8 X 4 loaf pan, 1 qt dish, or freezer bag.  Store in freezer.

Cooking directions
Thaw completely overnight.  (Pour into dish, if you stored in a freezer bag).  Top with crackers and pour melted butter over top.  Bake for 35 minutes at 350. 


I love to cook, but I don't want to spend time in the kitchen that I could be spending with visiting friends and family.


Monday, November 5, 2012

Decorating--Why we do the things we do

PreparingfortheHolidays

As you prepare to decorate this Christmas , have you ever really thought about why you drag those boxes (and boxes and boxes) out of storage and put them up for about four weeks and then take them down again? 


Perhaps you're like Snoopy and his lights and display contest, seeking at least bragging rights on your block, if not fortune.  You use up so much wattage that the power company sends you a Thank You card in January.  I actually lived two houses down from one of these folks growing up.  He would take a week off work to string lights over everything that didn't move and his garage was full of animated characters.  We called it Disneyland East,  and often something worse under our breaths when we couldn't get into our own driveway for all the traffic and gawkers filing past. 

Or maybe you're a Martha Stewart wanna-be and this is your chance to display all the crafts you've made.  Once when I was stuck in bed sick I watched one of her Christmas specials.  She was showing off a little village where the rooftops were made from pine cone scales.  Now perhaps Martha thinks its no big deal to ask one of her minions to dissect pine cones and reapply them with a glue gun but I have other things that need to get accomplished during the month of December (heck, it would probably take me November too!)

In both these cases, I think the decorator is trying to bring attention to themselves rather than the real reason for the season.

Now before I start sound too much like the Grinch, let me assure you that I love the lights and the garlands and the candles in the window.  Remember, I asked you to think about why you decorate.  Here are my reasons:  we are celebrating the birth of our Savior.  Last weekend we celebrated my Schnickelfritz's birthday and so we decorated with balloons and streamers.   So we decorate for Jesus' birthday too--only with strands of lights and evergreen trees.  But we always have a nativity set as one of the first thing guests see as they come in our home.  Mine is a very special set of Hummels given to me by my grandmother over 30 years ago.

Which brings up my second reason for decorating--Christmas is a time for family and memories.  Every time I unwrap the Hummels I think of Gram.  When we decorate our tree, each ornament has a memory.  We try to pick up one on every trip we take.  Others commemorate special events in our lives--there's a moose in a basketball uniform from when Fritz started playing with Upwards.  I've got a dough ornament of a blond girl skiing from when I learned decades ago.  As we place them on the tree, we relive those stories with each other.  Nothing special happen to you this year?  Then pick an afternoon and make ornaments with your kids and that can be your memory.  (I think my mother still has a moldy salt-dough star that I helped paint when I was 2 or 3.  It still has to go on the tree, even if its just hidden in the back).

So my challenge to you as you pull out your boxes is to decorate with meaning this year--not just to impress others or out of habit.


Sunday, November 4, 2012

Review: Activity Bags


After four years of homeschooling, I've come to accept the fact that there's nothing in the world I can do to make penmanship practice fun for my Schnickelfritz.  We just have to trudge through it knowing there are better things to look forward to--like science.  Here's a subject that can really bring a "wow factor" to our school days--it can be hands on, colorful, even explosive (within reason). Unfortunately,  I don't always have the time to plan and organize these experiments.  How great that a company like Activity Bags has done most of the upfront work for me.  We recently downloaded three volumes of Science Experiments in a Bag to review.
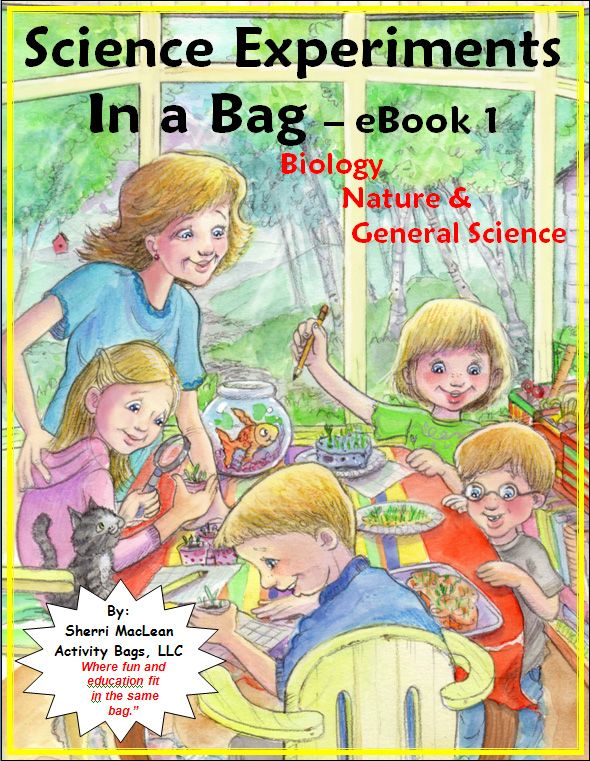
GRADES:   K through 8
FOCUS:  Biology, Nature & General Science
25 Experiments
eBook 1 webpage
It may be semantics, but I would call some of these activities, rather than experiments.  There is no hypothesis to prove or disprove when making geometric shapes with marshmallows and toothpicks.  Some activities will require days or weeks (growing seeds, fungus, watching garbage decompose underground).  Others can be done in one session (crushing cans, skewering a balloon without popping it).   You'll probably have most of the supplies and materials in your home already, but anything you don't have can be found at Walmart.
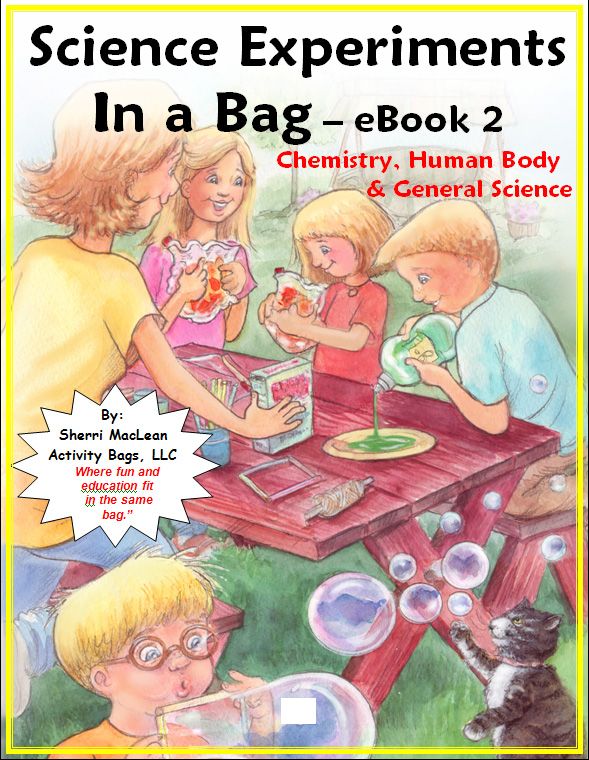
GRADES:  K through 8
FOCUS:  Chemistry, Human Body & General Science
25 Experiments
ebook 2 webpage
All of the experiments can be done in one session.  The human body activities focus on the five senses.  The chemistry activities cover mixing vinegar and baking soda, cleaning copper pennies, and making a cabbage juice litmus test.  The general science activities could really be classified as physics:  siphons, imbalanced forces creating motion, the flow of electrons, and static electricity.
Again, there are no exotic materials to procure.
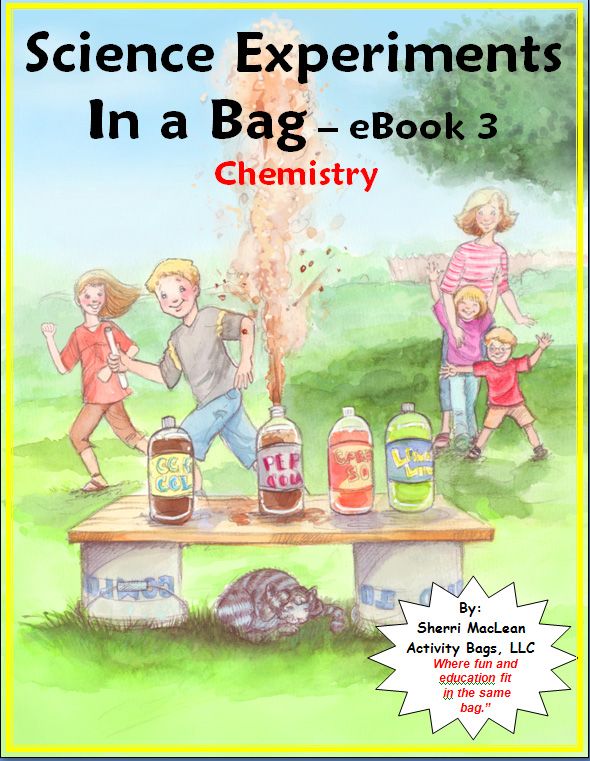


GRADES:  K through 8
FOCUS:  Chemistry
25 Experiments
eBook 3 webpage
Anytime you can drop Mentos in a two-liter of soda and log it as science hours, you've got a hit on your hands.  Other activities are turning pennies green, making glue and the old standby--a baking soda and vinegar volcano.  On that note, all these books include a chart showing which experiments are best done outside.


So why is it called Science in a Bag?  Because the non-perishable supplies can be assembled ahead of time in a plastic bag.  There a tips on organizing an experiment swap--each family preparing say, 10 bags of one experiment and then trading bags with nine other families.   The supply list for each experiment is listed in quantities for 1,10,15 or 20 bags.  There are also printable experiment logs to record observations, answer supplied questions, and take general notes. 

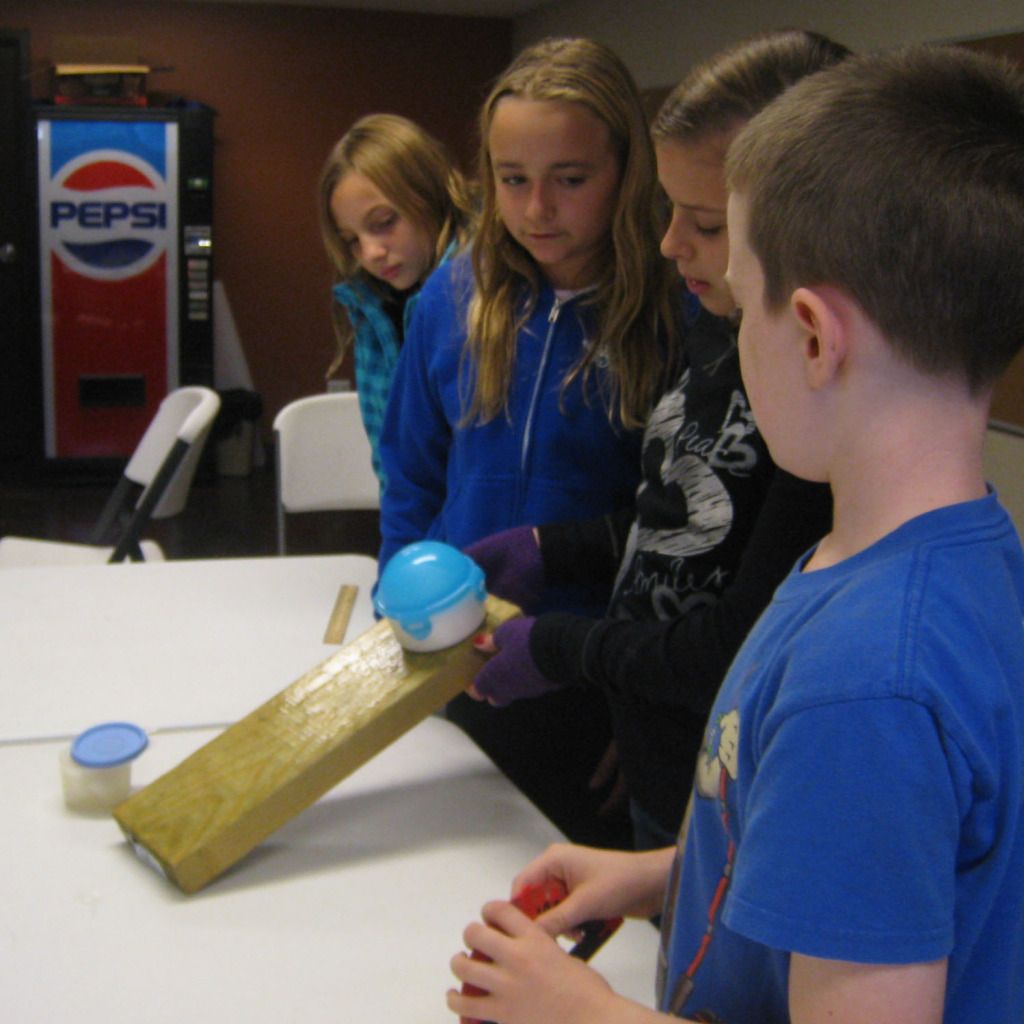
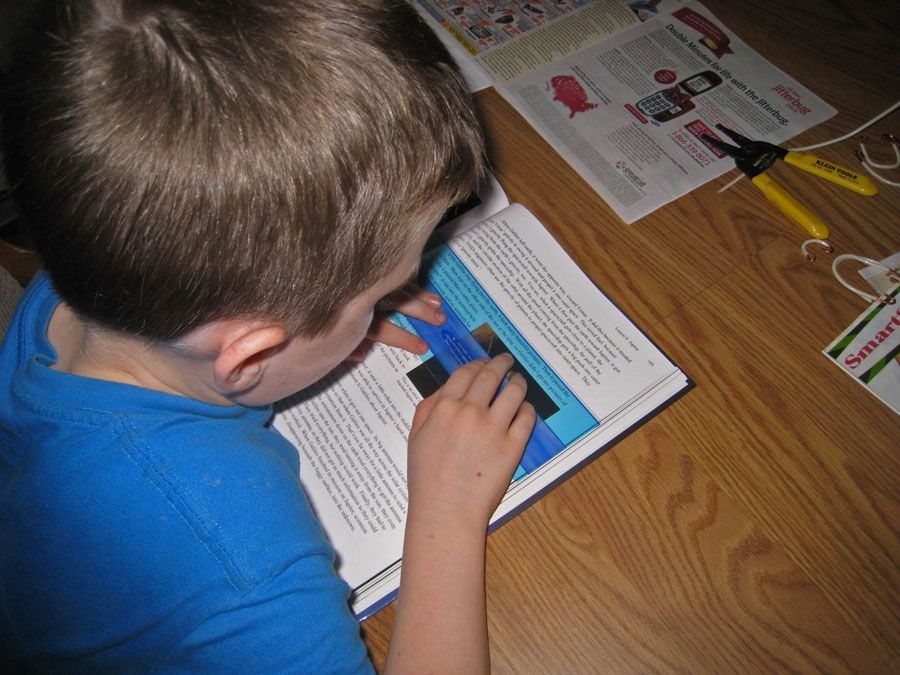
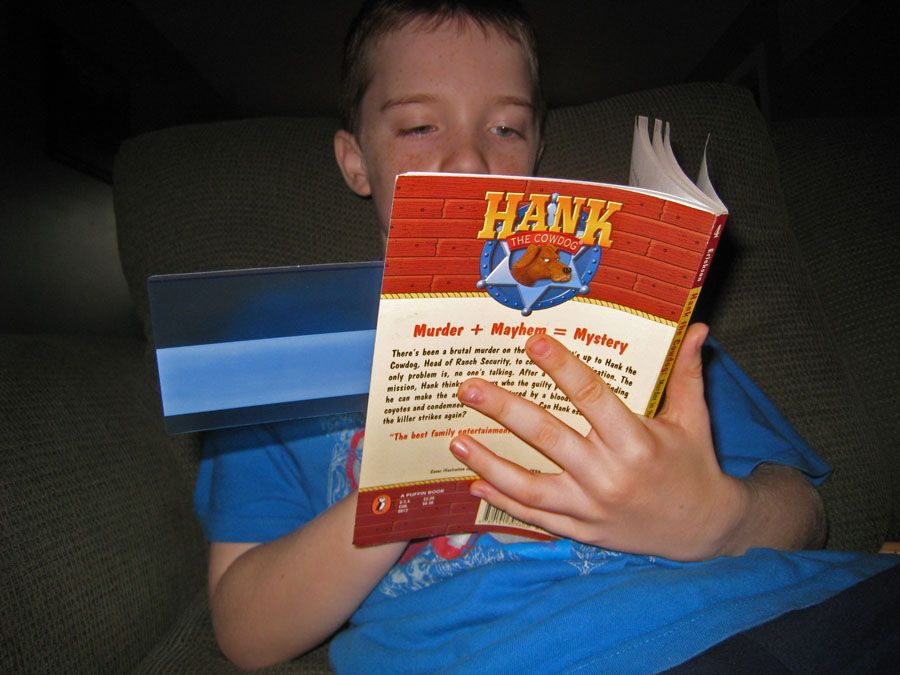
Schnickelfritz is currently studying Astronomy and we didn't find any experiments to tie in with that subject.  Instead we chose to keep it light--trying out the activities that we thought would give us a real "bang" as we wrapped up our school day.  I didn't require him to fill out the log sheets--we were just reinforcing the fact the science can be fun.  As such, these books might be good for grandparents or someone seeking to be the coolest babysitter on the block.

Speaking of "bang"  here's a few pictures of the can crusher experiment from book one.  We we rinsed out an empty can and let it dry overnight.  Then we poured in a tablespoon of water to cover the bottom and placed the can on the stove till it boiled one minute.  Then, using tongs, we plunged the can into a pot of very cold water.  There was a loud POP and the sides of the can caved in. 


We learned it was important to wait until you heard the boiling bubbles in the can before starting the timer.  Our first try we used the observation of steam as our key and the result was less intense.

Each eBook sells for $15 on the Activity Bags website.  You can buy volumes 1 and 2 as a bundle for $27.  Other bags are available with reading games, math games and travel activities.

Photobucket
 
I  received a free downloads of the 3 Science Experiments in a Bag volumes through the Schoolhouse Review Crew in exchange for my honest review. I was not required to write a positive review now was I compensated in any other way. All opinions I have expressed are my own or those of my family. I am disclosing this in accordance with the FTC Regulations.

Thursday, November 1, 2012

It's Soup Season!

Around here, most people look forward to the first day of deer season.  But for me, it's the start of soup season.  All summer it's been hot enough to fry eggs on the sidewalk and the last thing I wanted to do was fix or eat something hot.  But now there's frost in the morning and the smell of leaves burning and when I come in from walking the dog I want, no need, something to warm my inards.

This summer I got a free box of old Taste of Home Annual recipes and I've been just waiting for the day to load up the stock pot and test out some new soups.  The first one is a winner---from 1999, here's my version of ....

Garden Chowder


1/2 cup chopped red pepper
1/2 cup chopped onion
1/4 cup butter
5 cups total of your choice of chopped vegetables (I used potato, cauliflower, broccoli, and carrots)
3 cups chicken stock
1 tsp salt
1/4 tsp pepper
1/2 cup flour
2 cups milk (I used whole)
2 cups shedded colby cheese

In a large stock pot, suate red peppers and onions in butter until tender.  Add the remaining veggies, stock, salt and pepper.  Bring to a boil then cover and simmer for 20 minutes or until the veggies are tender.  Combine milk and flour until smooth, stir into the pot.  Bring to a boil and cook and stir for 2 minutes.  Add the cheese and stir until melted.

Makes 2 quarts

Monday, October 29, 2012

Review: Beloved Books


Okay, I've been homeschooling for five years, I've had a son for nearly ten, and I've been reading books for 40!  So how is it I missed The Sugar Creek Gang books?  To make matters worse, I spent 14 years in Indiana--just a hop, skip, and a jump from the real Sugar Creek. Author Paul Hutchens began writing about the gang in 1939, but I'd never heard of the series till we received a set to review from Beloved Books


First, a bit more about the series and then I'll share specifics about the audio set.

The stories are shared in first person by a character named Bill Collins, a red-headed, country boy who dreams of becoming a doctor.  He and his best friends (usually referred to by their nicknames) make up the gang:  Poetry, who's memorized hundreds of verses; Circus, the acrobat of the group, Big Jim, the leader; Dragonfly, who has the keenest eyesight; Little Jim, the best Christian boy of the group; and eventually Tom Till, a fellow red-head.

It's evident that the stories take place in a different era of American history--the boys attend a one room schoolhouse and Bill's dad plows behind a team of mules .  It was an era before political correctness--,  elementary school-aged boys carry a gun and kill a bear (and keep the cub for a pet), school begins with a Bible story and prayer, the whole town attends a multi-week tent revival . The stories are decidedly evangelical.  Bill relates how he prays for his friends father to be saved, a teacher uses a lamb who follows one boy into school as an illustration about the Lamb of God,  we sit alongside the boys at church, pray meetings and tent revivals. 

With titles like The Swamp Robber and The Killer Bear you may think the stories are all action or would be too frightening to younger kids.  But really Bill's stories are more slow and meandering like the namesake creek.  He talks about doing chores, eating lunch with the parents, swimming in the creek.  I think the most gruesome tidbit we heard was how Bill's dad rang the neck of the ol' rooster they were going to eat for supper.

We received Volume One of the audio version of the Sugar Creek Gang.  It contains six stories on 12 CDs, each story lasting about 2 hours.  These must have been aired on the radio at some point because there is music at the introduction and at intervals throughout, but its mostly just the narrator speaking.  I've also noticed a few recapping the plot moments which must have been the start of a new episode.  Bill introduces the members of the gang at the beginning of each story for the benefit of new listeners, but there are some plot points that continue from one story to the next so its best to start at the beginning and continue in order.

We love radio theater and audio books in our home already. I've credited my son's active imagination to the fact that he has to see the stories in his head as he listens (he'll also act out scenes as he listens, draw pictures of story events, or build "sets" with his Jenga blocks.  Schnickelfritz would listen to the Sugar Creek gang at bedtime and we'd pop them in the car on errand day.   I've been listening too and found some teachable moments to stop and discuss--Bill gets in trouble for forgetting to return home right after an errand and for forgetting to close the gate to the pigs.  We've been struggling to help Fritz  remember to check the dog's water and food regularly.


Beloved Books has six volumes of Sugar Creek Gang stories selling for $54.95.  Each set has 12 Cds and about 12 hours of material so that works out to just over $4 per hour/CD which is actually quite a bargain  (and don't worry about once and done, my son's been listening to them over and over).  I'm not going to give a suggested age--there's nothing too scary for little ones and I've enjoyed listening too.  The main characters are all boys, but I believe girls will find plenty to relate to.

There other audio titles include homeschooler's favorites like Little Britches, Gene Stratton Porter books, and G.A. Henty titles.  And here's the best news--you can use discount code OZARK-20 to receive a 20 percent discount on your order.

Photobucket
 
 
I received a free copy of Volume One of the Sugar Creek Gang  through the Schoolhouse Review Crew in exchange for my honest review. I was not required to write a positive review now was I compensated in any other way. All opinions I have expressed are my own or those of my family. I am disclosing this in accordance with the FTC Regulations.

Friday, October 26, 2012

Science Co-op Week 7


My Co-Op class
Wow!  Two weeks in a row I've had to drive the kids away from our science experiment and on to their next classes.  I even heard several kids ask their mom's if they could try this at home.  Last week made sense as they were playing with a marble coaster.  This week they were "playing" with food.  Our topic was electricity, and for once we actually did the experiment included on the Science of Disney Imagineering DVD.

The Toolman had helped me tape together four 9V batteries and connect them in a series.  The DVD didn't give much instruction on this point, but it appeared they soldered the wires.  We connected them with alligator clips I'd picked up at Radio Shack (where I also got a pack of LED lights).  Here's the set-up...jab a fork into either end of a pickle.  Use alligator clips to connect the battery pack to the forks  ( I didn't want to use my nice forks, but it was easy to find junk forks at Goodwill).   To "see" if current is flowing through the pickle, stick some of the LED lights in the top and see if they light up.  It is helpful to use several lights in each piece of food.  They only light if place in the right direction, and you can't tell by looking at them which way that is, so increasing the number of lights increases your chances that one is correct.  Then you can turn the unlit one around.

In the DVD, Asa demonstrates a current flowing through a pickle, a candy bar, and a glob of mayonnaise.  I told the students to bring a food item to class and we ended up with: a russet potato, a sweet potato, a yellow onion, a Twinkie, an apple, some string cheese, and a slice of French bread.  Before each student took his or her turn, we'd vote on what we thought the outcome would be.


There was a cheer from the crowd every time the LED's lit up.  I was surprised with our results.  Which  ones do you think worked?  Well I'm not going to tell you.  You need to try it yourself!

Wednesday, October 24, 2012

Review: Crossbow Education


If I had to choose to teach my son just one of the three R's of education it would be reading.  After all, if you can read well you can gain information about any other subject in print!  I love reading--and books (just ask the moving men) and I read aloud to Schnickelfritz all the time.  When Fritz's turn to read came, he often skipped words, inserted words that weren't there, and missed whole lines entirely.  He was having difficulty learning how to track from left to right and from one line to the next.  So we began using plastic bookmarks with tinted windows to help isolate the line of text he was reading.  He said that it really helped keep the words from "jumping around the page."   His reading has improved so much that he's often the first to volunteer in his Prairie Primer co-op.  He hasn't used the isolating tool in a while, so when we recently received a shipment of a similar product from Crossbow Education I was curious to see if his reading would make another leap of improvement.
The Eye Level Reading Ruler is an 8" X 3" flexible piece of plastic.  The two long sides are tinted but transparent, The narrow window isolates a line or two of standard text while the wide end can highlight about five lines.  The 10 pack we received allowed us to try a variety of colors to see which one was most helpful.  The color choices are:

Yellow, Celery, Grass, Jade, Aqua, Pink, Purple, Magenta, Sky,  and Orange.

Schnickelfritz chose his rulers based on his favorite color--blue.   He preferred using the narrow side and highlighting each line one by one.  It was the perfect width for his textbooks.  When I asked him to try the wider window he got distracted from the text by trying to determine when to move the ruler--when he was in the middle of the window or waitint till he reached the bottom.  It was simplest to just move the ruler after reading each line so the additional tinted area was unnecessary.  I forced him to try other colors and asked if he noticed any difference.  He didn't perceive any and I didn't notice any missed words or jumping lines as he read aloud no matter which color he used.

When Fritz was reading out of something other than a textbook, the ruler was more of a distraction than a help.  It would stick out way beyond the edge of the book and seemed cumbersome.  Fritz stopped using the ruler for free reading and I didn't force the issue.  In the end, he didn't use it in school either unless I reminded him, but I didn't really see a difference in his reading performance either way.  I suppose he's overcome the tracking obstacles he used to have.  If we were to continue using the Reading Rulers, I'd buy a set of his optimal color and trim some of them to a paperback width.


But we had such a nice set of rulers and I didn't want them to go to waste so I started using them and was amazed at the benefit I received.  As I mention at the beginning, I love to read and by the end of the day my eyes are quite tired.  I found that certain colors, especially the purple, made the text appear sharper and I didn't feel the eye strain in the evening.  The rulers also make a great straight edge when I want to underline or highlight in my Bible study.  The makers even thought to coat the sides of the ruler--one side glassy and the other matte finish so I could glide it over the page easily or have a little more grip when I pushed against it with my pencil.

I really do think these tinted tools can help beginning readers with tracking and now I know they work well for "more mature" eyes too.  One suggestion I have for Crossbow is to label the colors on the rulers.  If I want to order a set of just purple, that's pretty easy, but if I found the most benefit from one of the green tones I wouldn't know if it was grass or celery.  There was a flyer in the packet that shows the names and colors, but that's just another thing I can't keep track of.

A 10-pack of reading rulers (variety or single color) sells for $16.95.  A 5-pack is available for $9.45 (the variety pack includes Yellow, Grass, Aqua, Purple, and Pink).  Check out their website for other helpful tools for dyslexia and visual stress.


Photobucket

I received a free set of Eye Level Reading Rulers through the Schoolhouse Review Crew in exchange for my honest review. I was not required to write a positive review now was I compensated in any other way. All opinions I have expressed are my own or those of my family. I am disclosing this in accordance with the FTC Regulations.

Tuesday, October 23, 2012

A Little Elbow Grease Pays Off!

As you've probably noticed, we like bargains in this family.  There was the $400 set of dishes I picked up at a garage sale for $5 because one plate was missing (I asked for a replacement for Christmas).  There's our beautiful deck we furnished for absolutely free (okay, we paid for spray paint).  And we refurbished a garden bench for my parents.  We're not afraid of a little work to make used items seem new again.  Recently we found a sofa/love seat combo for free on Craig's List.  Believe it or not, we had to email why we deserved the set and he would pick the winner.  The post did mention that the furniture needed to be cleaned. 

When The Toolman pulled up with borrowed trailer full,  I nearly burst into tears.  The furniture didn't just need to be cleaned--it looked like we should wear a haz-mat suit to approach it.  The stuffing was gone from one arm, the recliner cables were broken and some of the springs were loose.  Where did this guy come off making us "plead" to receive his goods?  I was afraid we'd just saved him the hauling fees to the dump, and now we'd have to pay those too.  Cue the Mission Impossible music....


The stuffing was no problem.  When we flipped the couch over (there was no fabric covering the bottom) we could see the cardboad that had been holding it in place had broken.  Most of the stuffing was still in the side section, but I ran out and bought some more at the fabric store (when it was on sale 50% off of course) to make it extra full.  Once we had it in place we could install a piece of plywood over the opening to prevent reoccurance.

The Toolman figured out how to reattach the springs and secured them with some of those plastic ties.  And we found replacement cables on Amazon.  Of course, all this would be for naught if we couldn't get the fabric clean.  I couldn't imagine how much a professional service would charge--so much for a bargain couch.

Well the sofa was in our basement and we really had nothing to lose so I researched how to clean microfiber on the Internet.  Fortunately, I ran across a blogger who'd already tackled such a problem.  Chris and Robin's Nest gives detailed instruction on using rubbing alcohol to clean their sofa.  I went to Sams Club to buy large quantities of the stuff.  We went a step further and used a Shop-Vac to suck up as much liquid as we could.  Here's the result----
Surely I don't have to label the "Before" and "After" for you. 

Jan 2014 follow up:  After having the couch and love seat for a year, we decided they weren't all that comfortable.  We took it to the consignment store and they sold them for $400!  After taking out their commission, and accounting for the stuffing and rubbing alcohol we still came out waayyy ahead. 
Related Posts Plugin for WordPress, Blogger...