Showing posts with label science. Show all posts

Wednesday, June 25, 2014

Review: Science Demonstrations DVDs

How many other nails do you think you can balance on the head of single nail?  That’s just one of the questions we sought to answer as we watched a pair of Go Science DVDs.  This is the second series of science demonstrations being distributed by Library and Educational Services.  We had previously reviewed two DVDs from the first series and when my Schnickelfritz heard there was the opportunity to see more, he quickly chose the Sound/Gravity/Space and Engineering/Design/Flight volumes.  (As a side note: I’m a frequent L&ES customer and as long as they were shipping to my door, I ordered next year’s inductive Bible studies too).

Each DVD is hosted by Bob Roy, teacher of science methods at the University of Tennessee at Chattanooga and former director of Science Theater for a local news channel.  He’s joined, either on his back yard set or in a real field, by a group of kids and sometimes his dog.  The kids assist him in a series of science demonstrations which always end with “Every time we learn more about science, we learn more about our Creator….God.”  You’ll notice I’m using the word “demonstration” rather than “experiment” –we’re not testing a hypothesis or following the scientific method here.  Mr. Roy doesn’t even go into great depth to explain why the things work the way they do --  it’s really more like using science for brief sermon illustrations.

Volume One: Sound, Gravity, Space 

This 78 minute DVD contains the following demonstrations:


Workings of a Piano Water Whistle
Screaming Pop Can Candle Seesaw
Balloon with Nut Drop Book with Paper
Simple Telephone Sun-Golf Balls
Rueben’s Tube Solar Bag
Breaking Glass UV Beads
Organ Pipes Bang Barrel
Stick with String  

I’ve highlighted the demos that could be done at home, although you’ll have to determine the supply list and how to build any of the gadgets yourself.   The picture below is of the Screaming Pop Can activity.  By blowing VERY hard through a straw placed nearly between two cans we could make a VERY  annoying sound.  

Go Science: Screaming Pop Cans

The video demonstration ends with a brief discussion about pleasant vs. unpleasant sounds and that the prayers we say are a very pleasant sound to God’s ears.

Schnickelfritz thought the coolest demonstration was Rueben’s Tube, named after the man who discovered a way to “see” sound waves as flickering flames dance while sound is being passed through a tube of flammable gas.   This one obviously can’t be done at home.

Volume Seven: Engineering, Design, Flight

This 56 minute DVD contains the following demonstrations:


How Much Will it Hold Leaning Tower of Lyra
Nail Balance Trebuchet
Centrifuge Walking on Eggs
Bed of Nails Rocket Balloon
Vinegar Rocket Toiler Paper on Paint Roller
Film Canister Rocket  

We have our own vinegar rocket (a commercially made one) that we used and had a little more success than they did on the DVD.  It’s getting harder and harder to find film canisters (in fact, some kids probably don’t know what they are) but we had one from summer science at the local library where Fritz did the same activity.  And here’s a picture of our nail balance (incidentally, our answer to the opening question was 15 nails).  The mini-sermon point here was the each one of us has been given a purpose by God and when we work together we can set the world on fire.

Go Science: Nail Balance

The age recommendation for the DVD’s is 4-12.   This is down from the 6-14 age range listed on Series One of  Go Science and I’m wondering if it might not need to be lowered slightly more.  We reviewed Series One when Fritz was nine and he watched the demos over and over again.  In fact, he’d raise his hand and answer like he was one of the in studio kids (you can read that review with a click here).  Now he’s eleven and he watched the DVD’s when the package first arrived and once again with me when we did some of the activities ourselves, but he hasn’t viewed them again.

The DVD’s won’t be wasted though—I’m saving them to use for devotions as I lead Ranger Kids (K-2nd)  this fall. I really think it’s the best forum for the series.  The demonstrations are very engaging for younger kids, Mr. Roy is so enthusiastic, each one only lasts 5-10 minutes, and they all end with a Christian application. 

We’ve recently become very sensitive to the needs of the hearing impaired in our home and I will mention that these DVD’s do not have captioning. The Go Science DVD’s are available through Library and Educational Services for $8.97 per title. In order to purchase anything from this vendor you must fit in one of the following categories.

  • Resellers
  • Libraries, Library Directors, and Librarians
  • Schools, Teachers, and other School Leaders
  • Churches and Church Leaders
  • Home Educators
  • Missionaries
  • Licensed Day Care Centers
  • Specialty Stores


Click to read Crew Reviews

Tuesday, April 8, 2014

Review: Supercharged Science


Online homeschool science curriculum


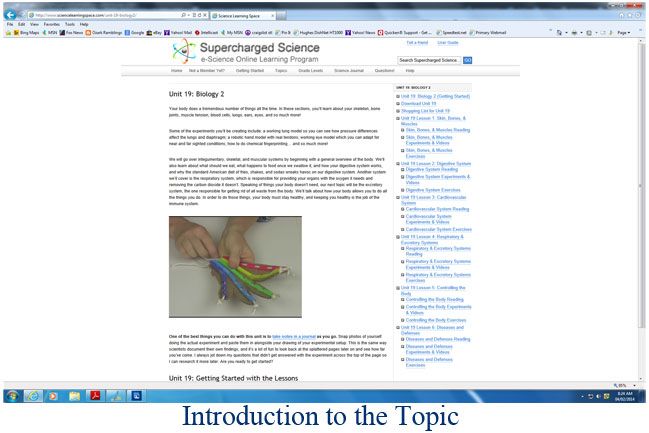
Last Spring, when we had our first chance to review Supercharged Science  we had already finished our main science curriculum for the year so I let my son choose projects that suited his fancy. You can read about it by clicking here, and I do recommend it because it will give you more of the overall picture of the program.   This year we were given a second opportunity to use their e-Science Premium Membership.  We’ve been studying human anatomy this year so we focused in on Unit 19: Biology 2, but here is a list of all the units available at this time. Note: A new subscriber has access to the first 7 Units and gains access to 2 additional Units each month they continue their membership. Since this is an online program, there are a few technical requirements to check.


Supercharged Science Units

  1. Mechanics
  2. Motion
  3. Matter
  4. Energy 1 (Levers & Pulleys)
  5. Energy 2 (Potential & Kinetic)
  6. Sound
  7. Astrophysics
  8. Chemistry 1 (Molecules, Atoms & Chemical Kinetics)
  9. Light
  10. Electricity
  11. Magnetism
  12. Alternative Energy
  13. Thermodynamics
  14. Electronics
  15. Chemistry 2 (Reactions, Bonds, Acids & Bases)
  16. Life Science 1 (Living Organisms, Cells, Genetics, Microscopes)
  17. Life Science 2 (Prokaryotes, Plants, Protists & Fungi)
  18. Biology 1 ( Invertebrates, Fishes, Amphibians, Reptiles, Birds & Mammals)
  19. Biology 2 (Skin, Bones, Muscles, Cardiovascular)
  20. Earth Science
Bonus Levels:
  • Award-Winning Science Fair Projects
  • Mathmagic
  • Teacher Resources
  • Science e-Camp (in the summer)


The unit begins with Aurora Lipper’s video introduction.  She explains what will be covered and previews some of the experiments.  On the right you’ll see links to download the PDF file for the Unit, links to the specific lessons within the unit, and a Shopping list of materials for the online lessons (the videos).


Online homeschool science curriculum


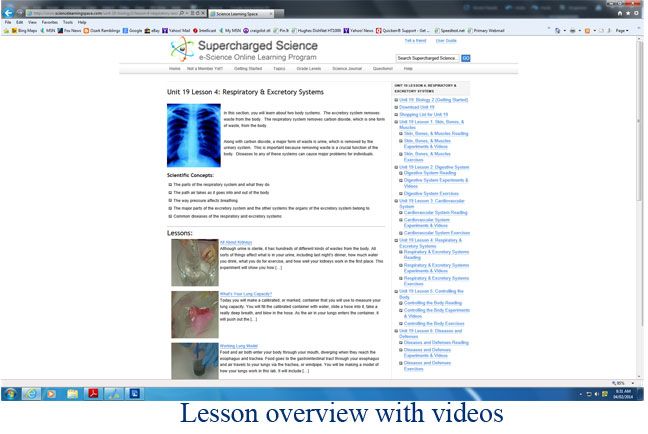
Most of the items you’ll probably already have in your home (or can pick up easily at Walmart), the few more difficult items usually have a link to an online source. The next image shows the lesson we were working (Respiratory and Excretory systems) and you can see the video lessons (I would use the term activities).


Online homeschool science curriculum


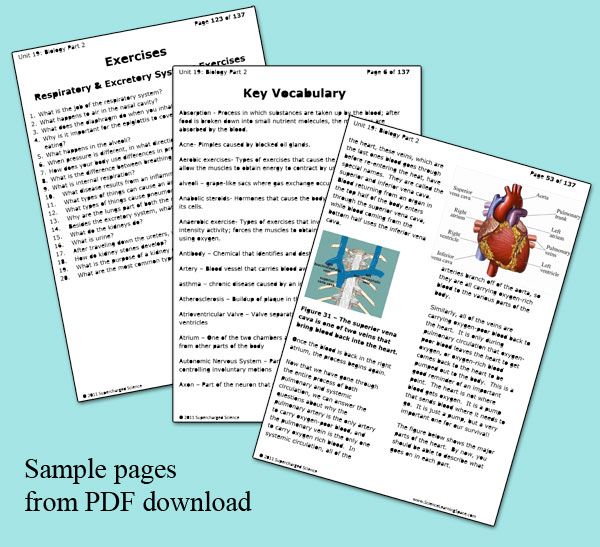
The download for the Unit has 137 pages that include another materials list (this time for the activities within the document, not online),  13 pages of vocabulary terms, and then Objectives, Textbook Reading, Activities & Experiments, and Exercises for each of the six lessons in the unit.   The exercises are really a bunch of questions that could be used for a quiz or test at the end of the unit.


If you want to do the online experiments, there are separate PDF downloads with detailed instructions.


How we used the product:

We read from our normal science curriculum but did the projects and exercises in Supercharged Science instead of our textbook—we even went back to do some activities on topics we studied a while ago because the videos just looked fun.  The website actually includes a Conversion Chart that matches up the Units with chapters or modules in many of the common homeschool science textbooks.  If you are using Supercharged Science as your only resource there is now a webpage organized by grade level and covers Pre-K through high school,  but be aware if you choose this approach there are some units and projects that aren’t listed in this approach.
On this particular day we were studying the Respiratory and Excretory systems—not two systems I’d necessarily combine on my own…
Lung capacity


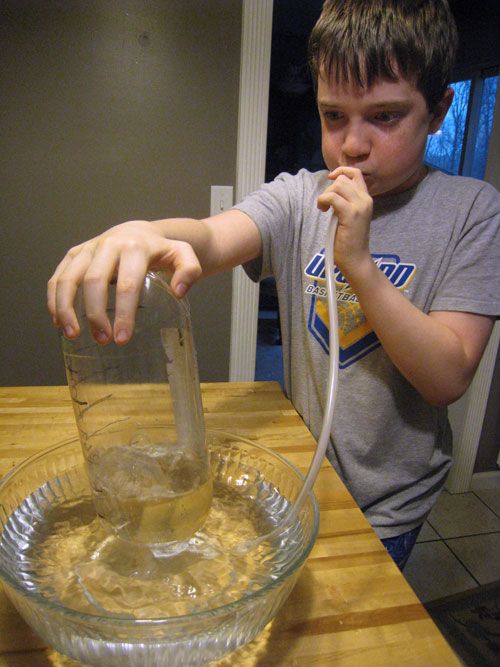
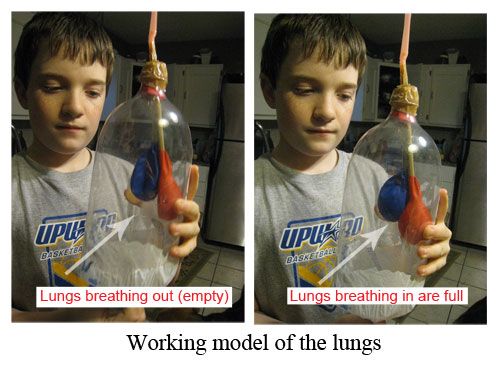
In this project we were testing lung capacity.  All we needed was some plastic tubing (try a pet store), some water, a bowl, and a soda bottle.  Turns out, both Schnickelfritz and I have a lot of air to blow out!  We hade to run to the dollar store where they sell 3-liter bottles of soda to try again.  Nothing was wasted though—the 2-liter was the “chest” for our working lung model below.


Working lung model


What We Liked:

  • No need to buy any special “science” materials – there were plenty of activities to choose from that only used common household items. (This may not be true for all units.)
  • Each online Lesson/activity has it’s own comment section.  If you leave a question there, you’ll get a response shortly.
  • The videos really help in setting up the projects, watching her build a certain item was much clearer than just reading a sheet of instructions.
  • Supercharged Science avoids the topic of evolution entirely so I don’t have to worry about “millions of years” or “goo to you by way of the zoo” teachings.


What We’d Like to Change:

  • I don’t know if it’s our satellite internet, but sometimes the videos were blurry, or the action would freeze although the audio continued.  Some mornings we couldn’t get the videos to start at all. (again refer to the system requirements to make sure it will work for you)

  • It is a little pricey.  The subscription is $37/month ($57/month for high school material).  That would be $333 for a 9-month school year.  That might not be so bad if I had several kids that could benefit from the course, but I school an only child.  Still, if you have a child with a real bent towards science, this is cheaper than a course at a community college.

If given the opportunity to review the program again we’ll jump at the chance because we really have loved all the experiments and Ms. Lipper explains things so well.  It is definitely worth visiting the Supercharged Science website and signing up for the money-back guarantee 30 day trial—especially when it’s being offered for only one dollar!  Find out more at the TOS Special Offer.  Once your registered, you’ll also receive emails from Ms. Lipper with invites to free online seminars and other bonus materials.  Or you can receive a free set of sample materials by just submitting your email address.


Click to read Crew Reviews

Monday, February 24, 2014

Life in the Blood Co-Op Activities

It was my turn again to host our Apologia science Anatomy & Physiology Blood Activitiesco-op as we wrapped up Lesson 7 in Human Anatomy and Physiology. The experiment in the book is to type your own blood. Blood Typing kits run about $10-13 each--too rich for for everyone in our co-op to have their own. There also seemed to be sighs of relief around the table when the boys learned I wouldn’t need any volunteers (we did buy one kit, more on that later).  I needed several other activities to keep the boys busy (our one girl was recovering from surgery--Get Well Soon E.M.!). Here's what we did....
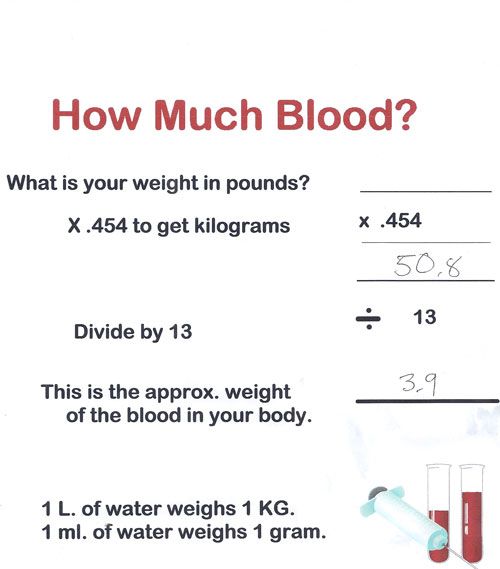
 

Activity #1 How much blood?

Our book says that the average human has 5 liters of blood. I set out all my kitchen bowls and had the boys guess which one held that amount. I didn't even tell them that a liter is a little bit more than a quart. Three boys picked the right bowl, one went to the largest and one went smaller.  I poured 5 liters in to show it filled it to the brim.


Anatomy Physiology Blood ProjectThen we set out to figure how much blood was in their bodies.  I kept things in the metric system so we could compare liters to liters (it also help that 1 liter of water weighs 1 kilogram). I made this worksheet for the boys including a step to convert from pounds to kilograms but before we started the lab I found a switch on the bottom of my scale to measure kg so we were able to skip that step.
My Vita-Mix pitcher holds two liters and has metric measurements on the side so we were able to pour & fill the bowls appropriately (there was some disappointment that the water wasn’t colored red so feel free to add this for accuracy).

Activity #2 Determine Blood Types

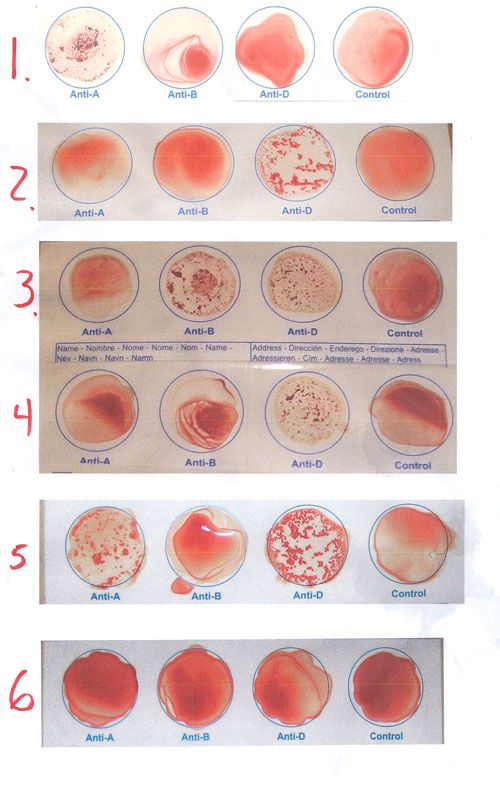
   I did buy one kit for my husband the Toolman to use since we don't know his type. He used the kit the night before and we let the kids compare his test to the chart. The results--well we know he's positive but there may have been a weak reaction in the A type. We're saying O+ for now but may need a real lab to be certain. Because of the iffy results I searched online for other folks' blood type tests (and yes, people have posted them). I copied and pasted six on a page for the kids to analyze--and that's really the point of the experiment, not learning what it feels like to prick your own finger.

Anatomy Physiology blood type project

I also shared statistics from the American Red Cross on  what percentage of the population has specific blood types.  Being O-  with a mother and grandmother the same, I had know idea that it’s a fairly rare type.


Activity #3 Determine compatibility

(I apologize up front for no pictures of this activity, but it’s hard to run it and document it at the same time. Next time I’ll put Schnickelfritz in charge of the camera). 

Of course the point of knowing your blood type is to know to whom you can donate blood and from whom you can receive blood without a bad reaction. I filled four plastic cups with water. The first I left plain and labeled O. The second and third were dyed blue and red and labeled A and B respectively. The final cup turned purple (both blue & red) and represented AB. I couldn't figure out a way to incorporate rh factor into the activity so we just concentrated on types.

The I place a glass bowl on the table to be our "patient." We took turns make the patient different types and “transfusing” different blood with a dropper.  Here are some tips: Make the patient liquid as pale as possible and the donor liquid dark so it will make a change when dropped in the glass jar.  If you’re using donor blood that is the same type as the patient blood it may make it darker but blue will still be blue and red will still be red.  Keep extra “patient” liquid on hand because once it’s changed you’ll need to discard it and start with pure color again.  I also rinsed our dropper between “transfusions.”

Next week’s activity will involve a real heart – saved & frozen after one of the boys shot his first deer last fall.  I’m not in charge so maybe I’ll have a chance to take pictures.

Don't miss a thing! Subscribe to Ozark Ramblings and get my posts in your inbox.

Friday, October 25, 2013

Apologia -- Animal Cell Project

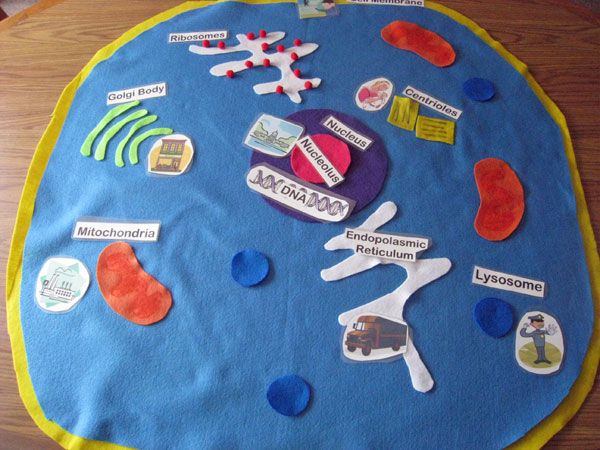
We've found someone to co-op science projects with again this year -- two families actually.  Schnickelfritz loves playing with the kids in both families and now I only have to worry about preparing for every third activity.  I played hostess for Chapter 1 of Apologia's Anatomy and Physiology textbook.  The suggestion in the book is to make a cell model with Jell-O and candy.  I really didn't want to try that with six kids -- 5 being boys.  Instead I found another homeschooling mom that used felt to construct a cell.  So I'm giving credit to Applie's Place for this  (she was doing it for Apologia's high school Biology course though so I guess I'll have to hold on to my model for a few years).

Hooray for me!  A new JoAnn Fabrics opened within reasonable driving distance.  They had felt on sale and I had a 20 percent teacher's discount (normally it's only 15 %).  I bought yardage for the cytoplasm and cell membrane and then used felt squares for all the organelles.  I typed up labels for all the parts and even found clip art to match the image reminders e.g. mitochondria = power plant.  I ran the labels and pictures through a laminator.

My son and I worked to have everything ready when our friends arrived today.


Of course when they first saw it, it wasn't labeled.  I let each kid (starting with the youngest) take a turn adding a label to an organelle.  Once it was correctly labeled, we discussed it's function and added the reminder picture. 

Now my motto is to make learning fun when possible so I came up with two games to reinforce our learning. 

First Game:  We removed all the labels, pictures, and felt objects, leaving just the cell membrane and cytoplasm base.  One mom shuffled the labels and called them out one at a time.  Each kid was timed to see how quickly he/she could reconstruct the cell in the order given.  If they made a mistake, the item had to be removed.  I started with the oldest kid this time and worked down so that the youngest would benefit by watching everyone before him--and of course he earned bragging rights for beating his oldest brother.  Everyone wanted to play this again so second round we added the reminder pictures.  If DNA or nucleolus came up randomly before the nucleus, they had to pick those objects up and place them on the nucleus when it was called. 

Second Game:  The felt objects we left, unlabeled, on the cell.  I described the function of the organelle and then the kids had to grab for it.  Sometimes there was enough, or almost enough to go around.  Other times there was only one of the object.  This got a little crazy -- have you ever played spoons?   We had to call a halt to the game because I had family coming over for dinner and didn't have time to clean blood out of the carpet.

This whole activity kept the kids engaged for 45 minutes.  Everyone had fun and learned something for the 13 year old down to his 7 year old brother.


Don't miss a thing! Subscribe to Ozark Ramblings and get my posts in your inbox.

Friday, April 12, 2013

Review: Supercharged Science


Whenever I gather with other home school moms and we chat about favorite subjects I am always in the minority.  I  favor math and science--both when I was the student and now as a teach my son.  When I taught a hands-on science class at co-op all the other moms were telling me how brave I was to tackle a subject they found intimidating.  From my perspective, the hardest challenge was finding experiment that the kids would find fun but were still packed with learning.  Our latest review product from Supercharged Science may be just the help for everyone concerned.   Their e-Science subscription series offers a plethora of streaming videos with a real rocket scientist explaining concepts for the intimidated set.  For those just looking for fun experiments--there are HUNDREDS!  Seriously, there are about 900 activities, experiments & projects.

The lessons are organized into Units:
  1. Mechanics
  2. Motion
  3. Matter
  4. Energy 1 (Levers & Pulleys)
  5. Energy 2 (Potential & Kinetic)
  6. Sound
  7. Astrophysics
  8. Chemistry 1 (Molecules, Atoms & Chemical Kinetics)
  9. Light
  10. Electricity
  11. Magnetism
  12. Alternative Energy
  13. Thermodynamics
  14. Electronics
  15. Chemistry 2 (Reactions, Bonds, Acids & Bases)
  16. Life Science 1 (Living Organisms, Cells, Genetics, Microscopes)
  17. Life Science 2 (Prokaryotes, Plants, Protists & Fungi)
  18. Biology 1 ( Invertebrates, Fishes, Amphibians, Reptiles, Birds & Mammals)
  19. Biology 2 (Skin, Bones, Muscles, Cardiovascular)
  20. Earth Science--Coming Soon
There are also special "bonus" units on The Scientific Method, Award Winning Science Fair Projects, Mathemagic, and a summer Science e-Camp.  For each unit, you'll find an introductory video and audio clip,  reading materials (you can read on screen or print out the PDF files), a printable lesson plan (with concepts taught, shopping list, answer key), and videos explaining the experiments and how to build them.  I wish I'd had access to this series when I was teaching hands-on science at our co-op.  The Try It project for one lesson was to build a hovercraft using a leaf blower and cutting a board with a jigsaw--way beyond what I was comfortable doing with a dozen kids.  Supercharged Science also has a hovercraft experiment with the same concept but uses a CD and a balloon and a hot glue gun (something I'm much more comfortable with). 

Blowing over paper lowers air pressure, making it rise

You can use the e-Science program as a stand alone program going from unit to unit (think of it as delight-directed--if you kid wants to learn about astrophysics, let him) or you may download PDF files on which units correlate with popular science curricula like Apologia, A Beka and Switched on Schoolhouse.

We had already finished our science book for the year so I let Schnickelfritz pursue whatever suited his fancy, although I made him begin the Scientific Method Project Guidebook.  It was full of puzzles and games to introduce the importance of observation;  how to recognize variables and why we should only change one at a time; and exercises in being clear and concise in our communication of results.  Here's a chance to test your observation skills...what do your read in the picture on the right?   If your student is old enough for Science Fair projects, the Guidebook ends with walking them step by step through a Linear Accelerator experiment complete with report, display board and oral presentation.

A basic Catapult
Fritz is still at an age where I want him to recognize learning can be fun.  So he could watch the videos and choose the experiments he wanted to try.  If he was interested in learning more then we could go back and read the lessons.  I, on the other hand, am absorbing the articles like Keeping a Scientific Journal, and Seven Biggest Mistakes in Teaching Science.

The majority of experiments use objects you probably already have in your home: rubber bands, string, washers, straws, index cards, etc.  We also used a few hand tools and a glue gun.  There are so many experiments in each Unit, you don't need to go buy "specialized science stuff" unless you want to.  These materials might include Neodymium magnets, neon bulbs, and electrical supplies that can be found at Radio Shack (they even supply the RS part numbers).


The monthly subscription to Supercharged Science is $37/month for K-8 material. To add the high school material (in addition to K-8) is $57/month.  This is no small sum, but if your kid has a bent for science it's certainly cheaper than a course at the community college.  A new subscriber has access to the first 7 Units (see the list above) and gains access to 2 additional Units each month they continue.  There's a 30 day satisfaction guarantee.  Still not sure?  You can try this FREE Science Activity Manual and Video Collection (normally $30).  


Photobucket


Sunday, November 4, 2012

Review: Activity Bags


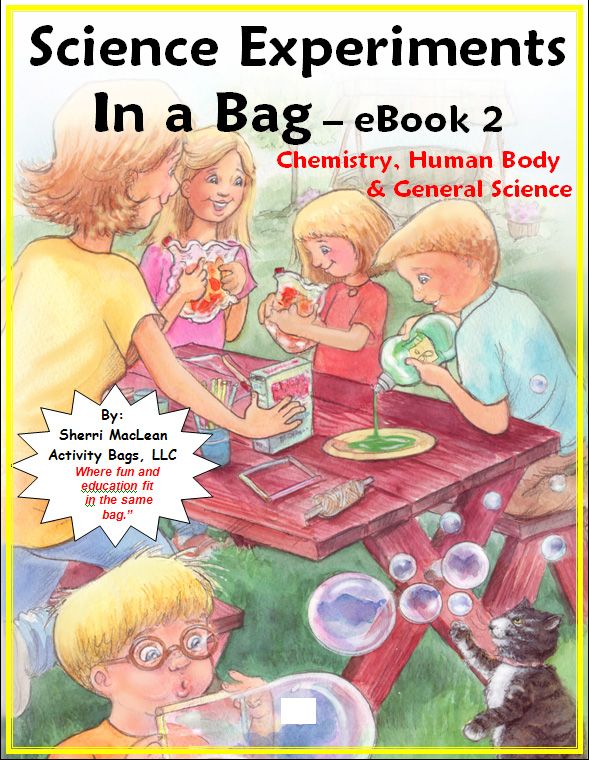
After four years of homeschooling, I've come to accept the fact that there's nothing in the world I can do to make penmanship practice fun for my Schnickelfritz.  We just have to trudge through it knowing there are better things to look forward to--like science.  Here's a subject that can really bring a "wow factor" to our school days--it can be hands on, colorful, even explosive (within reason). Unfortunately,  I don't always have the time to plan and organize these experiments.  How great that a company like Activity Bags has done most of the upfront work for me.  We recently downloaded three volumes of Science Experiments in a Bag to review.

GRADES:   K through 8
FOCUS:  Biology, Nature & General Science
25 Experiments
eBook 1 webpage
It may be semantics, but I would call some of these activities, rather than experiments.  There is no hypothesis to prove or disprove when making geometric shapes with marshmallows and toothpicks.  Some activities will require days or weeks (growing seeds, fungus, watching garbage decompose underground).  Others can be done in one session (crushing cans, skewering a balloon without popping it).   You'll probably have most of the supplies and materials in your home already, but anything you don't have can be found at Walmart.

GRADES:  K through 8
FOCUS:  Chemistry, Human Body & General Science
25 Experiments
ebook 2 webpage
All of the experiments can be done in one session.  The human body activities focus on the five senses.  The chemistry activities cover mixing vinegar and baking soda, cleaning copper pennies, and making a cabbage juice litmus test.  The general science activities could really be classified as physics:  siphons, imbalanced forces creating motion, the flow of electrons, and static electricity.
Again, there are no exotic materials to procure.


GRADES:  K through 8
FOCUS:  Chemistry
25 Experiments
eBook 3 webpage
Anytime you can drop Mentos in a two-liter of soda and log it as science hours, you've got a hit on your hands.  Other activities are turning pennies green, making glue and the old standby--a baking soda and vinegar volcano.  On that note, all these books include a chart showing which experiments are best done outside.


So why is it called Science in a Bag?  Because the non-perishable supplies can be assembled ahead of time in a plastic bag.  There a tips on organizing an experiment swap--each family preparing say, 10 bags of one experiment and then trading bags with nine other families.   The supply list for each experiment is listed in quantities for 1,10,15 or 20 bags.  There are also printable experiment logs to record observations, answer supplied questions, and take general notes. 

Schnickelfritz is currently studying Astronomy and we didn't find any experiments to tie in with that subject.  Instead we chose to keep it light--trying out the activities that we thought would give us a real "bang" as we wrapped up our school day.  I didn't require him to fill out the log sheets--we were just reinforcing the fact the science can be fun.  As such, these books might be good for grandparents or someone seeking to be the coolest babysitter on the block.

Speaking of "bang"  here's a few pictures of the can crusher experiment from book one.  We we rinsed out an empty can and let it dry overnight.  Then we poured in a tablespoon of water to cover the bottom and placed the can on the stove till it boiled one minute.  Then, using tongs, we plunged the can into a pot of very cold water.  There was a loud POP and the sides of the can caved in. 


We learned it was important to wait until you heard the boiling bubbles in the can before starting the timer.  Our first try we used the observation of steam as our key and the result was less intense.

Each eBook sells for $15 on the Activity Bags website.  You can buy volumes 1 and 2 as a bundle for $27.  Other bags are available with reading games, math games and travel activities.

Photobucket
 
I  received a free downloads of the 3 Science Experiments in a Bag volumes through the Schoolhouse Review Crew in exchange for my honest review. I was not required to write a positive review now was I compensated in any other way. All opinions I have expressed are my own or those of my family. I am disclosing this in accordance with the FTC Regulations.

Friday, October 26, 2012

Science Co-op Week 7


My Co-Op class
Wow!  Two weeks in a row I've had to drive the kids away from our science experiment and on to their next classes.  I even heard several kids ask their mom's if they could try this at home.  Last week made sense as they were playing with a marble coaster.  This week they were "playing" with food.  Our topic was electricity, and for once we actually did the experiment included on the Science of Disney Imagineering DVD.

The Toolman had helped me tape together four 9V batteries and connect them in a series.  The DVD didn't give much instruction on this point, but it appeared they soldered the wires.  We connected them with alligator clips I'd picked up at Radio Shack (where I also got a pack of LED lights).  Here's the set-up...jab a fork into either end of a pickle.  Use alligator clips to connect the battery pack to the forks  ( I didn't want to use my nice forks, but it was easy to find junk forks at Goodwill).   To "see" if current is flowing through the pickle, stick some of the LED lights in the top and see if they light up.  It is helpful to use several lights in each piece of food.  They only light if place in the right direction, and you can't tell by looking at them which way that is, so increasing the number of lights increases your chances that one is correct.  Then you can turn the unlit one around.

In the DVD, Asa demonstrates a current flowing through a pickle, a candy bar, and a glob of mayonnaise.  I told the students to bring a food item to class and we ended up with: a russet potato, a sweet potato, a yellow onion, a Twinkie, an apple, some string cheese, and a slice of French bread.  Before each student took his or her turn, we'd vote on what we thought the outcome would be.


There was a cheer from the crowd every time the LED's lit up.  I was surprised with our results.  Which  ones do you think worked?  Well I'm not going to tell you.  You need to try it yourself!

Friday, October 19, 2012

Science Co-op Week #6

Yesterday's topic was Energy--kid's have it in bucketloads, this mom could use a little more.  Just kidding!  Our Science of Disney's Imagineering DVD covered  potential, kinetic mechanical, and renewable forms of energy as well as the Law of Conservation of Energy.  

I've discovered our 20 minutes doesn't allow for intricate experiments so we didn't try building a Newton's Cradle   Instead I pulled out one of Schnickelfritz's favorite toys.  When he told us his life's ambition was to build roller coasters we bought him a Skyrail Coaster set by Quercetti.


I divided the class into teams and gave each a looping section of track and their choice of ball--I had a steel ball bearing, a glass marble, a plastic marble, a small rubber ball, etc.  Each team needed to build a "lift hill" for their coaster that built enough potential energy for their marble to stay on the track through the loop.  Would the mass of the ball  make a difference in the length and height needed?  We didn't detect much difference but then our tracks were in set lengths at we couldn't add it incrementally. After each group built their own, we started combining loops.  The boys had to stand on chairs and hold the track near the ceiling to get a marble to conquer three loops in a row. 


The experiment was a success. For once, I had to force the kids to stop experimenting and move on to their next classes.  Incidentally, the building manual that comes with the set has several pages of scientific principles in the back and shows you how to construct samples showing momentum, centripetal force, etc.

Friday, October 12, 2012

Science Co-op Week 5

We've reached the half-way point in our science co-op now.  I've only lost one student who decided to switch to animal science.  This week I started the class by telling the kids if they want to impress people, tell them that today we studied trobology.  Know what that is?  The science of friction (another Disney Imagineering DVD I need to reviewin detail).   The Try It Yourself experiment dealt with making musical (I use that term loosely) instruments by rubbing strings.  I decided to find my own experiment,  one more practical.  And this time after I explained the procedure I was able to take some pictures!

We linked the concept of friction to traction on the road.  In this case our roads were two foot long lengths of 2 x 4's and our vehicles were plastic containers weighted down with sugar.  Our control piece was the plain board, a second board was coated with oil -- I likened it to the oil slicks raised when it begins to rain.  The final board was coated with ice to simulate winter driving.  I found the best way to prepare the board was to lay it flat in the freezer the day before and mist it with a spray bottle several times a day.


The kids placed their "vehicles" at one end of the board and slowly began lifting them.  They stopped as soon as the containers started slipping and measured the height of the board and the angle of the slope.   


I have to say I was surprised at the results (I was a bad teacher and didn't follow my own advice to always try the experiment before doing it with the kids).  The icy board did have the least friction, but the oil-coated board actually required greater height and slope than the plain wood.  In retrospect, I wonder if the rain actually lifts the oil off the road surface and perhaps I should have wet the board down before (or after) applying the oil.  If anyone tries this experiment, please let me know how this turns out.


Friday, October 5, 2012

Science Co-Op Week #4

This week was Levers & Pulleys in co-op class.  We always start class by watching the appropriate Science of Imagineering DVD only this week I couldn't get the dad-danged player to work.  I sent one of the other moms to find the minister's son, our resident A/V tech.  I was having to improvise and I'm not nearly as entertaining as Imagineer Asa.   Luckily, I had a demonstration on how pulleys make our work easier.  I had the two largest boys in class stand on either side of me, each holding one of Schnickelfritz's karate sticks and tried to pull them towards me.  I didn't make them budge.  Then I brought up the smallest girl in class.  We tied a laundry line to one stick and wound it back and forth between the two sticks.  The picture below gives you an idea--I couldn't take a photo while I was running the class...


If you try this yourself, use lots of rope and have the kids stand 3-4 feet apart.  That way they can be pulled towards each other without the risk of fingers getting smashed by the sticks.  Also, be sure the two helpers hold the sticks at the top and bottom with the ropes in between.  I didn't notice one boy had both his hands at the bottom and the first time the girl pulled, the ropes just slid off the top.

Thank goodness, after this the minister's son was able to hook up a new DVD player and we proceeded with the video.  (I just realized, I've never done a review of the Levers & Pulleys DVD so I'll have to share that with you later).

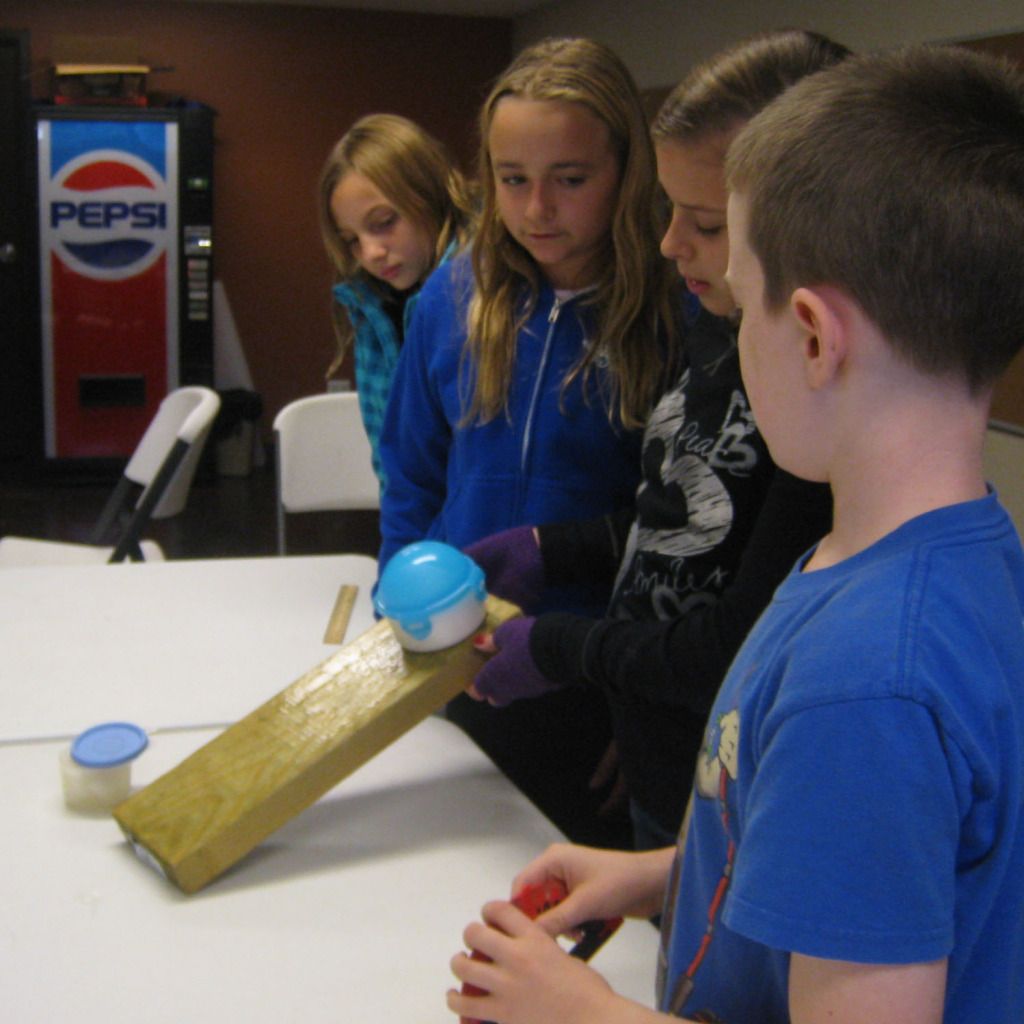
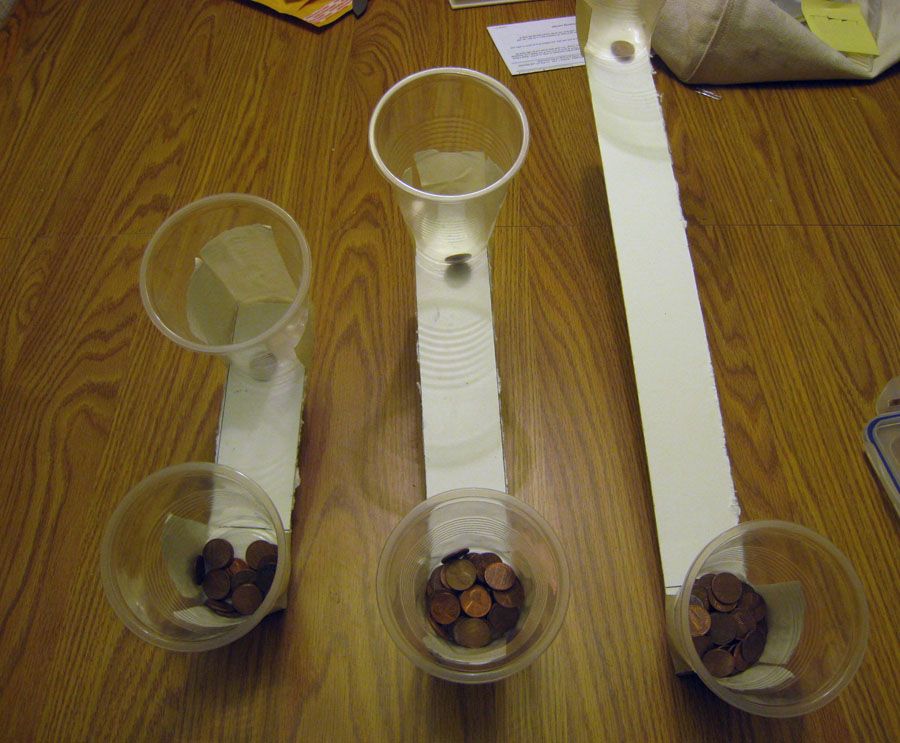
Our hands on experiment involved our other simple tool--levers.  I found it on a Cyberchase website and altered it slightly to suit our tight schedule.  Rather than give each group three different length levers I divided the class into three groups and gave each a lever of differing lengths.  The lever itself is made of foam board balanced on a dismantled binder clip.  The instructions call for Dixie cups, but I used the same cups as our fluids experiment and they worked fine.

To my mind this experiment worked backwards.  Rather than having a set load and seeing how longer levers made it easier to lift, the experiment used a set effort and saw how changing lengths allowed us to lift heavier loads..  We placed one penny in the effort end cup (which was placed in a down position).  Then the teams added one penny at a time into the load end until the seesaw shifted and lifted the effort end off the ground.

 Here's a better angle to see that the longer the lever the more pennies it took for the seesaw to shift.


If you try this, make sure the kids place the fulcrum under the line and have them recheck it throughout.  Sometimes it would shift to under the load cup and then nothing would make it shift.  (I couldn't find a way to attach the fulcrum to the board without interfering with the mobility).

Friday, September 28, 2012

Science Co-op Week #3

Our video this week dealt with Gravity and as I mentioned in my post about the Science of Disney Imagineering  DVD, the experiment on the disk was a little too ambitious.  There was no way we could build a hovercraft in  twenty minutes.  I chose to focus on some center of gravity experiments instead.

  1. The students lined up against the wall with their feet and backs touching the wall surface.  I placed a rock at their feet and asked them to pick it up.  No one could.  In order for us to keep our balance, we must keep our center of gravity over our feet.  When we bend over, we stick our tushes backwards to compensate but that's not possible when you're next to a wall.  As each kid bent forward they stumbled.
  2. This time the kids turned sideways to the wall, with a shoulder and one foot pressed against it.  The test was to see if anyone could lift the foot away from the wall off the ground.  Because no one could lean to the opposite side to keep the center of gravity over the planted foot no one was able to do so.
  3. I had the kids sit in a chair with its back pushed up to the wall.  A partner stood in front of the chair and was supposed to push 1 finger against the forehead of the sitter, preventing him from leaning forward.  In theory, the sitter shouldn't have been able to stand because his center of gravity was over his seat, not his feet.  The kids were either unwilling or unable to apply enough pushing force to the forehead (perhaps I should have had them use the palms of their hands) and so the sitters were able to lean forward enough to eventually stand up.
  4. I turned the chairs sideways against the wall.  A child would lean over the chair with their heads against the wall, lift the chair, and the try to stand up.   This task should be easier for girls, who carry their center of gravity lower than the boys.  Most boys in my class haven't develops big chests and upper bodies so the difference wasn't that extreme.  Then I had the kids wear a back pack and repeat the process.  This time the girls really struggled but the boys could do it easily.

Friday, September 21, 2012

Science Co-op Week 2


Our topic for the week was Fluids.  I had planned to do a demonstration on how siphons works for our hands-on time.  I got the idea from Discovery Book Volume 1 for the Teaching Tank.  If you've never seen these--they are a plexiglass container about 1 foot square.  The normal kit makes the container about 1/2 an inch wide, but you can buy an expansion kit that increases the width to 3 inches.  You can see both versions on the book cover.


I think this is a great tool for co-op because it's size can be seen in a large room.  I've purchase three of them as a find them at curriculum swaps because a lot of experiments use more than one--like the siphons.


I share all this with you because I wanted you to know about the tank--I think it's a good investment that we can use throughout Schnickelfritz's  education, but in the end I couldn't get the experiment to work when I tried it before class.  The tubes need to be full of water when they're submersed in the tanks.  I could hold my thumb over one end while I inserted the other, but because I couldn't fit my hand in the tank for the second end I had to move my thumb and the water immediately drained out.  In hindsight, perhaps I should have used the expansion kit for the middle tank so I could remove my thunb under the water.

Instead, we did an experiment that's one the Science of Disney Imagineering DVD.  Asa uses a glass jar filled with water and covers it with a Chinet plate before inverting it.  The water stays in the glass even though it's upside down.  My last minute search for supplies yielded plastic cups and plates.  Here's what we learned--the plastic plates had a little give to them so if we filled the cups to the brim the weight (as the video suggests) the weight of the water would distend the plate and the water could escape.  We were able to acheive the effect if we filled the cups 1/4 to 1/2 full, but it still took some care when inverting.  You also needed to be careful holding the cup because if you squeezed it the pressure would force the water out.  If it hadn't been a last minute substitution, I would have purchased rigid cups and plates. See the importance of trying experiments before doing them with the kids? 


Friday, September 14, 2012

Science Co-op Week 1

We survived our first week of co-op classes,  and I mean that literally.  In order to create more "classrooms" the church erected some dividers in the fellowship hall.  While we were trying to read Little House in the Big Woods on one side, a group of younger students were singing a song to learn the continents on the other.  Apparently they were pointing on a map at the same time and some one's point turned into a push and two sections of the dividers came crashing down on our kids.  One girl had a busted lip and hurt her back, but the rest were mostly scared and not injured.

I asked one of the older boys to help me get my Science of Disney Imagineering DVD ready for viewing after lunch.  They just installed a flat screen TV and apparently no one was exactly sure how to work it.  In five minutes I had all the boys over 12 checking connections and pushing buttons--on the TV, on the DVD player, on the remote.  We finally had a black and white image on the screen but it was blown up so large it couldn't all fit on the screen.  I was doing some serious praying because half my class was going to be watching the video.  Someone finally had the idea to switch some wires and then it worked fine.

We started with Trajectory.  We did not use the Try It Yourself project from the DVD--as fun as it would have been, a 3 man slingshot in a church didn't seem wise.  Instead,  we tested the statement that a 45 degree angle would  launch the projectile the farthest.  We used large hair rubber bands stuck in a notch in the end of a wooden ruler.  The students could pull the rubber band back the same distance every time.  We used protractors to set the angles from 14 to 60 degrees.  I would have tried 75 degrees but we were already hitting the basement's low ceiling.  I had the students put dominoes down to mark where the rubber bands landed--I'd already made labels for the dominoes with the different angles written on them.  I was planning to have the kids measure the distances next, but we'd already run out of time.  Instead we just looked at the pattern of domino markers and we could see the 15 degree launches were the shortest and the 45 degree launches did go the farthest.

Next week: Fluids

Monday, July 9, 2012

Science of Disney Imagineering: Trajectory

We shipped Schnickelfritz of to Camporama yesterday which means its just me and the dog at home (until Toolman and I go to join him on Thursday--more about that later).  So what's a mom to do?  Well, I am taking some time to scrapbook, but I'm also entering next year's school work into Edu-Track.  A new challenge this year will be teaching a hands-on science class at our co-op.  I've decided to use the Science of Disney Imagineering DVDs to introduce each subject and we'll either do the Try It Yourself experiments or something else that fits the topic (we're not going to build that hovercraft from the Gravity DVD).   Now's as good a time as any for me to finish up my summaries from this great series.  So today we'll look at Trajectory (I think this is Fritz's favorite).


Asa's Invention:    In order to feed guests quickly Asa builds the Churro-Matic 3000 to launch deep fried treats into the guests waiting hands.  I think this is why my son loves this video.  While trying to perfect the speed and angle of launch Asa sends churros into a co-worker's bowl of soup, takes out a model coaster, and impales a computer monitor--nothing captures a boy's fancy more than comedic destruction.

Defined Terms:   Trajectory, Gravity, Projectile, Parabola, Zero G's

Disney Rides and Attractions that exemplify the theme:


Lights, Motors, Action! Extreme Stunt show:  It turns out it takes more than just horsepower and guts to perform the crazy car jumps that entertain guests.  To do the same trick over and over day after day someone had to perform some pretty precise calculations with car speed, launch angles, etc.  Asa suggests a new stunt with a bicycle and garbage truck launching at the same time off of the same ramp.  In theory, with no wind resistance, the two vehicles would follow the same path--although the stunt coordinator said he wouldn't want to be the guy on the bike.


Toy Story Midway Mania:  Since the interactive element of this ride takes place in the virtual world, we are dealing with perfect trajectory with only gravity to consider.  Each time the ride stops for shooting, computers are determining the up & down, and left to right angles of the pull string cannons.


Disney's Fireworks shows:  We often walk away remembering the beauty of the display and how well it flowed with the music.  Did you ever stop to consider just how someone gets all those explosions to occur at the right time and position in the sky?  They know the mass of each firework and the launch angle of each tube.  A computer controls compressed air to adjust the speed at which each projectile is launched and the laws of physics take over from there.

Leapfrog Fountains at the Imagination Pavilion:  I could spend hours watching these jets of water hop from pad to pad (sometimes right over my head).  Water is normally a very turbulent fluid, so to pull this trick off special flow heads had to be installed to "calm" the water down do that it will follow the parabolic path when squirted out.


California Screamin'  The roller coaster train isn't a projectile because it has to follow the path of the tracks, but trajectory does play a part in coaster design.  When the tracks pull the cars down down at a faster rate than it would normally follow from gravity alone the rider is rewarded with that weightless feeling.

Try It Yourself   Asa and some friends build a three-man sling shot.  (We won't be doing this for my co-op class since we inside a church--but it could be a lot of fun!)


If you'd like to learn about the other titles in the Science of Imagineering series click here.
Related Posts Plugin for WordPress, Blogger...