I’d like to start this post by thanking Amy Pak (from Home School in the Woods) for giving me permission to use her products during this tutorial. We’ve been using her Time Travelers series as part of our history study this year. As much as we love the reading, lapbooks, timelines, etc. there is one area my son finds less than appealing—coloring in all the hand drawn images. Of course you aren’t required to color anything, but it does make everything more appealing to the eye. So we’ve been importing images into Photoshop Elements and colorizing them there. Then, we’re not only studying history but getting some computer graphics skills as well. Let’s start with a big project—the Battle Blitz game from The American Revolution Time Traveler. The folder game is made up of two PDF files (one for each side of the folder game).
After putting the CD-ROM in my computer, I select File>Open and browse to my disk drive. The file folder I want it PDFs/Lesson-Masters/M-19-1-BattleBlitz-1 . You can see a thumbnail preview at the bottom.
The Time Travelers files are arranged with one page per PDF file, but Photoshop Elements can pull one page or several from a file so we have to go through another pop up window. There’s only one page to select here, but you can see a sample of a multi-page file in my Lapbooking tutorial from last year.
We finally have the page loaded in our work area. You can see a portion of the page has a gray/white checkerboard pattern which only means it’s transparent on screen. It’s a little distracting visually (especially when we start working up close) so I’m going to pull the whole image onto a new file with a white background. Important Note: Be sure and immediately Save your file with a NEW NAME (Save As) so you don’t lose your original image.
The easiest way to change colors is with the Paint Bucket Tool (it really looks like a tipping paint bucket spilling blue paint). After clicking the tool, the curser also changes to a paint bucket (but black and white). The key is the very tip of the spilling paint of the curser. Whatever color it rests on when I left click the mouse will be turned to the selected foreground color. And all the contiguous pixels of the same color will also be changed. It’s probably easier to demonstrate by changing the word “Blitz” from black to red.

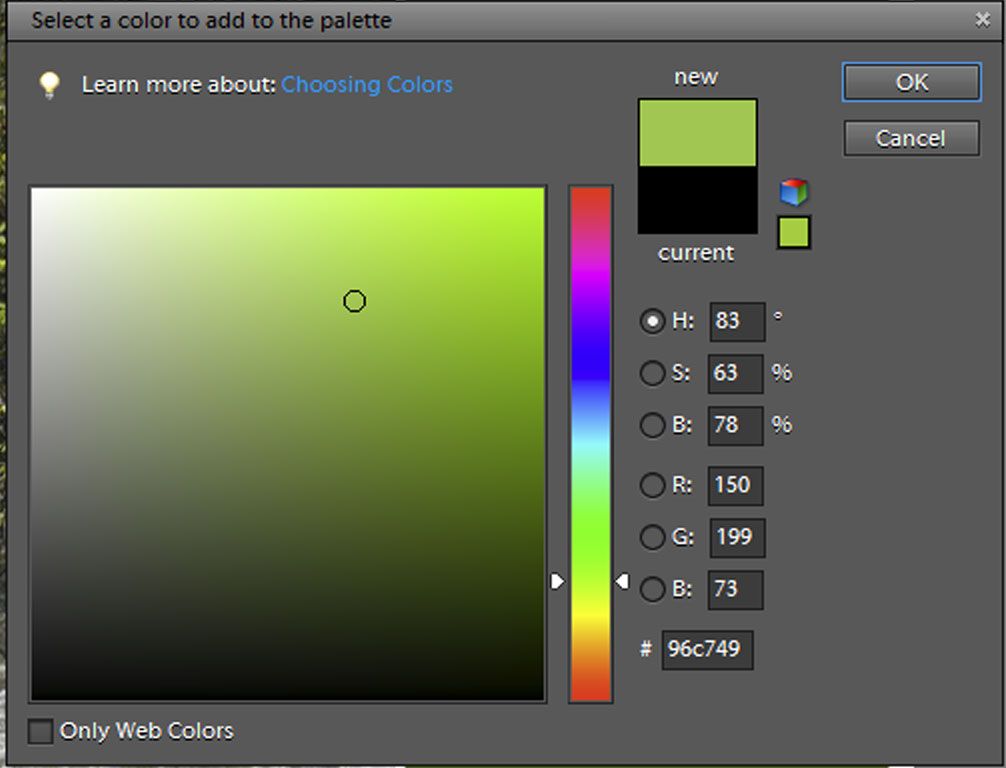
First I’ll change the foreground color…In the lower left corner you’ll see two overlapping squares (in the picture above one is green and one white). If you click your mouse in the square a window will pop up and you can pick any new color. First click on the general color in the rainbow column and then pick somewhere in the large square for something specific. In this case I want to make the word Blitz bright red.
With my red color in the foreground and the Paint Bucket Tool selected, all I have to do is click the mouse when the tip of the spilling paint is on the object I want to recolor. Below the letter B has turned red, but the other letters, while the same color, are not touching the B so they remain black. I’ll have to click on each letter (or part of a letter like the dot of the “I”).

After coloring in the title, I’m going to work on the water portions of the map with a nice light blue. You’ll notice that as long as the wave lines don’t form an entire loop, the water color will fill the lakes to their edges. We can run into a problem though if the area isn’t enclosed—look at the lakes around the Battle Blitz logo. The edges near the box aren’t enclosed. When we click to change the white to blue, that blue color will be carried to any contiguous white pixel and we’ll end up with the whole map colored blue (see below).

When this happens, the first step is to choose Edit>Undo. Then we need to draw lines to enclose the areas we want to color. I switch to the brush tool and select a small pixel size (2-3 works fine), and draw a small line to connect the edges of the lake –I can keep the same color I’ve chosen for the water.

I’ve got to do that with each water area. Sometimes you’ll need to really zoom in to 200 or 300 % so you can look for the gaps. For example, when coloring in the ocean of this map I had gaps where the labels for New Jersey and Delaware crossed the shoreline. With a little patience, I got the map colored (and the green arrow at the start). Then I turned my attention to the flags around the border.

Notice how we run into the problem with the color bleeding into areas where we don’t want it again, in this case the stars in our field of blue. These flags will be so small when printed, I don’t worry about drawing lines to enclose shapes. I just switch the foreground color to white and use the brush tool to click where the stars should be in the pattern.

Now no one, least of all my son has the patience to color in all the flags around the page. We’ve only got to do each once and then we can copy and paste for the other images. I use the Rectangular Marquee tool (the dashed line box under the eye dropper) and click and drag over the flag and banner. Then I choose Layer>New>Layer Via Copy. With my new flag layer I need to erase the area where the battle and date are listed. I do this with the Eraser Tool (it looks like a pink eraser). I’ve hidden the white background in the image below so you can see the areas are transparent – the names of the other battles will show through.

Then I copy this layer over and over (Layer>New>Layer Via Copy) as needed, moving it to the correct squares and rotating the image to match the layout. I went over the process to rotate and flip layers in last year’s post on Lapbooking. When placing the new layer over the old one, it’s often helpful to temporarily reduce the opacity so you can really align your images. If you look to the layer section of the screen, you can see a place to adjust the opacity (normally 100%). After aligning the images, return the opacity to 100%).

Yes, this is some work, but I count this time as computer skills/graphic arts on my son’s transcript—that’s a marketable skill in the business world. Here’s our finished game board.

Tomorrow, we conclude our 5 Days of Photoshop for Homeschool with another, more subtle coloring technique so be sure and stop back. In the meantime, check out some of my Crew mates 5 Days of … posts or click on the graphic to see all the participating blogs.
Beth @ Acorn Hill Academy ~ Nature Study
Aurie @ Our Good Life ~ Photography Tips and Tricks
Dinah @ The Traveling Classroom ~ Tips for Learning a Second Language
Julie @ Nurturing Learning ~ Art Resources
Tara @ This Sweet Life ~ Preparing for a New School Year
Sara @ Embracing Destiny ~ Purposeful Living
Rebekah @ There Will Be a $5 Charge for Whining ~ Culinary Adventures for Boys
Hillary @ Our Homeschool Studio ~ Fitting in the Extras


No comments:
Post a Comment