Showing posts with label Digital Scrapbooking. Show all posts

Wednesday, April 9, 2014

Photoshop Elements and the Daily Bugle

Note: If your just joining the five day series, you need to go back and read Day One and Day Two because we’ll be using the techniques we learned then today.  Also, thank you to Amy Pay of Home School in the Woods for her permission to showcase projects from The American Revolution Time Travelers CD.


This year we’ve been using several of the Time Travelers CD’s  as part of our history study.  One of the review tools created by Amy Pak is a newspaper of sorts.  The master PDF pages are to be printed out and assembled for the student to write on and illustrate.  Unfortunately for me, my son dislikes drawing and hates writing even more.  So I set about to see if we could add type and images to the PDF files with our Photoshop Elements---and it worked!  We have our newspaper for review of history facts for now and my son is picking up some practical (and marketable) computer skills in the bargain.  So let me show you how it’s done….
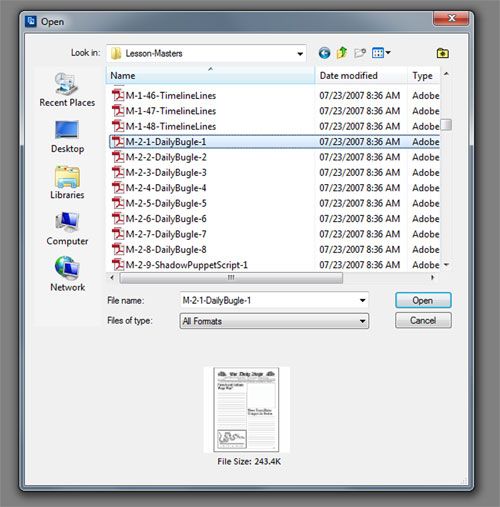


After putting the CD-ROM in my computer, I select File>Open and browse to my disk drive. The file folder I want it PDFs/Lesson-Masters/M-2-1-DailyBugle-1 . You can see a thumbnail preview at the bottom.
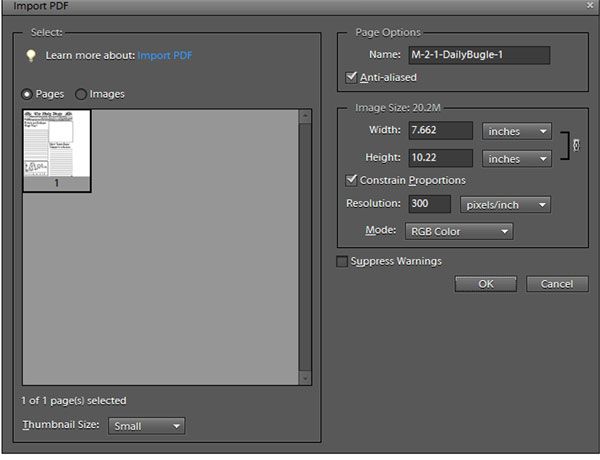


The Time Travelers files are arranged with one page per PDF file, but Photoshop Elements can pull one page or several from a file so we have to go through another pop up window. There’s only one page to select here, but you can see a sample of a multi-page file in my Lapbooking tutorial from last year.


The first page of the Daily Bugle opens in our work area. Important Note: Be sure and immediately Save your file with a NEW NAME (Save As) so you don’t lose your original image. Now if you’re like me, you’ll find that checkerboard background distracting.  All that means is that the background is transparent (in other words nothing will print there, leaving the paper blank).  Too make it easier on the eyes I’m going to use the paint bucket tool to “pour” white color over the background.  We’ll cover this feature more in tomorrow’s post on coloring PDF’s.  This won’t effect our printed paper at all—just save us some eye strain.
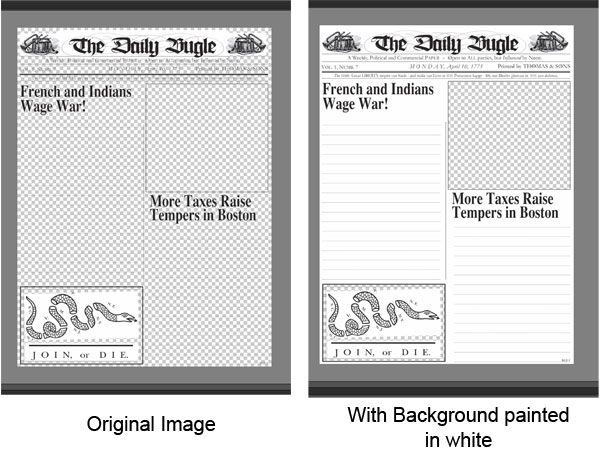
First let’s add a picture to that transparent box left on the right side of the page.   I found an image of the Boston Tea Party, but let’s define the space where it’s going to go using the Rectangle Tool (see Day One’s post if you need to review the procedure).
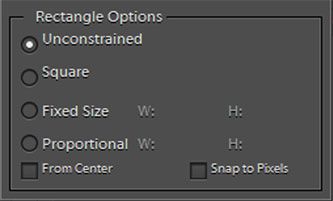
 

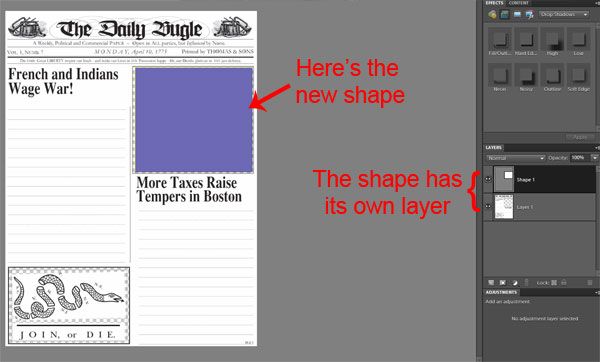
Rather than set a fixed size (since I don’t know it), I’m going to select the Unconstrained option and hold and drag my mouse over the area.  The shape will automatically be placed on its own layer above the background.


Then I will open my saved Boston Tea Party image, drag it up into the work area and use the Move Tool to position it over my blue shape.
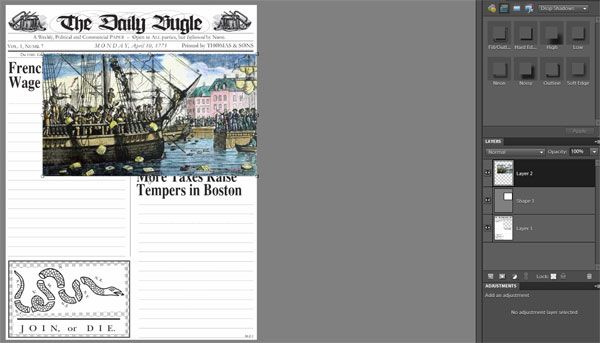
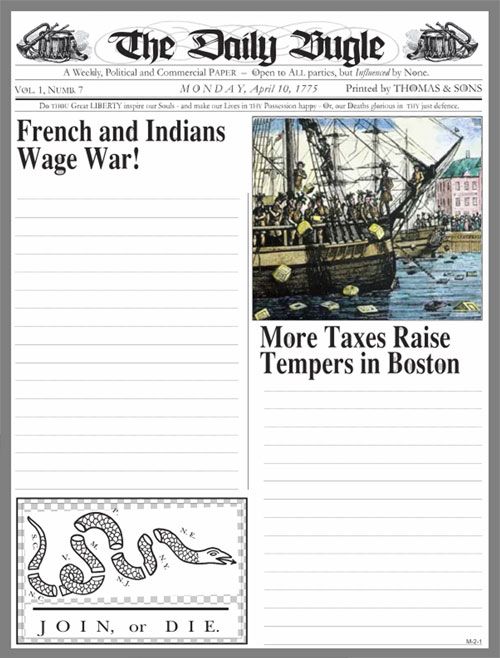


The landscape image is too big for my space.  After I using the clipping mask (see Day Two) I can resize and nudge the image around and focus on the tea being dumped from the ship.


Now it’s time to work on the text.  We’ll put another rectangle shape over the lined area meant for writing – this time I’ll make it white.  Because this is going to be a considerable amount of writing—more so than the sentence we used on Day Two’s flash cards, I would have my son type his story into a Word document first.  That way we can use spell-check, etc.  I’ll just show you how to import the text.

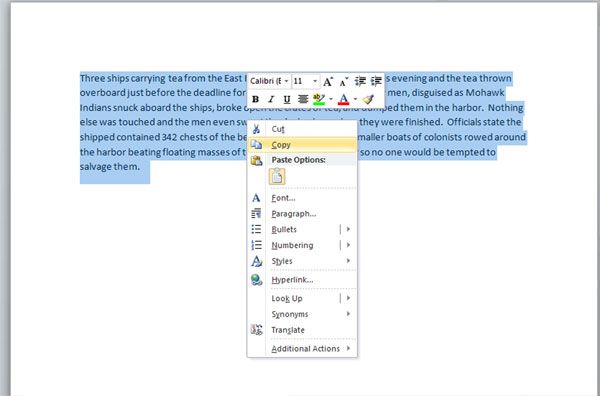
First I highlight the paragraph written in Word , right click on it and choose Copy.
In Photoshop Elements, I’m going to select the Type Tool (the big T) and choose the font, size, color and alignment I want (this is covered in more detail in last year’s Day 3 post).  I’m going to select a small font size to start because I can always make it larger.  Then  I  click the mouse near the top of the white rectangle shape.  You should see a vertical black line blinking (I can’t use screen capture to show you because the cursor always disappears).  Then I right click the mouse and choose Paste.  The text will appear and wrap itself in the defined shape.
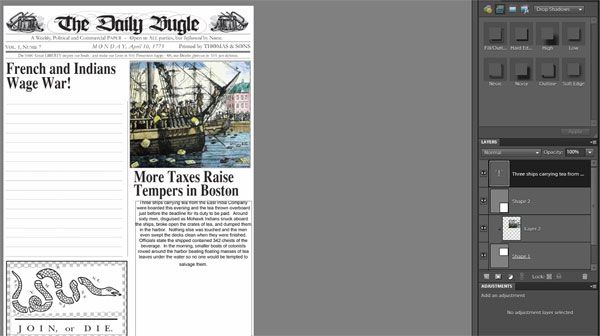
You can see I’ve got plenty of white space left so I’ll enlarge the font. With the Type Tool still selected I’ll click anywhere over the text –this will keep me in the same text layer instead of starting a new one.  Then I can click and hold the mouse and drag it over the entire paragraph to highlight it (It will now appear white on a black background).
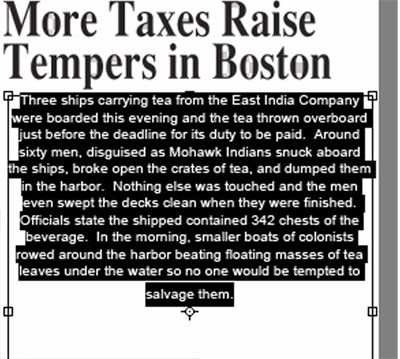


With the text highlighted, I can go to the top of the screen and click on the down arrow next to the font size.  I’ll keep selecting the next larger size until I find one that fills my space.  When there start to be bigger gaps between predetermined sizes (say a jump from 48 to 60 pts) you may prefer to type in a number.


Just repeat these steps to fill in the other side of the page and you’ll end up with something like this.
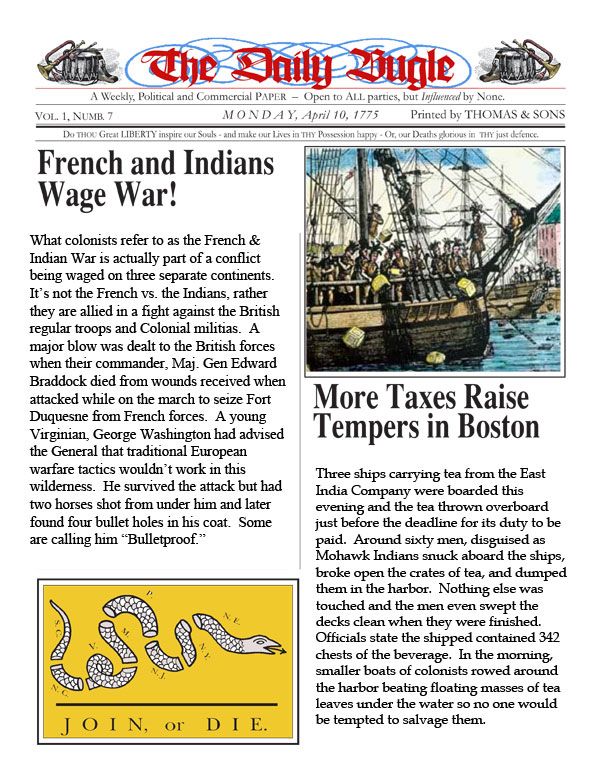
Like it?  Did you notice the title and the flag had been colored in?  We’ll be learning how to color in PDF files tomorrow so come back.

In the meantime, check out some of my Crew mates 5 Days of … posts or click on the graphic to see all the participating blogs.

Beth @ Acorn Hill Academy ~ Nature Study
Aurie @
Our Good Life ~ Photography Tips and Tricks
Dinah @
The Traveling Classroom ~ Tips for Learning a Second Language
Julie @
Nurturing Learning ~ Art Resources
Tara @
This Sweet Life ~ Preparing for a New School Year
Sara @
Embracing Destiny ~ Purposeful Living
Rebekah @
There Will Be a $5 Charge for Whining ~ Culinary Adventures for Boys
Hillary @
Our Homeschool Studio ~ Fitting in the Extras

April Blog Hop


Tuesday, April 8, 2014

Photoshop Elements for Flashcards Pt. 2


Yesterday we worked on building a template for creating our own flashcards.  Today we get to move on to the fun stuff—adding pictures and facts to remember.  Incidentally, these are one sided flashcards that work in pairs (1 picture/1 fact).  I use them for matching up exercises or playing the Memory game.  These aren’t like math flashcards where the student sees the problem on one side and the parent sees the answer on the other. 

I’ve been making American Revolution flashcards so I just Google the name of the individual and “portrait” to get started. When I find an image I like I click on it to bring up a larger preview and the click on “View Image” to bring up the picture in a blank window.


When you Right-Click the image in the new window you’ll have the option to Save Picture As… I’ve got a folder saved on my computer full of Revolutionary war figures so I’ll save the image there. When I’ve got 9 of them I can complete a page of flashcards.


I go into Photoshop Elements Edit and open my flashcard template and nine images. You can see them all at the bottom in the project bin. If you can’t see all your open pictures you may need to use the slide to the right of the project bin to scroll down.  First I double click on the template to bring it up into the work area and I select the Move Tool from the top left side of the screen.  IMPORTANT NOTE:  Before you change anything, use File>Save As and save this template under a new name (Say Revolutionary portraits page 1).  That way you are not making changes to your original multi-layer template.

I click on the tan rectangle in the upper left corner –you’ll see a thin line around the shape and Shape 1 will be highlighted in the Layer box to the right.  Now I’m go to click on one of the portraits for the project bin and hold the mouse button down to drag the image up to the work area.

Whoops, what happened?  You can’t see the image can you?  That has to do with the order that we built the rectangular shapes.  Each new shape is placed on a layer above the previous one so while we dragged our image above Shape 1 it’s place below Shape 5 (the middle).  The image is there, you can see the outline of it.  Since all objects dragged up are going to be placed dead center, let’s do something about this right now. 

Find the layer named Shape 5 in the Layer section. Click and hold the left mouse button.  You should notice the cursor changing from a pointing finger to a clenched fist.  Now you can pull the layer down the screen which will in turn move it closer to the background of our multi-layer template.  I put my Shape 5 right above the background layer.  As you drag the Shape 5 layer down you should notice the portrait should be revealed.  Now we can use the move tool to drag the portrait over the rectangle in the upper left corner.


None of the images I’ve chosen are exactly the same size as the tan rectangle I’ve created.  That’s okay because I plan to use the shape as a clipping mask (See last year’s Day 2 tutorial for more details).  For now all I need to do is click and drag the corner square of the portrait to make the image bigger than the tan rectangle.  Then I hold the Ctrl key and tap G.


All at once the portrait is confined to the size of the tan rectangle and the portrait layer appears indented above the Shape 1 layer.  I can still move and resize the portrait layer to tweak what appears in the space.  This may be more evident when I work on the landscape image of Ethan Allen.

You can see the picture is far too wide.  After applying the clipping mask the image looks like this…

I can still move the image around so that Ethan is in the center of the frame (look at my finished work).


If you read my post about making explorer flash cards you’ll recall I wish I had added the names to the pictures—after all I wasn’t trying to have my son be able to pick Abigail Adams out of a line up.  I’ve added text to each portrait to include their name and even found a .psd file of John Hancock’s famous signature.

  Now let’s briefly talk about the corresponding flashcards that will be filled with facts of these great Americans.  We need to start with the blank template file (I hope you took my advice and saved your portrait project under a new name and you still have a blank template to go back to). First we’ll need the  Type Tool (for more detail on changing fonts, color, and size read last year’s Day 3 tutorial).


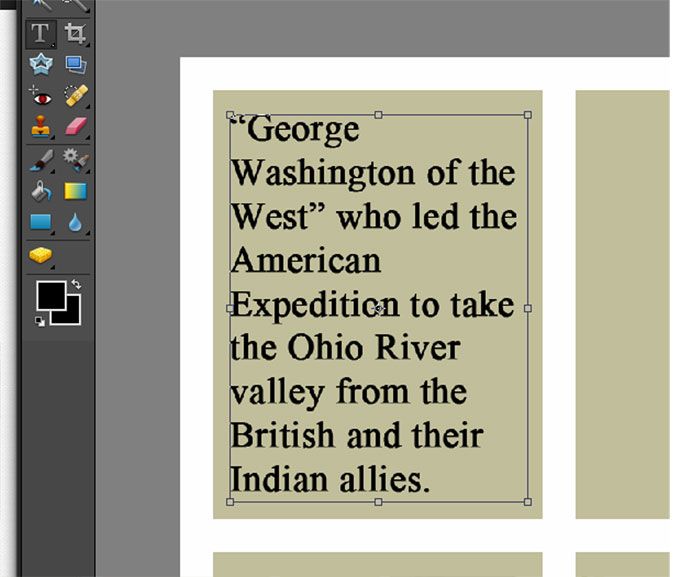
Defined Type area Text “wraps around” as I type

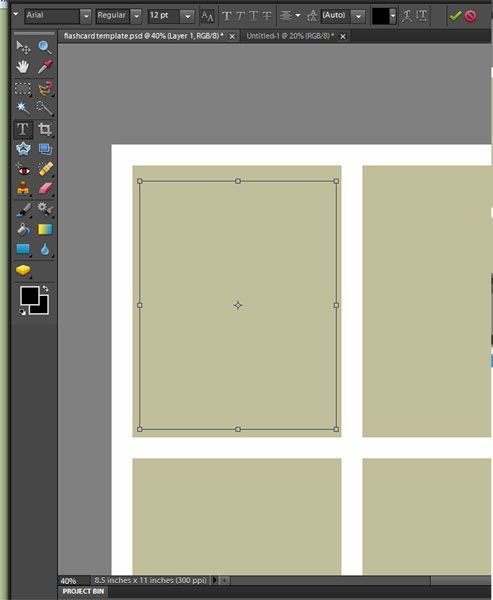
I Click and hold the left mouse key and drag the cursor to create a box just inside the borders of the first rectangle—this will define my text area.  The text will “wrap around” when I reach the edge, just like I was using a word processor.  Be aware that this is NOT a word processor and won’t alert you to any misspelled words, etc.


If you’re going to print on colored cardstock, you don’t need the tan background.  I used the paint bucket tool (refer to Day 1) to change everything back to white—just make sure you’re on the shape layer not the text layer.  Then to see the outline of the card I switch to the Move Tool and right-click on each shape and chose Edit Layer Style from the pop up menu.


In the new window, put a checkmark in the box that says “stroke.”  You can change the thickness and color of the lines to suit your tastes.


I hope you now feel comfortable with making template shapes, inserting pictures and text boxes because we’ll be doing all three tomorrow when we publish our own newspaper!  In the meantime, check out some of my Crew mates 5 Days of … posts or click on the graphic to see all the participating blogs.

Beth @ Acorn Hill Academy ~ Nature Study
Aurie @
Our Good Life ~ Photography Tips and Tricks
Dinah @
The Traveling Classroom ~ Tips for Learning a Second Language
Julie @
Nurturing Learning ~ Art Resources
Tara @
This Sweet Life ~ Preparing for a New School Year
Sara @
Embracing Destiny ~ Purposeful Living
Rebekah @
There Will Be a $5 Charge for Whining ~ Culinary Adventures for Boys
Hillary @ Our Homeschool Studio ~ Fitting in the Extras
April Blog Hop


Monday, April 7, 2014

Photoshop Elements for Flashcards pt. 1

Last August we spent five days introducing you to the idea of using Photoshop Elements in your homeschool. If you missed any of those topics, here they are:

Quick Pages for Journaling/Notebooking

Multi-Layered Templates for Recordkeeping

The Type Tool for Flashcards and Labels

PDF Templates for Lapbooking

Extracting Images for Posters

BONUS Tutorial: Making shape books

Now I’m back with some more PSE projects –this time things I’m using for our study of the American Revolution. So let’s jump right back in….

Sometimes I feel like I’ve turned into a flashcard queen, but it’s been so easy to use them in reviewing games for our history.  We’ve covered explorers, colonies, and now figures of the Revolutionary Way.  Today I’m going to show you how to make a multi-layer template so you can easily plug in your own text and/or photos and make flashcards.  Don’t let the lingo scare you…it’s really easy.

We’ll start with a new blank file (need to review how?add-grid-lines Check out Day One of last year’s 5 Days of Photoshop Elements).  This time we’ll do an added step and turn on the grid lines to help us align our boxes.   Click on View>Grid and the default grid is displayed with gray dotted lines every 1/4 inch and solid black lines every inch.  If you don’t like these colors or you wish to change to metric measurements (or even pixels), you can click Edit>Preferences>Guides & Grid.  I’ll be sticking with the defaults.

Because we use flashcards for Go Fish or Memory type games, I prefer to make ours roughly the size of baseball cards (don’t know if my non-American reader’s have any comparable trading cards to relate to?).  I can fit nine on a page and still be able to cut them out and stick them in a standard size laminating pouch.  I cut them first and then laminate (if you laminate the entire page first and then cut, the edges aren’t sealed and begin to separate with use).

The first tool I’ll be using is the Rectangle Tool to make specified size boxes.  It will be easier to view on the computer screen (certainly easier for this tutorial) if the boxes aren’t white like the background.  If you haven’t changed your default foreground color, they’ll be black.  I’ve changed mine to a nice tan.  The rectangle Tool is one of six shape tools that are toggled from the same spot in the tool bar (third spot up from the color selector).  It should be the default tool, but if you see something else right click in the corner and choose the top tool.

select-rectangle-tool

The mouse will change from an arrow to a cross shape and I could start drawing with the grid lines as my guides, but I prefer the precision of designating the size of my box.  In the top left corner of the screen you should now see the blue rectangle shape repeated next to a white down arrow.  Clicking on that arrow opens a new window.

set-rectangle-size


Set the fixed size of your box to 2.5 inches wide by 3.25 inches high.  (Note: you have a second opportunity to change the color of your boxes here). 


place-first-block


Click your mouse close to the intersection 1/4 inch from the top and from the left edge.  The box should appear and snap into the grid lines. (If it doesn’t you can switch to the Move tool and nudge the box until it does snap in place). 


3-blocks-across


Now move over 1/4 inch from the last box and click again to make a new box appear.  Repeat to squeeze one more box in the row.


fill-the-page layers-show-location

You’ll move down 1/4 inch and create a second and then a third row.  There should be 1/4 inch separating the boxes and the edges of the page with a slightly larger margin at the bottom.  If you look in the Layers area of the workspace, you’ll see each rectangle shape has been added to its own layer and the thumbnail will show it’s location on the grid.  (For some unknown reason the theme to the Brady Bunch is now rattling around my head).

You can turn off the grid lines and save this as a .PSD file to use for any future flashcard project. You want to keep in in this format with all the layers.  Switching it to .jpg will save file space but will make it a flat image and we won’t be able to manipulate the placeholders for our pictures or text when we add them tomorrow. 

In the meantime, check out some of my Crewmates’ 5 Days of … posts, or click on the graphic to see all the participating blogs.

Beth @ Acorn Hill Academy ~ Nature Study
Aurie @
Our Good Life ~ Photography Tips and Tricks
Dinah @
The Traveling Classroom ~ Tips for Learning a Second Language
Julie @ Nurturing Learning
~ Art Resources
Tara @
This Sweet Life ~ Preparing for a New School Year
Sara @
Embracing Destiny ~ Purposeful Living
Rebekah @
There Will Be a $5 Charge for Whining ~ Culinary Adventures for Boys
Hillary @
Our Homeschool Studio ~ Fitting in the Extras

April Blog Hop

Friday, November 1, 2013

2013 Digital Scrapbooking Day

Heads up and fair warning!  Tomorrow is the first Saturday of November which means two annual events are occurring--my son's birthday party and Digital Scrapbooking Day.  Most of you are probably more interested in the latter.  At Schnickelfritz's party only he gets the gifts but by browsing online anyone can get freebies and sales on the digi-scrap items.  Fortunately for me a lot of websites started their sales today because I won't have time to go near the computer tomorrow.  I just bought the Mad Scientist kit and Quick Page add-on (both half price)  from Scraps n Pieces to record our science projects for the year.


If you check out my Pinterest page (look in the right hand column to subscribe) you can find other great kits under Digital Scrapbooking Science and Digital Scrapbooking History.   If you see something you like I encourage you to get it now.  I just cleaned up my boards to remove some kits that are no longer available--kits are retired, designers leave stores, and stores go out of business.  I'd been waiting to get a Civil War related kit when we study it next year, but the store went out of business and now it's gone.  Great thing about digi-scraps is they only take up space on a disk or hard drive so buy now and save it till you need it.

If you are just looking to scrapbook family memories, I've found two big blog trains that will provide you with mega kits if you visit every stop on the journey.  The DigiScrap Parade is offering an Our Life Kit with a green/blue/tan color palette (this one should be available for some time).  The Scrap Orchard is offering a the Oh Snap kit has a teal/lime green/yellow/orange kit with a photography theme.  It will only be available for free this weekend and some parts are only available if you participate in online events..  I have no affiliation with either site.

I'll also use this time to remind you of some of my previous digital scrapbooking posts in case you need inspiration/information.


5 Days of Photoshop Elements for School

 Day 1:  Notebooking & Journaling
 Day 2:  Record Keeping
 Day 3:  Flashcards & Organizing
 Day 4: Lapbooking
 Day 5: Classroom Posters

Other Digi-Scrapping Posts

Making Shaped Books with PSE


Don't miss a thing! Subscribe to Ozark Ramblings and get my posts in your inbox.

Thursday, August 15, 2013

Making Shaped Books with PSE

Last week we spent five days introducing you to the idea of using Photoshop Elements in your homeschool.  If you missed any of those topics, here they are:

Quick Pages for Journaling/Notebooking

Multi-Layered Templates for Recordkeeping

The Type Tool for Flashcards and Labels

PDF Templates for Lapbooking

Extracting Images for Posters

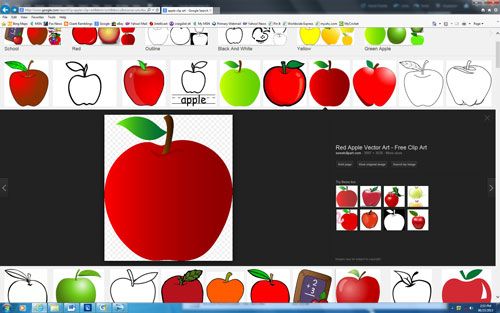
When we last discussed lapbooking, we were relying on someone else to provide us with the shape of the mini-book and just adding our our text and images.  What if you want to make your own mini-book and what if you’re bored with simply squares or rectangles.  Let’s learn how to make a shape book next.  For our example I’m going to make an apple book for Johnny Appleseed.  I start by Googling an apple clip art image.

Here’s a good one and I can tell from the checkerboard pattern that the background is already transparent so I won’t have to extract the image.

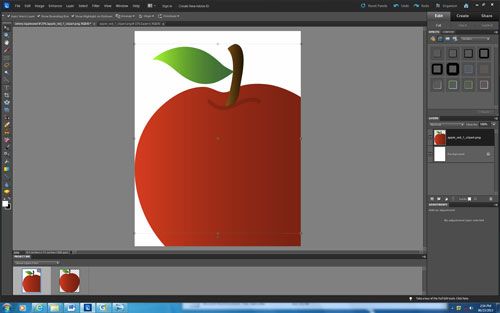
Wow, look how big the apple was when I dragged it onto my 8.5X11 blank file.  I didn’t notice the image size when I was Googling.  I’m working with it anyway because it’s easy to make a large image smaller.  (If you start with an image that’s too small and try to stretch it out, it can look really pixelated).  I resize the apple by dragging on a corner and place it on the right side of my blank background.  Now I’m going to use Photoshop Elements Stroke feature to make the back page of my mini book.

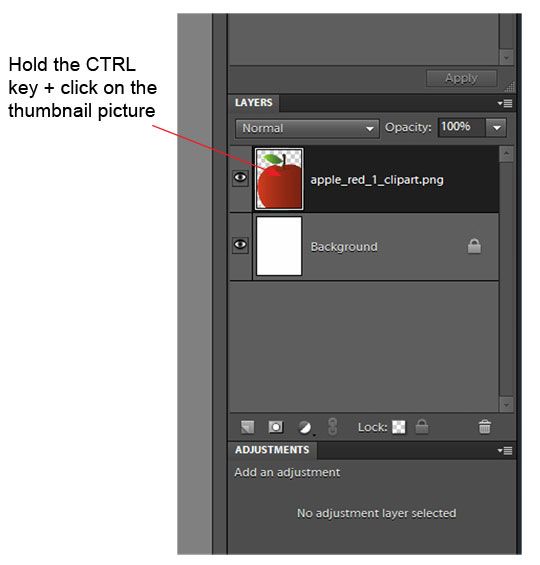
You’ll see “marching ants” around the apple in the work area.

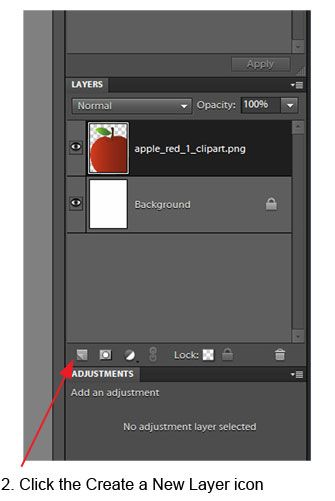
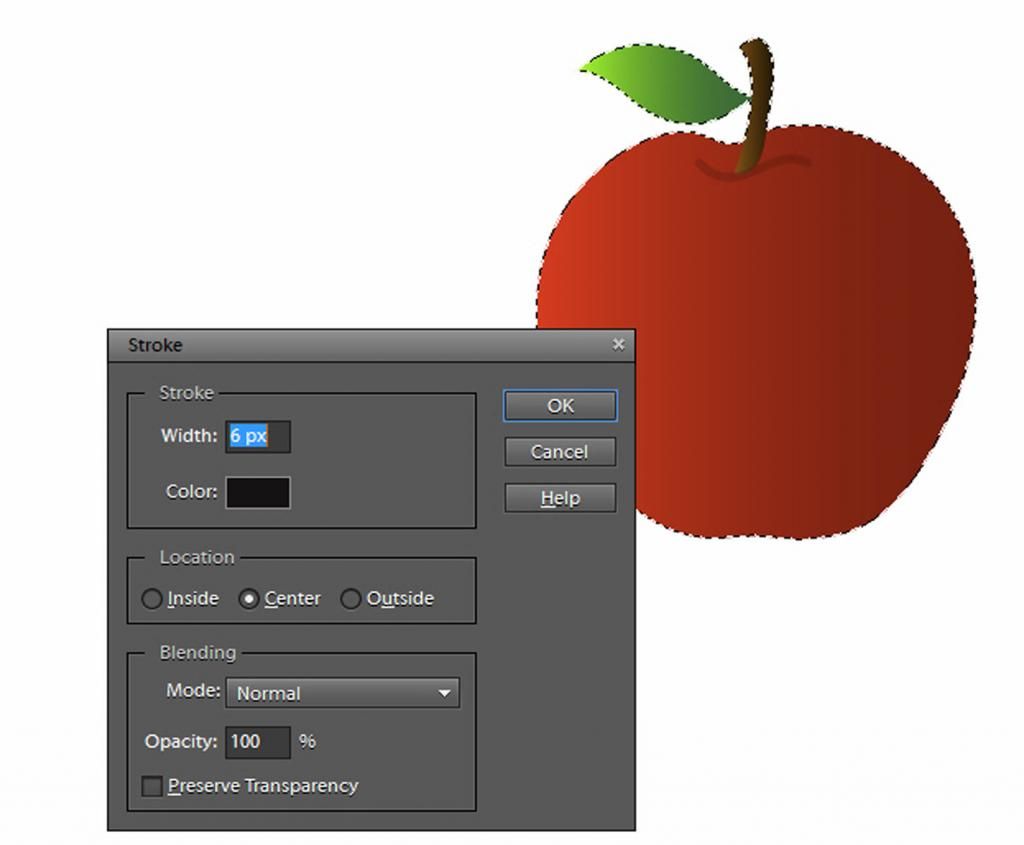
The new layer will appear above the old one in the layer section and the marching ants will still be around the apple (they’re really around the new copied apple).  Now click on Edit>Stroke (Outline) Selection. A new window will pop open.

We’re making the cutting line for the back of the mini-book so we want it to be several pixels wide and black in color.  I leave it centered so that when I cut down the middle of the line it will match up perfectly with the front side.  With your width and color set, go ahead and click OK.  There’s now a black outline on top of the apple, but we need to reverse the image. Select Image>Rotate>Flip Layer Horizontal.

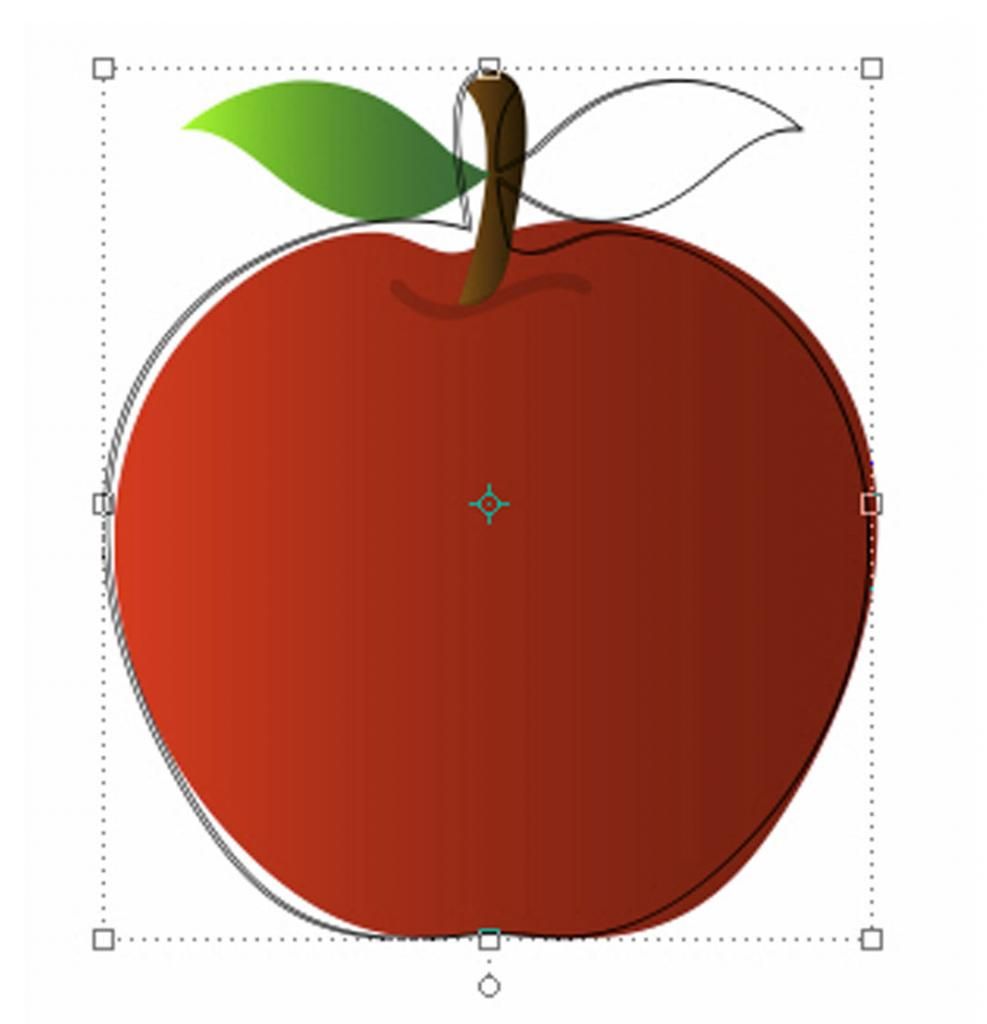
Now the outline of the apple is a mirror image of the original.  If you try this and can’t tell the apple image from the outline, you’ve probably selected the plain Flip Horizontal instead of the Flip Layer.  Make sure the Move Tool is highlighted on the left hand side but DON”T use your mouse to move the outline shape.  We want to keep it on the same level as our apple so it will match up when we fold the book..  Instead use your left arrow key to nudge the outline over.  There should still be some overlap—this will be the fold of the book where the front and back stay connected. Too small an area and the front will likely tear off with use. 
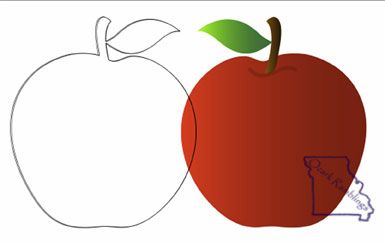
 

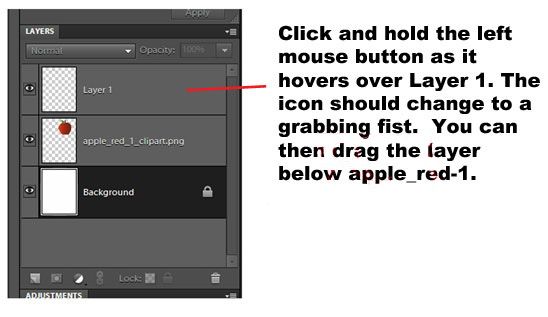
See how the outline is on the face of our mini-book.  We don’t want that.  It’s easier to deal with than you think.  We just need to change the order of our layers.

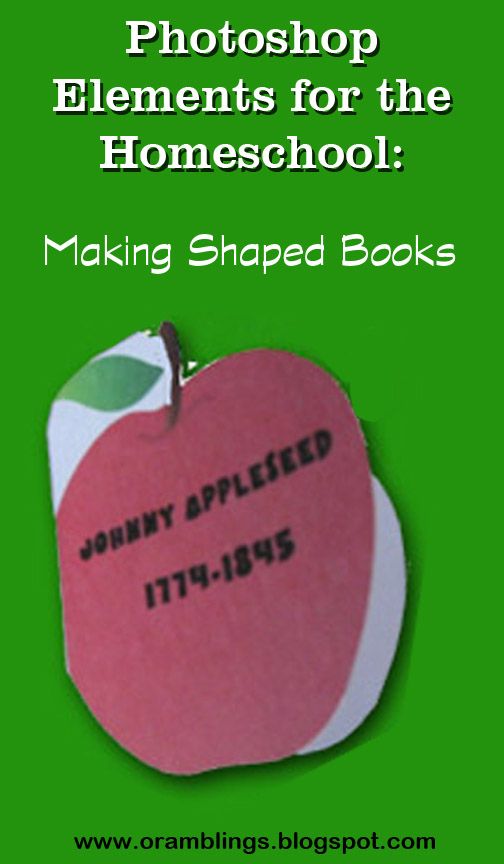
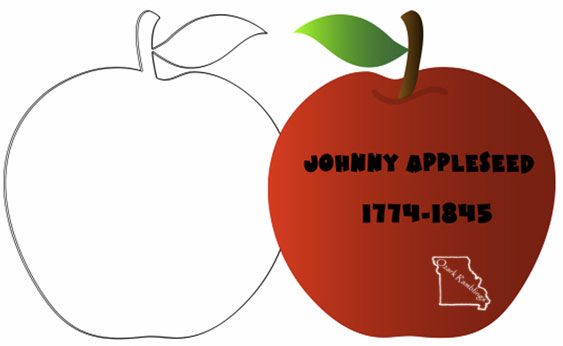
Now there’s a portion of the red apple will appear on the back page of our book, but I don’t care since that side will be glued down anyway.  Here’s the image of the finished shape book after I’ve added my text.

Next week I plan to go into more detail about the Magic Extractor feature—using the zoom and changing brush size to get those tiny details.  If there are any projects you’d like to learn to tackle with Photoshop Elements, please leave me a comment.

Related Posts Plugin for WordPress, Blogger...