Tuesday, April 8, 2014

Photoshop Elements for Flashcards Pt. 2


Yesterday we worked on building a template for creating our own flashcards.  Today we get to move on to the fun stuff—adding pictures and facts to remember.  Incidentally, these are one sided flashcards that work in pairs (1 picture/1 fact).  I use them for matching up exercises or playing the Memory game.  These aren’t like math flashcards where the student sees the problem on one side and the parent sees the answer on the other. 

I’ve been making American Revolution flashcards so I just Google the name of the individual and “portrait” to get started. When I find an image I like I click on it to bring up a larger preview and the click on “View Image” to bring up the picture in a blank window.


When you Right-Click the image in the new window you’ll have the option to Save Picture As… I’ve got a folder saved on my computer full of Revolutionary war figures so I’ll save the image there. When I’ve got 9 of them I can complete a page of flashcards.


I go into Photoshop Elements Edit and open my flashcard template and nine images. You can see them all at the bottom in the project bin. If you can’t see all your open pictures you may need to use the slide to the right of the project bin to scroll down.  First I double click on the template to bring it up into the work area and I select the Move Tool from the top left side of the screen.  IMPORTANT NOTE:  Before you change anything, use File>Save As and save this template under a new name (Say Revolutionary portraits page 1).  That way you are not making changes to your original multi-layer template.

I click on the tan rectangle in the upper left corner –you’ll see a thin line around the shape and Shape 1 will be highlighted in the Layer box to the right.  Now I’m go to click on one of the portraits for the project bin and hold the mouse button down to drag the image up to the work area.

Whoops, what happened?  You can’t see the image can you?  That has to do with the order that we built the rectangular shapes.  Each new shape is placed on a layer above the previous one so while we dragged our image above Shape 1 it’s place below Shape 5 (the middle).  The image is there, you can see the outline of it.  Since all objects dragged up are going to be placed dead center, let’s do something about this right now. 

Find the layer named Shape 5 in the Layer section. Click and hold the left mouse button.  You should notice the cursor changing from a pointing finger to a clenched fist.  Now you can pull the layer down the screen which will in turn move it closer to the background of our multi-layer template.  I put my Shape 5 right above the background layer.  As you drag the Shape 5 layer down you should notice the portrait should be revealed.  Now we can use the move tool to drag the portrait over the rectangle in the upper left corner.


None of the images I’ve chosen are exactly the same size as the tan rectangle I’ve created.  That’s okay because I plan to use the shape as a clipping mask (See last year’s Day 2 tutorial for more details).  For now all I need to do is click and drag the corner square of the portrait to make the image bigger than the tan rectangle.  Then I hold the Ctrl key and tap G.


All at once the portrait is confined to the size of the tan rectangle and the portrait layer appears indented above the Shape 1 layer.  I can still move and resize the portrait layer to tweak what appears in the space.  This may be more evident when I work on the landscape image of Ethan Allen.

You can see the picture is far too wide.  After applying the clipping mask the image looks like this…

I can still move the image around so that Ethan is in the center of the frame (look at my finished work).


If you read my post about making explorer flash cards you’ll recall I wish I had added the names to the pictures—after all I wasn’t trying to have my son be able to pick Abigail Adams out of a line up.  I’ve added text to each portrait to include their name and even found a .psd file of John Hancock’s famous signature.

  Now let’s briefly talk about the corresponding flashcards that will be filled with facts of these great Americans.  We need to start with the blank template file (I hope you took my advice and saved your portrait project under a new name and you still have a blank template to go back to). First we’ll need the  Type Tool (for more detail on changing fonts, color, and size read last year’s Day 3 tutorial).
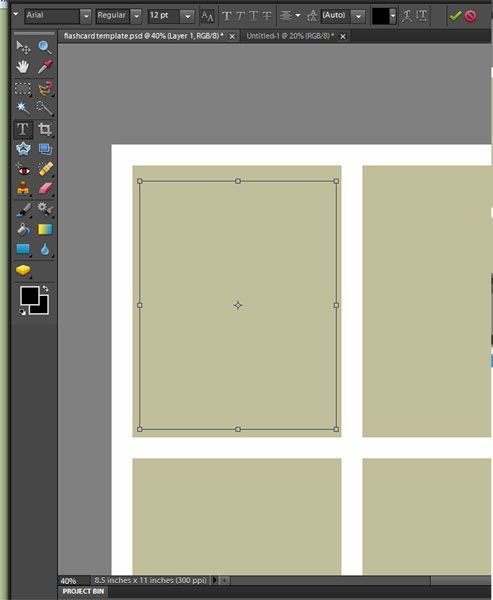
 

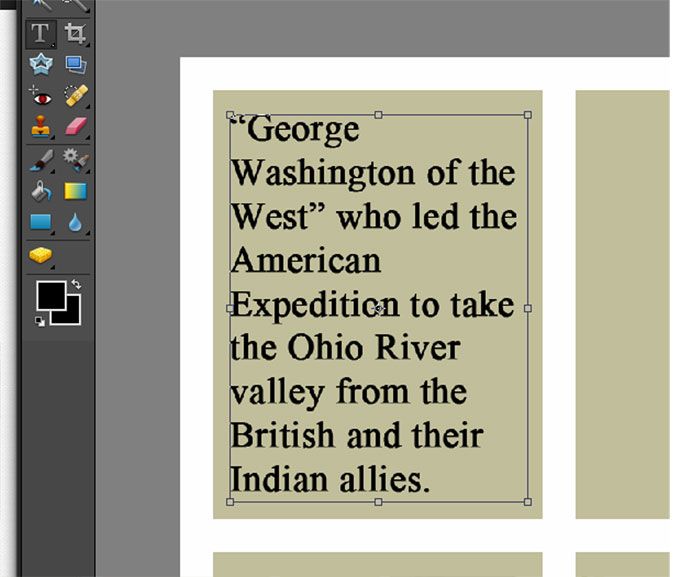
Defined Type area Text “wraps around” as I type

I Click and hold the left mouse key and drag the cursor to create a box just inside the borders of the first rectangle—this will define my text area.  The text will “wrap around” when I reach the edge, just like I was using a word processor.  Be aware that this is NOT a word processor and won’t alert you to any misspelled words, etc.


If you’re going to print on colored cardstock, you don’t need the tan background.  I used the paint bucket tool (refer to Day 1) to change everything back to white—just make sure you’re on the shape layer not the text layer.  Then to see the outline of the card I switch to the Move Tool and right-click on each shape and chose Edit Layer Style from the pop up menu.


In the new window, put a checkmark in the box that says “stroke.”  You can change the thickness and color of the lines to suit your tastes.


I hope you now feel comfortable with making template shapes, inserting pictures and text boxes because we’ll be doing all three tomorrow when we publish our own newspaper!  In the meantime, check out some of my Crew mates 5 Days of … posts or click on the graphic to see all the participating blogs.

Beth @ Acorn Hill Academy ~ Nature Study
Aurie @
Our Good Life ~ Photography Tips and Tricks
Dinah @
The Traveling Classroom ~ Tips for Learning a Second Language
Julie @
Nurturing Learning ~ Art Resources
Tara @
This Sweet Life ~ Preparing for a New School Year
Sara @
Embracing Destiny ~ Purposeful Living
Rebekah @
There Will Be a $5 Charge for Whining ~ Culinary Adventures for Boys
Hillary @ Our Homeschool Studio ~ Fitting in the Extras
April Blog Hop


Review: Supercharged Science


Online homeschool science curriculum


Last Spring, when we had our first chance to review Supercharged Science  we had already finished our main science curriculum for the year so I let my son choose projects that suited his fancy. You can read about it by clicking here, and I do recommend it because it will give you more of the overall picture of the program.   This year we were given a second opportunity to use their e-Science Premium Membership.  We’ve been studying human anatomy this year so we focused in on Unit 19: Biology 2, but here is a list of all the units available at this time. Note: A new subscriber has access to the first 7 Units and gains access to 2 additional Units each month they continue their membership. Since this is an online program, there are a few technical requirements to check.


Supercharged Science Units

  1. Mechanics
  2. Motion
  3. Matter
  4. Energy 1 (Levers & Pulleys)
  5. Energy 2 (Potential & Kinetic)
  6. Sound
  7. Astrophysics
  8. Chemistry 1 (Molecules, Atoms & Chemical Kinetics)
  9. Light
  10. Electricity
  11. Magnetism
  12. Alternative Energy
  13. Thermodynamics
  14. Electronics
  15. Chemistry 2 (Reactions, Bonds, Acids & Bases)
  16. Life Science 1 (Living Organisms, Cells, Genetics, Microscopes)
  17. Life Science 2 (Prokaryotes, Plants, Protists & Fungi)
  18. Biology 1 ( Invertebrates, Fishes, Amphibians, Reptiles, Birds & Mammals)
  19. Biology 2 (Skin, Bones, Muscles, Cardiovascular)
  20. Earth Science
Bonus Levels:
  • Award-Winning Science Fair Projects
  • Mathmagic
  • Teacher Resources
  • Science e-Camp (in the summer)


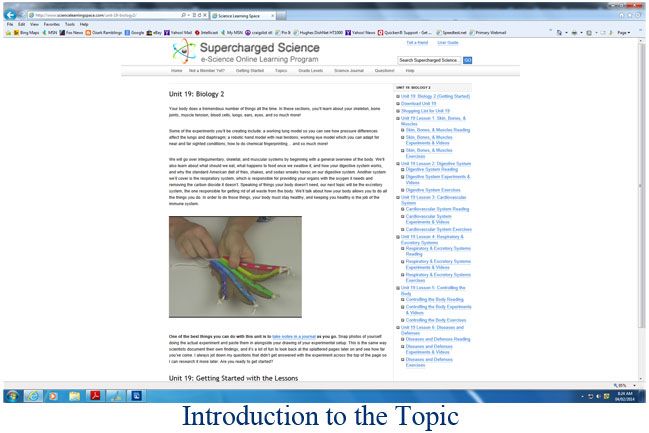
The unit begins with Aurora Lipper’s video introduction.  She explains what will be covered and previews some of the experiments.  On the right you’ll see links to download the PDF file for the Unit, links to the specific lessons within the unit, and a Shopping list of materials for the online lessons (the videos).


Online homeschool science curriculum


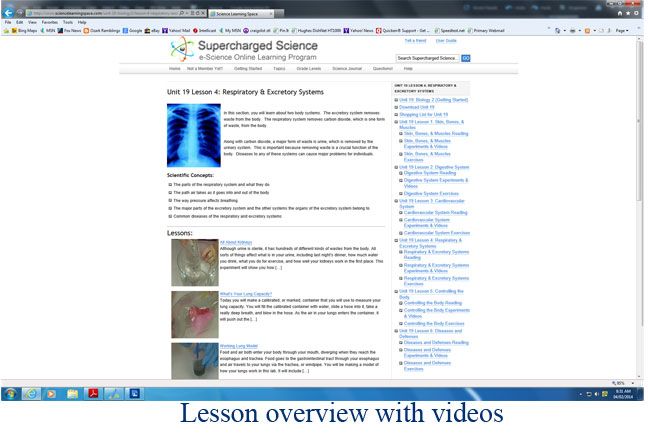
Most of the items you’ll probably already have in your home (or can pick up easily at Walmart), the few more difficult items usually have a link to an online source. The next image shows the lesson we were working (Respiratory and Excretory systems) and you can see the video lessons (I would use the term activities).


Online homeschool science curriculum


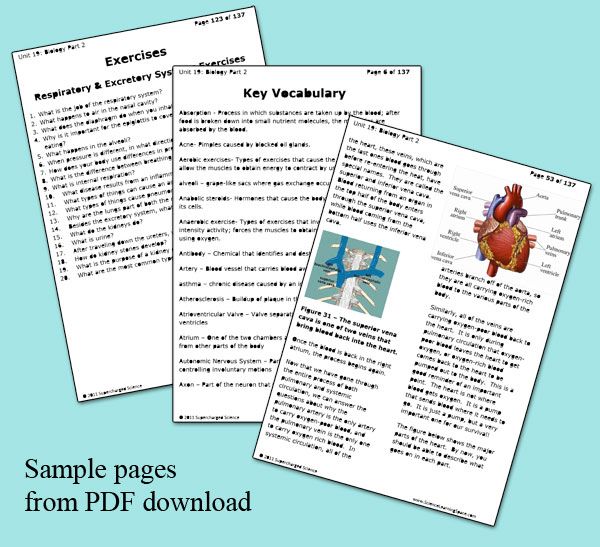
The download for the Unit has 137 pages that include another materials list (this time for the activities within the document, not online),  13 pages of vocabulary terms, and then Objectives, Textbook Reading, Activities & Experiments, and Exercises for each of the six lessons in the unit.   The exercises are really a bunch of questions that could be used for a quiz or test at the end of the unit.


If you want to do the online experiments, there are separate PDF downloads with detailed instructions.


How we used the product:

We read from our normal science curriculum but did the projects and exercises in Supercharged Science instead of our textbook—we even went back to do some activities on topics we studied a while ago because the videos just looked fun.  The website actually includes a Conversion Chart that matches up the Units with chapters or modules in many of the common homeschool science textbooks.  If you are using Supercharged Science as your only resource there is now a webpage organized by grade level and covers Pre-K through high school,  but be aware if you choose this approach there are some units and projects that aren’t listed in this approach.
On this particular day we were studying the Respiratory and Excretory systems—not two systems I’d necessarily combine on my own…
Lung capacity


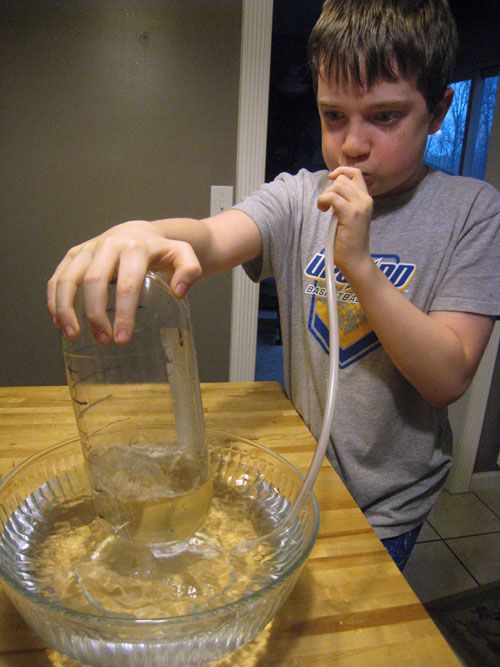
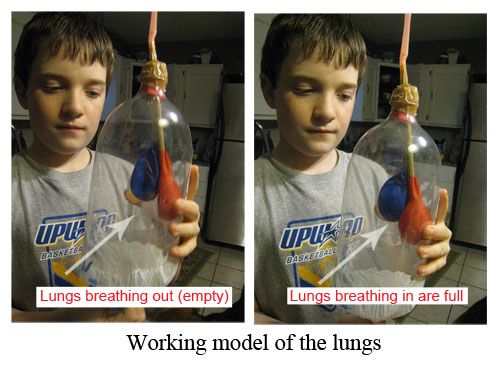
In this project we were testing lung capacity.  All we needed was some plastic tubing (try a pet store), some water, a bowl, and a soda bottle.  Turns out, both Schnickelfritz and I have a lot of air to blow out!  We hade to run to the dollar store where they sell 3-liter bottles of soda to try again.  Nothing was wasted though—the 2-liter was the “chest” for our working lung model below.


Working lung model


What We Liked:

  • No need to buy any special “science” materials – there were plenty of activities to choose from that only used common household items. (This may not be true for all units.)
  • Each online Lesson/activity has it’s own comment section.  If you leave a question there, you’ll get a response shortly.
  • The videos really help in setting up the projects, watching her build a certain item was much clearer than just reading a sheet of instructions.
  • Supercharged Science avoids the topic of evolution entirely so I don’t have to worry about “millions of years” or “goo to you by way of the zoo” teachings.


What We’d Like to Change:

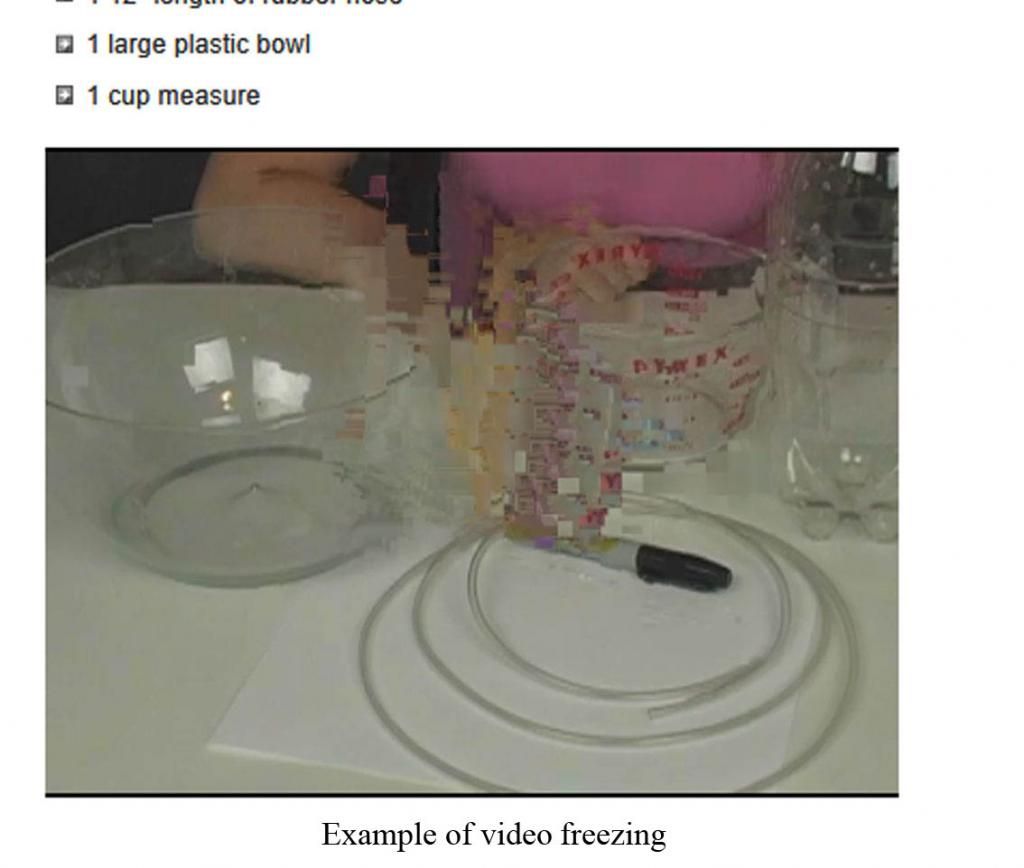
  • I don’t know if it’s our satellite internet, but sometimes the videos were blurry, or the action would freeze although the audio continued.  Some mornings we couldn’t get the videos to start at all. (again refer to the system requirements to make sure it will work for you)

  • It is a little pricey.  The subscription is $37/month ($57/month for high school material).  That would be $333 for a 9-month school year.  That might not be so bad if I had several kids that could benefit from the course, but I school an only child.  Still, if you have a child with a real bent towards science, this is cheaper than a course at a community college.

If given the opportunity to review the program again we’ll jump at the chance because we really have loved all the experiments and Ms. Lipper explains things so well.  It is definitely worth visiting the Supercharged Science website and signing up for the money-back guarantee 30 day trial—especially when it’s being offered for only one dollar!  Find out more at the TOS Special Offer.  Once your registered, you’ll also receive emails from Ms. Lipper with invites to free online seminars and other bonus materials.  Or you can receive a free set of sample materials by just submitting your email address.


Click to read Crew Reviews

Monday, April 7, 2014

Review: Victus Study Skills

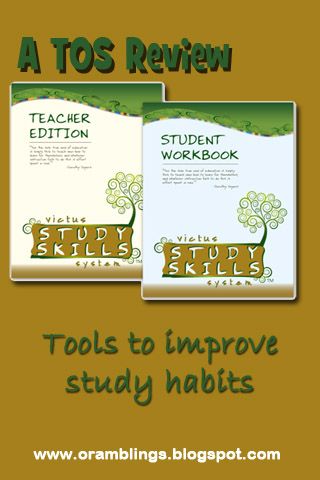
Victus Study Skills ReviewOne of my goals in homeschooling my son is to give him the tools and skills necessary to succeed in the big world outside our door.  His education isn’t just the accumulation of facts, because face it: no one’s career hinges on his knowing the name of the General who died in the French and Indian War (Braddock).  It’s much more important to foster his love of learning and teach him how to find information when he needs/wants it. Along those lines comes Victus Study Skills System.  They teach students how to study: reading for information, taking notes in lectures, time management, etc.  We received two spiral-bound books that make up the Victus Study Skills System : the Student Workbook ($20) and the Teacher Edition ($40). 

Why study (or teach) how to study?  Up to now I’ve been the controller of my son’s education – I tell him how many pages to read in history, I’ve broken down assignments into daily bits so his 5 paragraph essay will be done when I want it, I’ve given the reminders “You’ve got a math test tomorrow so you better look over the rules on multiplying by a negative.”  I won’t always be his teacher though—a college professor may give a term paper assignment at the beginning of the semester and not mention it again till it’s due, a boss may hand over a manual on the new accounting software and expect him to teach himself.  My aunt recently shared that perhaps she’d been to lenient in homeschooling my cousin—if he didn’t feel prepared for a test, she’d often postpone it for a day or two.  No classroom teacher would make that exception---which my cousin is discovering the hard way in college.

There are 10 lessons in the Student Workbook (:

  1. Introduction and Study Habits Checklist
  2. Learning Strengths
  3. Mission and Goal Setting
  4. Time Management
  5. Organization and Study Environment
  6. PQRST
  7. Listening
  8. Note Taking
  9. Test Taking
  10. Review

For each lesson there is usually a fill-in-the-blanks page that we filled out during our discussion of the topic (the Teacher’s Edition has the answers filled in).  Then is a separate page for the student to work on—this could be filling out  an hourly schedule for the time Management lesson or a place for note taking while listening to a brief paragraph about banana plants. 

The Teacher Edition (82 pp.) has an Introduction on the philosophy of the Victus System, a section of teacher instructions, a section covering the 10 student lessons, and an appendix with some addition tools and reinforcement exercises.

The Sample Course Plan suggests covering all ten lessons in a 5-day school week.  This pacing was much too fast for my 11 year old. We managed to do a lesson per day for the first 5 lessons—these were mostly exercises in self reflection: assessing current study habits, determining learning modalities, setting up a weekly schedule. We would discuss the topic and I would give him the answers to fill in, but I tried to let him work on the project page himself so I wouldn’t influence his opinions/decisions.  Such a surprise—I’d always assumed my son was a kinesthetic learner, but the survey showed he learns best visually (he’s still a wiggle worm).

When we got to the heart of learning how to study and I slowed waaaayyy down.  (Lesson 6 ) PQRST is a mnemonic to help remember the steps of reading for information:  Preview, Question, Read, State, Test.  We spent a day on each letter/word –discussing it and then applying it to both our history and science texts.  (Lesson 7) Listening while I’m talking or reading aloud is my son’s weakest area—I spent a whole week here alone trying to get 10 minutes of good active listening from him at a time.  Right now he’s only tested in math so much of Lesson 9 didn’t apply –but we’ll be reviewing it again in the future.  In fact, I’m planning on reviewing the Victus Study Skills at the start of each new school year as we work out the kinks from summer vacation and would recommend it to other homeschoolers to do the same.

The Victus program can be used by all ages (the website has some recommendations for tweaking the program for kids ages 4-7). Students ages 8-10 should be able to work through the Student Workbook with a parent who is using the Teacher Edition. Older students may work on their own with a Student DIY Workbook.   You may find the table of contents and sample pages for each book on the website.


Click to read Crew Reviews
 

Photoshop Elements for Flashcards pt. 1

Last August we spent five days introducing you to the idea of using Photoshop Elements in your homeschool. If you missed any of those topics, here they are:

Quick Pages for Journaling/Notebooking

Multi-Layered Templates for Recordkeeping

The Type Tool for Flashcards and Labels

PDF Templates for Lapbooking

Extracting Images for Posters

BONUS Tutorial: Making shape books

Now I’m back with some more PSE projects –this time things I’m using for our study of the American Revolution. So let’s jump right back in….

Sometimes I feel like I’ve turned into a flashcard queen, but it’s been so easy to use them in reviewing games for our history.  We’ve covered explorers, colonies, and now figures of the Revolutionary Way.  Today I’m going to show you how to make a multi-layer template so you can easily plug in your own text and/or photos and make flashcards.  Don’t let the lingo scare you…it’s really easy.

We’ll start with a new blank file (need to review how?add-grid-lines Check out Day One of last year’s 5 Days of Photoshop Elements).  This time we’ll do an added step and turn on the grid lines to help us align our boxes.   Click on View>Grid and the default grid is displayed with gray dotted lines every 1/4 inch and solid black lines every inch.  If you don’t like these colors or you wish to change to metric measurements (or even pixels), you can click Edit>Preferences>Guides & Grid.  I’ll be sticking with the defaults.

Because we use flashcards for Go Fish or Memory type games, I prefer to make ours roughly the size of baseball cards (don’t know if my non-American reader’s have any comparable trading cards to relate to?).  I can fit nine on a page and still be able to cut them out and stick them in a standard size laminating pouch.  I cut them first and then laminate (if you laminate the entire page first and then cut, the edges aren’t sealed and begin to separate with use).

The first tool I’ll be using is the Rectangle Tool to make specified size boxes.  It will be easier to view on the computer screen (certainly easier for this tutorial) if the boxes aren’t white like the background.  If you haven’t changed your default foreground color, they’ll be black.  I’ve changed mine to a nice tan.  The rectangle Tool is one of six shape tools that are toggled from the same spot in the tool bar (third spot up from the color selector).  It should be the default tool, but if you see something else right click in the corner and choose the top tool.

select-rectangle-tool

The mouse will change from an arrow to a cross shape and I could start drawing with the grid lines as my guides, but I prefer the precision of designating the size of my box.  In the top left corner of the screen you should now see the blue rectangle shape repeated next to a white down arrow.  Clicking on that arrow opens a new window.

set-rectangle-size


Set the fixed size of your box to 2.5 inches wide by 3.25 inches high.  (Note: you have a second opportunity to change the color of your boxes here). 


place-first-block


Click your mouse close to the intersection 1/4 inch from the top and from the left edge.  The box should appear and snap into the grid lines. (If it doesn’t you can switch to the Move tool and nudge the box until it does snap in place). 


3-blocks-across


Now move over 1/4 inch from the last box and click again to make a new box appear.  Repeat to squeeze one more box in the row.


fill-the-page layers-show-location

You’ll move down 1/4 inch and create a second and then a third row.  There should be 1/4 inch separating the boxes and the edges of the page with a slightly larger margin at the bottom.  If you look in the Layers area of the workspace, you’ll see each rectangle shape has been added to its own layer and the thumbnail will show it’s location on the grid.  (For some unknown reason the theme to the Brady Bunch is now rattling around my head).

You can turn off the grid lines and save this as a .PSD file to use for any future flashcard project. You want to keep in in this format with all the layers.  Switching it to .jpg will save file space but will make it a flat image and we won’t be able to manipulate the placeholders for our pictures or text when we add them tomorrow. 

In the meantime, check out some of my Crewmates’ 5 Days of … posts, or click on the graphic to see all the participating blogs.

Beth @ Acorn Hill Academy ~ Nature Study
Aurie @
Our Good Life ~ Photography Tips and Tricks
Dinah @
The Traveling Classroom ~ Tips for Learning a Second Language
Julie @ Nurturing Learning
~ Art Resources
Tara @
This Sweet Life ~ Preparing for a New School Year
Sara @
Embracing Destiny ~ Purposeful Living
Rebekah @
There Will Be a $5 Charge for Whining ~ Culinary Adventures for Boys
Hillary @
Our Homeschool Studio ~ Fitting in the Extras

April Blog Hop

Friday, April 4, 2014

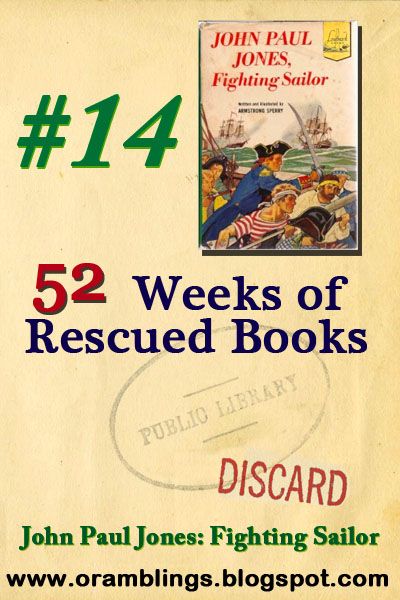
Rescued Book 14: John Paul Jones

Blame it on my public school education, but I assumed the American Revolution was entirely a land-based war.   Okay, I remember a little about British ships blockading Boston Harbor and then the French fleet arriving at Yorktown to cut off any escape and forcing Cornwallis to surrender…but that’s it.  Turns out there was a small American Navy.  It mostly attempted to waylay supplies and reinforcements from reaching British troops,  but there was one man who actually commanded his ship to take the fight to the Eastern shores of the Atlantic.  His name was John Paul Jones.

John Paul Jones, Fighting Sailor

Sperry, Armstrong. . New York: Random House, 1953, 176 pp.

He was actually born John Paul, son of a Scottish gardener. He captained  a merchant ship in the British West Indies and after the death of two crew members (one during an attempted mutiny), he was forced to seek refuge in the American colonies under a new name (he added Jones to the end).  Two years later (1775) the name Lt. John P. Jones appeared on the roster of officers for the newly formed Continental Navy.

His first command was a small sloop with only twelve 4-pound cannons mounted on the deck, but he used it to defeat ship after ship – he captured a full company of English infantry and their cargo of 10,000 heavy winter uniforms that protected Washington’s troops instead of Burgoyne’s. During a raid of Nova Scotia he commandeered nine ships from the English fishing fleet.   He was chosen to carry news of Burgoyne’s surrender to Ben Franklin in Paris where he was trying to persuade the French king to join the American cause.

And while there, he decided to take advantage of his proximity to English soil.  With 29 men he snuck into the fort at Whitehaven, England and spiked all the cannons (rendering them useless) then he had the gall to set fire to the town and ships in the harbor –the spark being provided by a local when Jones asked him for a light for his pipe.  It was the only raid on English soil during the war.

With all his success, it seems strange that orders arrived from the Continental Congress that took away Jones’ command.  Fortunately, Jones didn’t take the slap in the face the same way Benedict Arnold did.  Rather than turn traitor he sought the aid of Ben Franklin to persuade the king to outfit a new ship to captain.  It was an old ship with old cannons (they’d actually been condemned by the French Navy) but Jones seemed to prefer the role of underdog. 

He engaged in battle with a 50-gun frigate and was boarded.  When a British officer asked him to surrender he uttered his immortal words “I have not yet begun to fight”  (I do recall that phrase so maybe he did appear in my history books).  Eventually it was the British ship that lowered its colors.

The story ends with this triumph – in fact I wish we hadn’t read the Afterward. John Paul Jones was essentially abandoned by the country he had served so well.  He commanded the Black Fleet for Russia’s Catherine the Great for a short time, but died penniless in Paris at the age of 46.  He was buried in an unmarked grave. 

The United States eventually did try to do right by him, more than 100 years too late.  In 1908 and American ambassador led a successful search to recover the body which is now entombed  in a crypt in the chapel at the U.S. Naval Academy in Annapolis.

If you’ve got a child enthralled with pirates and sailing ships this would be an excellent read. Just judge by this passage…

 Sweating gun-crews slewed the 4-pounders forward to bear on the mighty frigate. The powder boys came racing, each with a coil of smoldering slow-match in a tub.

The gun-captain shouted, “Run ‘em out, lads!”

The men threw their weight on the tackles and the cannon ran out. For a second Paul Jones thought with satisfaction of the dismantling shot: lengths of wicked iron chain, joined to a single iron ring in the center. When discharged, it would hurtle like a rocket from the guns, shredding the enemy’s rope and canvas.

My copy of John Paul Jones, Fighting Sailor was in a whole box of Landmark Books I picked up at a library book sale.  They were all part of the private collection of a John Carron –I can’t imagine why he parted with such treasures.

You can find a list of all my Rescued Books here.

Monday, March 31, 2014

Review: Captivated Documentary

MediaTalk101.org

Media DiscernmentWhen the opportunity arose to review a documentary on media and discernment by Media Talk 101 I knew it was something I needed to see.  However when the Captivated DVD arrived in the mail I promptly left in the catch-all spot near my front door and didn’t touch it for three weeks because I also knew it was something I didn’t want to see.  I made the assumption beforehand that I would just be made to feel guilty about how much time my family watches TV and my son plays video games.  I already had the excuses ready to shout back at the screen –“It’s been a bad winter and we’ve been stuck inside,” or “My son is an only child and all the other kids in the neighborhood are still in school when we finish for the day.”  Still I had to watch it for the review….and you know what?  I learned something.
I always thought of media as a product (and its over-consumption as a problem) of the modern age.  You know television, internet, texting, and video games…but there’s nothing new under the sun.  The first telegraph message was sent in 1844. It didn’t take long before telegraph operators were missing their work by playing a “virtual” checkers game and “chatting” over the lines.  The wireless operators on the Titanic were working so late on a backlog of messages for passengers that they missed the one warning about icebergs that could have saved the ship.  The only differences today are the variety of media available and the speed at which they now fly at us.

Captivated is broken into five sections:


Intro/Consumption:

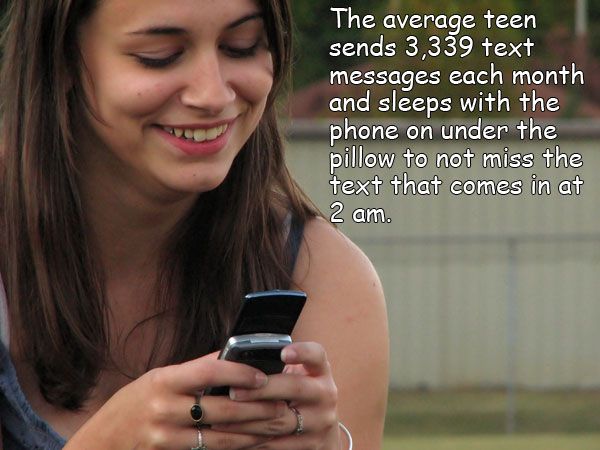
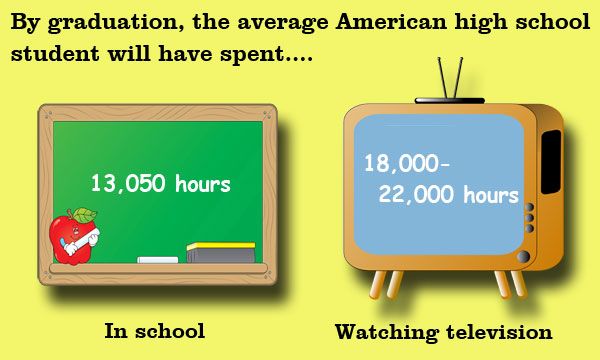
  Here we listen to just how much time is spent on media—watching TV, playing games, texting. And it’s becoming a round-the-clock binge. 


Content:

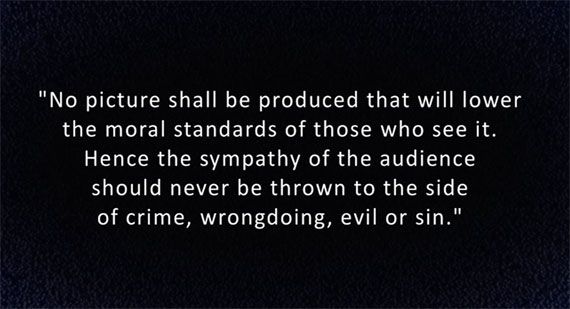
   Music, movies, games, etc. can either bring positive or negative messages—not just negative but harmful to children.  This statement came from the Motion Picture Production Code of 1930—a promise to self regulate before state and federal  censure laws were enacted. The code was changed, skirted and liberally interpreted for years and finally abandoned in 1968.


Captivity:

Studies show that playing virtual games can produce the same feelings of accomplishment as real life, but you really haven’t done anything.  The lady on the left was so obsessed with Farmville she set up false accounts to “gift” herself objects for the came.  She wore herself out  doing virtual chores for hours.    Now she tends to real gardens in her yard.


stalin-quoteBattleground: 

 Media is not neutral.   The bottom line is that this is a battle for our minds and our children’s mind—how we think, live, vote, etc.  The first step is to put on the full armor of God.


Freedom:

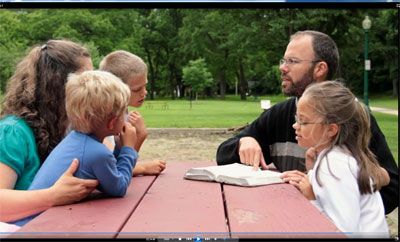
Practical tips to implement a media fast in your family.   Fair warning, kids will probably be grumpy.  Go outdoors (leave the cell phones and IPads inside).  Plan activities to fill the void.  One of the best choices would be to add family Bible time.


In the Bonus Features, there are extended interviews of the experts from the documentary (9 interviews, 5-23 minutes long) and a message from the producer to clarify that he’s not anti-technology/anti-media.  I can confirm this through outside sources as Media Talk 101 has recently taken over sponsorship of the Christian Worldview Film Festival in San Antonio, TX.  

I watched this video by myself with a pad and paper to write things I wanted to remember and ideas I wanted to try in our home.  I didn’t make my son watch it, but I have hade discussions with him about some of the things I learned.  Now when I see him watching game shows I’ll stop and ask “Is this a wise use of your time?”   I didn’t feel the guilt I expected to feel—in fact, I see we’re ahead of the game in a lot of areas – we only allow video games rated E, we have picky standards of what movies and TV shows we watch,  we rarely partake in social media on the computer outside of work and our son doesn’t use it at all.  The next step will be for my husband and I to prayerfully consider a media fast for our family.

The Captivated DVD ($16.95) contains a 107 min. documentary and 4 bonus features.  It is meant for parents –you may choose to share portions with your kids.  I recommend it to all parents but homeschoolers especially.  We’ve gone to great lengths to keep certain worldviews away from our kids by teaching them at home, but how much of those same worldviews are we letting sneak in through our TV’s, DVDs, MP3 players, and computer screens.  This documentary gives a lot of food for thought. There are Spanish subtitles available through the Setup menu. According to the setup screen English closed captioning for the hearing impaired should be available through my TV, but I couldn’t get them to appear.

Click to read Crew Reviews

Related Posts Plugin for WordPress, Blogger...