 Summertime often means vacation time and we’re just finishing ours. You know the drill—itineraries, tour guides, postcards, photo albums, souvenirs, exotic foods. Did I mention our destination was Egypt? Did I mention we traveled back in time? It’s all true thanks to Project Passport World History Study: Ancient Egypt. This is one of three world history titles available from Home School in the Woods, the other two cover The Middle Ages and the Renaissance & Reformation. Two more titles are in the works for Ancient Greece and Ancient Rome. We received the download version of the study but it’s also available on CD-ROM. Since you have to do all the printing you should stock up on paper, colored paper, colored card stock, and ink. This is a good time to use a craft store coupon and buy a multicolor pack of 8 by 11 1/2 cardstock.
The program is Windows and Macintosh compatible (mine runs through Internet Explorer offline) and you will need Adobe Reader to access and print the texts and project printables.
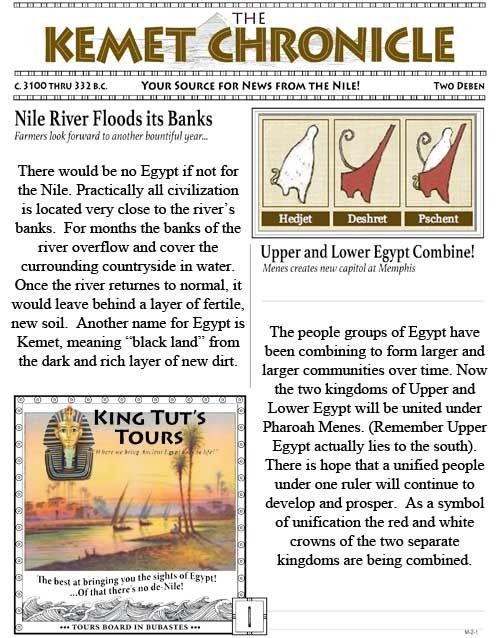
This is not our first go with Homeschool in the Woods (I’ll link to my other reviews at the end of this post). 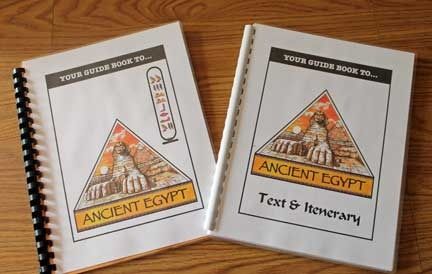 Standard drill for me is to print out the lesson texts and teacher’s instruction manual. Since this whole study is themed as a vacation tour they are referred to as the Guide Book and Travel Itinerary respectively. If you are familiar with HSitW from their Time Travelers American History series, you know that students work on craft projects (souvenirs), build a timeline (Snapshot Moments in History), write a newspaper (The Kemet Chronicle), and build a notebook (Scrapbook Sights) and lap book (I guess they couldn’t come up with another travel themed name). New additions to the world history series are Postcard Greetings from famous folks from the past, MP3 audios of tours through historic sites, and a final wrap up with the creation of a trifold travel brochure.
The other book I’ve printed out and bound holds all the notebook pages Schnickelfritz creates (we found a website that translated his name into a cartouche to add to the cover!). I print out all the base pages and assemble them and we keep all the timeline figures and other things that will be added to the base pages in a clear plastic binder (mine actually zips up so I don’t have to worry about little pieces falling out). I also include some blank card stock pages that will hold the mini books that would normally go in the lap book. The only things I don’t print before we start are the newspaper pages. Because my son has dysgraphia and doesn’t like to draw or color, I allow him to use Photoshop Elements to add photos and type in his articles (I actually wrote a tutorial about this process if you want to check it out).
With the Time Traveler series, I didn’t always follow the lesson plan in order however I do recommend that for Project Passport. The audio tours are really more like radio theater and they do have a chronological order—referring to previous stops, etc. When you start the program you can access everything you need for each lesson—the text, project instructions, any audios. One improvement over the Time Traveler series is that the project photos are included in the lesson rather than collected in a separate page. The other icons let us know what projects will be included with the lesson, the camera represents the Snapshot Moments timeline for example.
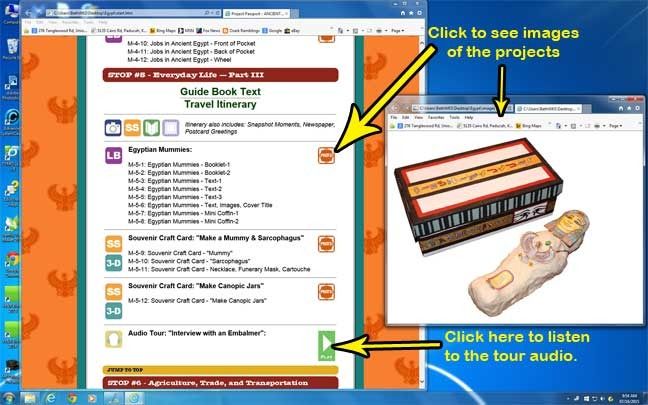
I did mention that I like to print out the lesson text and instructions in advance so I wish they were also available in a single PDF file for quick printing.
I usually read the lessons out loud to Fritz while he added figures to the timeline. Most lessons were 2-3 pages and while he could have read them to himself, the concepts—like the traditional vs. the new chronology of Biblical and Egyptian history were difficult enough to require us to stop reading and discuss. I did let him look through the lesson and choose 3-4 sentences to compose his newspaper article (I wasn’t worried about plagiarism, I was just glad he could determine which facts were most important to remember). Sometimes the notebook projects contained so much information they could have been their own separate lesson and if we hadn’t had the deadline of this review I might have scheduled them for their own day.
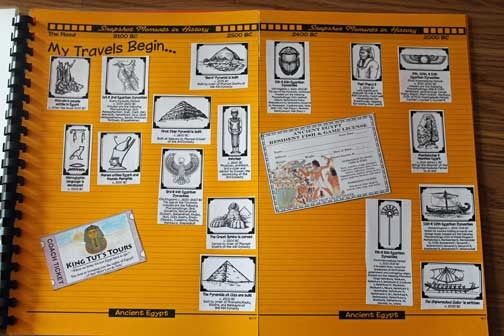
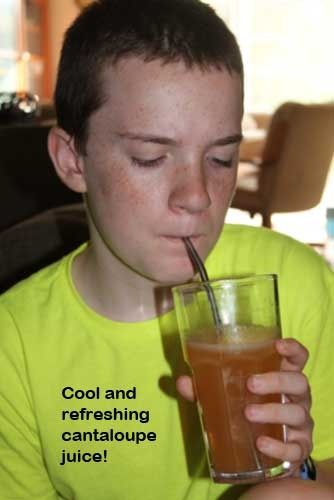
I’ve said it before and I’ll say it again—we love how HSitW makes history come alive. It’s not just names and places and dates, these were real people that had to eat and work and go to school just like we do. There are lessons on what everyday life was like for the common men and women: what they wore, what there houses were like, what games the children played and best of all what they ate! We may not do the craft projects, but we always like to try the recipes. We were already familiar with hummus and baba ghanouj but this cantaloupe juice was a new refreshing cooler for the hot weather.
We love our Homeschool in the Woods studies. They would be great if you’re teaching a range of ages. The younger kids might not get all the details but they could take part in the craft projects or making the recipes. They might even be the ones to color in all the printable images.
Here are the links to the other history studies we’ve reviewed:
The Civil War
The Industrial Revolution
World War II
The Middle Ages


 Family reunion……road trip…..over fourteen hours in the car in two days, and that’s if we were lucky. Last year we got stuck in road construction traffic and spent an hour to cover six miles. What was one of the first things I made sure I packed in my car bag?

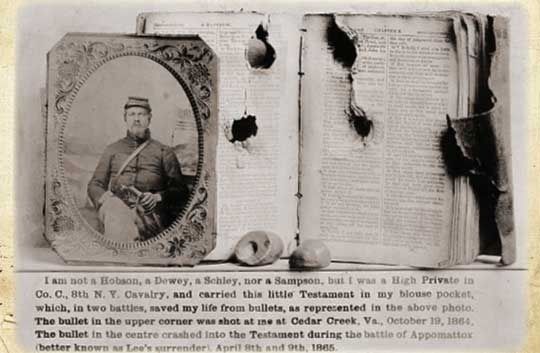
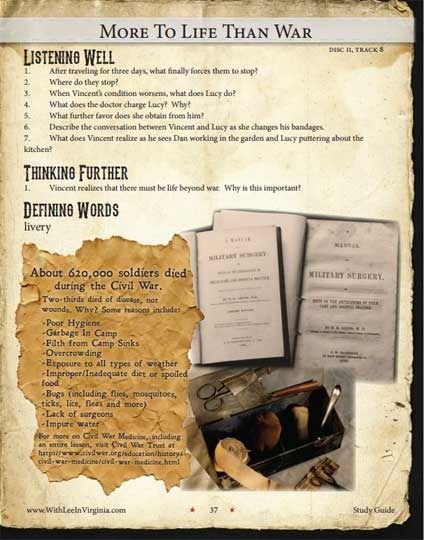 We have been listening to WLiV simply for pleasure since our study of the Civil War concluded the first quarter of last year. Had the timing been right, we could have used Heirloom’s free Study Guide to make this more of a unit study. Each track from the CD has its own page of words to define—some military/war terms and some things we just don’t see any more, like a livery. The Listening Well questions test memory and comprehension. The Thinking Further questions deal with critical thinking, looking at actions/situations from a Biblical standpoint, and other historical/geographical research. The background and artwork would make it “ink intensive” to print the 52 pages out, but I highly recommend you letting students at least look at the pages. There are maps, inset texts with more information, and some thought-provoking photographs of the war. Look at this image of a Bible that had been carried in the breast pocket of a young soldier. It saved his life by stopping two minie balls and I pray it also saved his soul.


 Summertime often means vacation time and we’re just finishing ours. You know the drill—itineraries, tour guides, postcards, photo albums, souvenirs, exotic foods. Did I mention our destination was Egypt? Did I mention we traveled back in time? It’s all true thanks to
  Standard drill for me is to print out the lesson texts and teacher’s instruction manual. Since this whole study is themed as a vacation tour they are referred to as the Guide Book and Travel Itinerary respectively. If you are familiar with HSitW from their Time Travelers American History series, you know that students work on craft projects (souvenirs), build a timeline (Snapshot Moments in History), write a newspaper (The Kemet Chronicle), and build a notebook (Scrapbook Sights) and lap book (I guess they couldn’t come up with another travel themed name). New additions to the world history series are Postcard Greetings from famous folks from the past, MP3 audios of tours through historic sites, and a final wrap up with the creation of a trifold travel brochure.



 our read aloud title for the fall and I want to finish by Thanksgiving…


 I’m excited to say I finally made my first batch of pickles. “Big Deal” you’re thinking, you can lots of pickles every summer. I have too, but this batch is special because I’m try to add lacto-fermented foods to our diet. The concept is new to my husband, son, and me so I wanted to start with something familiar—thus the pickles.
 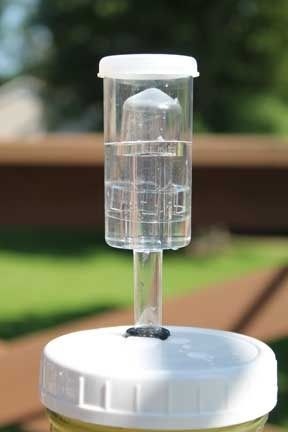 Some weeks ago, my son had an eye doctor appointment to which we had arrived quite early (it was our first visit and I wasn’t sure how long it would take to arrive). In the same shopping complex was a home brewing store. I purchased several airlocks and gaskets for less than $2 each. At home I had my husband drill the appropriate sized holes in some of the plastic lids now available for mason jars—some standard sized and some wide-mouth. I can now use the airlock lids on pint, quart, or half-gallon jars depending on how many cukes I harvest at once. Note: I also purchase some silicone lid gaskets as these plastic lids aren’t absolutely air tight on their own.

 Since we began homeschooling eight years ago, we’ve always started our day with Bible study. It represents the place God should have in our lives and let’s face it…sometimes we can really use the prayer as we start the day. This fall my Schnickelfritz will officially become a teenager (gulp), so this summer I’ve been checking out a Bible study for this age range published by