Showing posts with label In the Kitchen. Show all posts

Saturday, September 12, 2015

Cast Iron Pans

I’ve taken up ironing!  Not the kind that fights wrinkles but cooking in cast iron.  In another one of my maybe steps to improve our family’s health, I’ve ditched the non-stick pan (which let’s be honest had lost most of its non-stickiness). 

At an auction last month we picked up a 6 inch and a 10 inch pan.  These had both seen better days and were rusty so my husband had to go at them with a wire attachment on his drill and then reseason them.  That could be a post on its own and if I ever get the pictures he took off his phone maybe I’ll do one.  I will share that at one point he thought he’d overcooked the pans as the first layer of oil seemed to be bubbling and flaking.  It turns out there was a second layer of rust that had been seasoned over before and he had to get the wire attachment out again.

When he was sure he’d gotten down to good clean iron, we applied a thin layer of oil, baked it in the gas grilled, let it cool till he could handle it again and repeated the whole procedure two more times.  The final appearance of both pans were a glossy  black.  I was still a little skeptical—would they really be nonstick?

The best test I could come up with was scrambled eggs.  I didn’t put any oil in the pan and I hadn’t cooked sausage or bacon in it before the eggs—this was straight out the the drawer and onto the stovetop.  I did let it heat up for felt like quite a while (after all, you’re not supposed to have an empty non-stick pan over heat for long).  Well, a picture is worth a thousand words—take a look at my results….
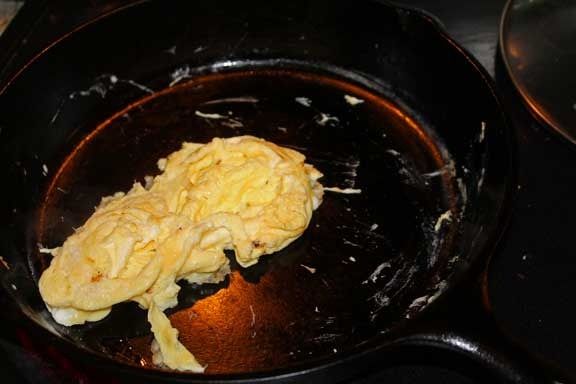
And here’s another great thing—I can use this pan in my oven and over our firepit (in fact we originally bid on it for that reason).  I found a great recipe for a deep dish pizza in a cast iron pan that I can’t wait to try.

Friday, July 10, 2015

Fermented Pickles

I’m excited to say I finally made my first batch of pickles.  “Big Deal” you’re thinking, you can lots of pickles every summer.  I have too, but this batch is special because I’m try to add lacto-fermented foods to our diet.  The concept is new to my husband, son, and me so I wanted to start with something familiar—thus the pickles. 
This is just the latest step on my journey to health.  The last of the three fermented foods that Donna Schwenk of Cultured Food Life calls “The Trilogy.”  I’ve been making dairy kefir for years now and have that routine down.  Last spring I began brewing my own kombucha and this spring I thought I’d give fermented vegetables a go.

One positive note—I really don’t have that large a garden.  When I’ve canned pickles before I’ve had to let some get too large on the vine or pick them and have them start shriveling while I waited to have enough to do a batch of canning.  With this method I just use what’s ready and adjust the size of my fermenting jar.  I’m using everything at its peak!

My tools:

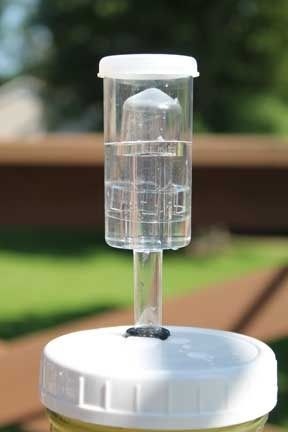
Airlocks are not a necessity for fermenting, but I live in a very humid climate with high mold counts.  I didn’t want to be scraping mold off the top of my liquid.  You can find lids available online, but at a premium price. Some weeks ago, my son had an eye doctor appointment to which we had arrived quite early (it was our first visit and I wasn’t sure how long it would take to arrive).  In the same shopping complex was a home brewing store.  I purchased several airlocks and gaskets for less than $2 each.  At home I had my husband drill the appropriate sized holes in some of the plastic lids now available for mason jars—some standard sized and some wide-mouth.  I can now use the airlock lids on pint, quart, or half-gallon jars depending on how many cukes I harvest at once. Note: I also purchase some silicone lid gaskets as these plastic lids aren’t absolutely air tight on their own.
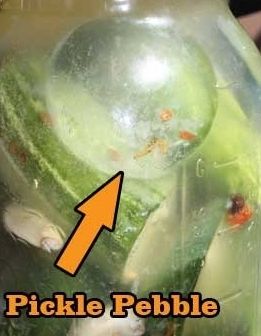
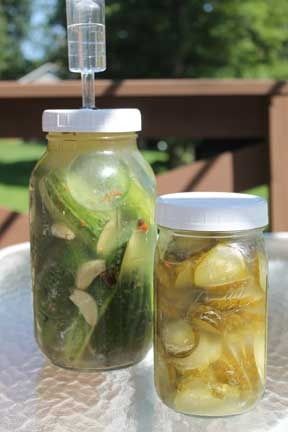
Pickle Pebbles—When researching the whole fermenting process I came across a company that makes glass weights to keep the fermenting food under the surface of the liquid.  At the time they only sold standard sized weights (and I’ve been able to fit 2-3 at the top of my wide-mouth jars.  Now they’ve come out with Pickle Pebbles Plus+ for the larger openings.

I’ve heard several tips for keeping pickles crunchy when canning—cutting off the blossom end of the cucumber, keeping the cukes in ice water until your ready to can them, and adding a leaf with high tannin levels to the jar (grape, horseradish, oak or black tea).  While we have abundant oak leaves at our disposal, I don’t think I want to learn what they taste like.  I bought some organic black tea bags and added one (with the paper tag cut off).

For seasoning I used some heads of dill straight from the garden and cloves of garlic.  I threw in a few shakes of pickling spice I had on hand fow extra measure. I left my cucumbers whole, or nearly whole while they were fermenting and sliced them after they’d reached a taste I was happy with.  Of course I sampled a few and they really were still crunchy and delicious.  You can see, I’m already working on my second batch!

Saturday, June 27, 2015

Blueberry Pickin’

Honeeeeeey, I know WHAT has been eating our blueberries!

The sun was shining…the humidity was down (both rare in this wettest June on record)…my son was at camp…and I decided to go blueberry pickin’.  You may think of blueberries as being a crop of Maine or Michigan, but we have several pick-your-own farms here in Missouri too (maybe it’s an “M” state thing?).  I wasn’t the only one with that idea—parking spots were at a premium, yet the field of bushes didn’t feel crowded.  There were times that I couldn’t see anyone, but I could here snippets of conversation: folks who had filled their buckets debated where to eat lunch, some discussed where they’d finished picking cherries and strawberries and where they planned to pick apples and peaches, toddler Oliver insisted “I can still see you, Mama” when she warned him not to wander off.  He was even carrying a little metal pail~~it was a real Blueberries for Sal moment (even more real considering there had been a black bear sighting last week)!  But the only animal encounters today were with the farmer’s dog and rooster—which caused Oliver to squeal with delight. 

I plan to try dehydrating some of my eight quarts of berries and will freeze the rest for breakfast smoothies or perhaps make a batch of Blueberry Spice Jam for Christmas presents.

Blueberry Spice Jam (Yield: 5 half-pints)

  • 2-1/2 pints ripe blueberries
  • 1 tbsp lemon juice
  • 1/2 tsp ground cinnamon
  • 5-1/2 cups sugar
  • 3/4 cup water
  • 1 box (1-3/4 oz) powdered pectin

Wash and crush blueberries in a saucepan (it’s easier if you crush one layer at a time). Add lemon juice, cinnamon, and water.  Stir in the pectin and bring to a rolling boil over high heat, stirring frequently.  And the sugar and return to a full boil.  Stir constantly for a full minute with a rolling boil.  Remove from heat and skim off any foam.  Fill sterile jars allowing 1/4” headspace.  Adjust lids and can in a boiling water canner for your altitude:

0-1000 ft. ~~ 5 minutes

1001-6000 ft. ~~ 10 minutes

above 6000 ft. ~~ 15 minutes

Friday, May 15, 2015

In the Kitchen: Au Gratin Potatoes

I’m in a cooking rut—not the maid dishes but the sides.  It seems like I’m always grabbing a can of corn or a can of green beans.  I’ve also decided that for our health we need to expand our palate and down the road move to fresher foods.  But for today, I’m just working with what I have on hand—which is lot’s of potatoes.  I bought the 10 pound bag since it was on sale for less than the 3 pound bag, but now I need to use them up before they sprout. 

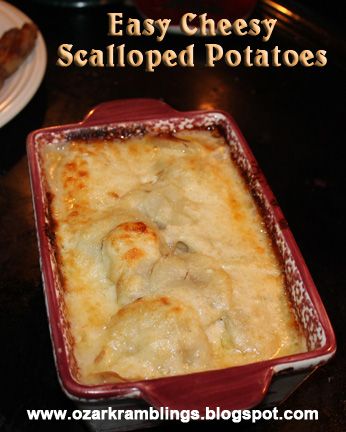
I pulled out my Better Homes and Gardens cookbook and turned to the veggie section.  The first potato recipe where I had all the ingredients was Scalloped Potatoes, but then I noticed the alternative version at the bottom of the page—and everything is better with cheese.  Good thing I’d gotten some natural white cheddar in my last co-op order.


Cheesy Scalloped Potatoes

  • 1/2 C. chopped onion
  • 1 clove garlic, minced
  • 2 T. butter
  • 2 T. flour
  • 1/2 t. salt
  • 1/4 t. black pepper
  • 1 1/4 C milk
  • 1 lb. potatoes (peeled if desired)
  • 6 oz. white cheddar cheese, grated

Begin by making a white sauce: melt the butter in a small pan. Add the onion and garlic and cook until tender. Stir in the flour, salt and pepper. Let this cook for a minute to get rid of the raw flour taste.  Add the milk, then cook and stir till thickened.


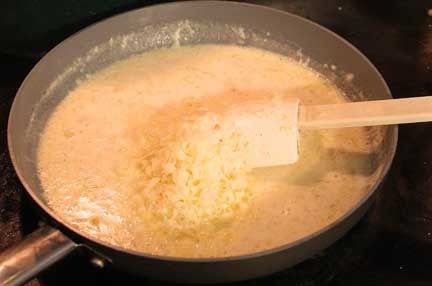
Add the grated cheese to the thickened sauce and stir while it melts (sorry for the white on white image).  You could also use yellow cheddar, or an American cheese if you wanted a milder flavor.


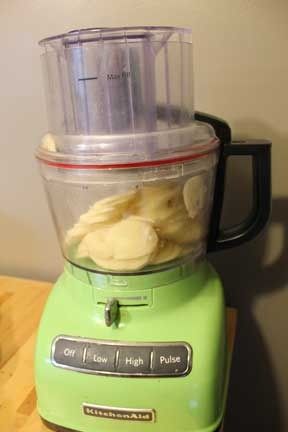
While that stayed warm I peeled and sliced the potatoes. Normally I’m a “leave the skin on because that’s where all the vitamins are” kind of cook, but with scalloped potatoes the skins tend to fall off in rings anyway so I just peeled them.  This KitchenAid food processor was my birthday present last year.  I normally use it to make butter, but it has a great “select your thickness” feature so I could get my potato slices just the way we like them.


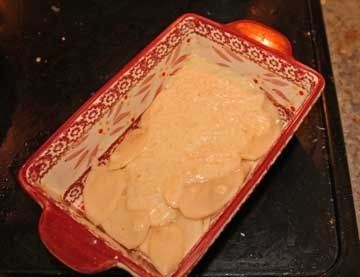
Next begin layering the potatoes in a 1 1/2 quart baking dish.  Mine is stoneware so I didn’t have to worry about sticking, but you may want to grease a metal or glass dish.  Stop halfway and add half the cheese sauce, then repeat. Cover the dish and bake at 350 for 40 minutes.  Remove the cover and bake for another 20.


Saturday, February 28, 2015

Hard Boiled Eggs in a Pressure Cooker

It’s no secret I love my pressure cooker.  It makes the best pot roast in the world.  It’s saved my bacon on several occasions when I’ve only got 30 minutes to get dinner on the table.  And I’m always looking for new recipes to try in it.  Just published is The Great Big Pressure Cooker Book with 500 recipe, and what is the first one I choose to try…hard boiled eggs.
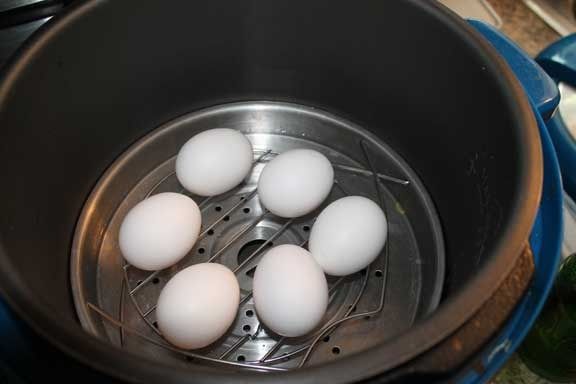

I know it’s not the fanciest of dishes, but here’s the thing-I heard you could boil eggs under high pressure or they’d explode (I knew it was possible to do so under low pressure, but my cooker only comes with one setting).  Well, I’m on a diet that allows me two eggs for a protein serving and I thought I’d eggs-periment with with a batch for my snacks.  ( I couldn’t resist the pun)

The instructions specify a 6 quart and I have an 8 quart.  My understanding was it would take my cooker longer to come up to pressure (I guess because the steam has that much more space to fill first) so I added a little more water than what the recipe calls for, but I didn’t reduce the time under pressure.  Here’s the instructions for a 6 quart electric pot.

1. Add about 2 inches of water to the pressure cooker and insert a metal vegetable steamer in the bottom.  The water shouldn’t come through the holes of the steamer.

2. Place up to 12 large eggs in the steamer.

3. Cover with the lid and seal.  Bring the cooker up to pressure and set the cooker’s timer for 3 minutes.

4. When the machine reverts to its warming cycle, unplug it and let it sit for 8 minutes.  Use the quick-release method at the end of this time.

5. Unlock the lid and transfer the eggs to a bowl.  Peel them while still warm.

 I made sure I had the full 2 inches of water in the cooker, but that brought the level up through the steamer holes so I just added a rack to the steamer.  The wires actually kept the eggs from rolling around which might be a good thing.

Bottom line:  no eggs exploded, in fact only one had a crack.  The next step of course is the peeling and I’d heard that pressure cooked eggs were easier to peel.  Unfortunately, this is also a false rumor.  I found the eggs were no easier to peel than traditionally boiled eggs.  Oh well, I guess I’ll save that problem for another eggs-periment.

Saturday, January 3, 2015

Sausage Chowder


The tree and decorations are down, the temperature is dropping, a cold rain may turn to ice overnight…the reality that the holidays are over and winter itself still lies ahead has hit me.  I need comfort food!  As long as the weather holds, I plan on sharing a comforting soup, stew or chowder with you on Saturdays.  And the bonus for myself—I’s going to scour through my all-too-large cookbook collection and select all new ones to try.  I’ll share first opinions and brainstorm how I might tweak the recipe in the future.  I might be using the pressure cooker, slow cooker or just a Dutch oven on the stove.  Here’s my first—Sausage Chowder.


Ingredients

  • 1 pound fully cooked smoked sausage
  • 1 med. onion, quartered & thinly sliced
  • 4 cups diced potatoes
  • 3 cups water
  • 2 tsp. dried parsley
  • 1 tsp. dried basil
  • 1 tsp. salt
  • 1/8 tsp. pepper
  • 1 can whole kernel corn, drained
  • 1 can cream-style corn
  • 1 can evaporated milk

Directions

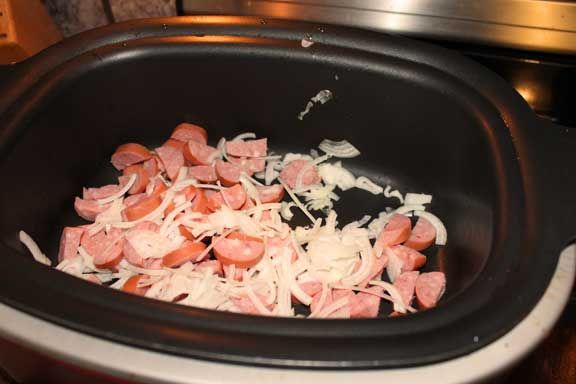
Cut sausage in half lengthwise and then thinly slice.  Brown the sausage and onion over medium heat in a soup kettle or Dutch oven.

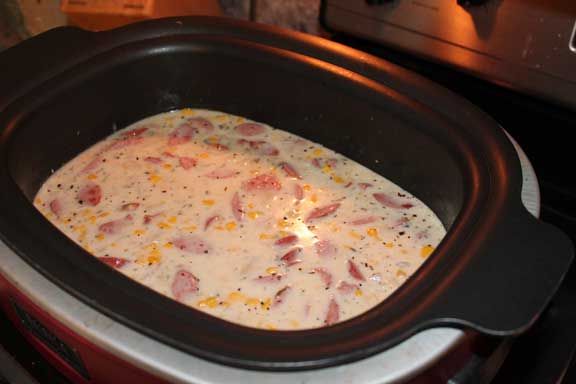
Add potatoes, water, parsley, basil, salt and pepper to pot.  Bring to a boil then reduce heat, cover, and simmer 15-20 minutes until potatoes are tender. Add canned ingredients.  Cook another 5-10 minutes until heated through. Yield: about 3 quarts of chowder – you’ll have to judge the number of servings depending on whether you use this as a main dish or an appetizer.

Family Reaction:

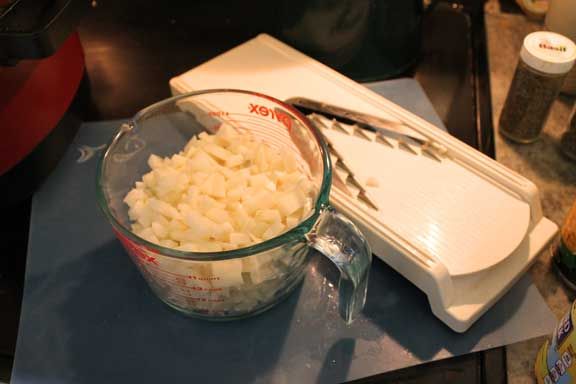
You can see I already tweaked the recipe because all I had in the house was kielbasa instead of smoked sausage.  Rather than use a Dutch oven, I cooked it all in my Ninja 3-in-1, which has a stovetop setting.  Everyone loved the taste.  My husband would have liked it to be a little thicker—maybe I’ll cut down on the water.  I’m including a picture of my diced potatoes.  For their size a 15-20 minute simmer was too long, they were too mushy.  Another thought is to mash them slightly to thicken the dish before I add the corn.  A sprinkling of cheese when serving would go well too.

Tuesday, March 25, 2014

Szechwan Chicken Pasta

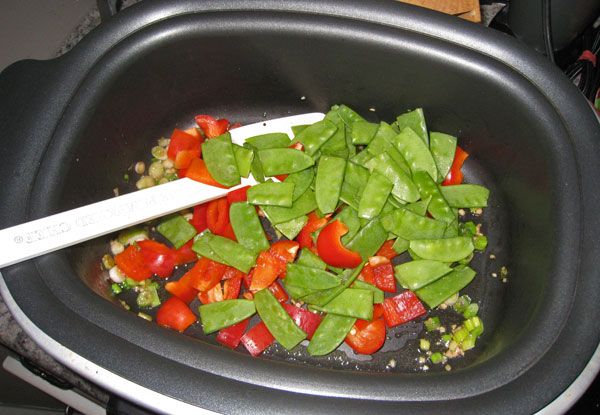
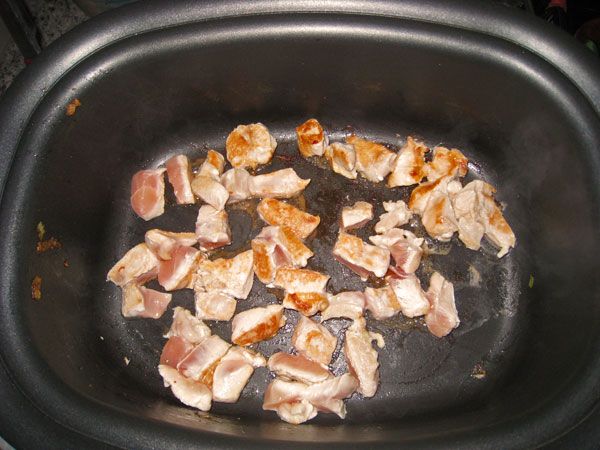
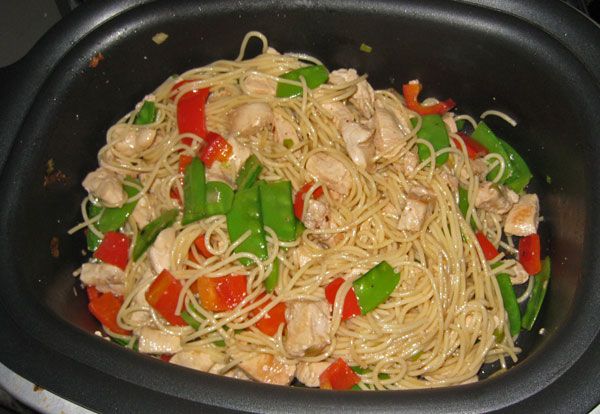
Last week we made a thick and hearty bean soup—perfect for cold weather days.  But with Spring and Summer, I prefer lighter dishes.  This recipe takes advantage of one of the first things ready in my garden—snow peas!  Normally, I make this dish in a wok, but this day I tried it in my new favorite kitchen appliance: a Ninja 3-in-1 Cooker.  You can do it all in here, including cooking the spaghetti noodles beforehand.

Szechwan Chicken Pasta

  • 1T. vegetable oil
  • 4  boneless, skinless chicken breasts
  • 2 C. fresh pea pods
  • 2 cloves garlic
  • 1 large bell pepper (I prefer red)
  • 2 green onions
  • 1/4 C. soy sauce
  • 2 T. white vinegar
  • 1 t. chili oil
  • 1/2 t. crushed red pepper flakes
  • 8 oz. spaghetti, cooked per directions (I prefer to break in half)
  • 1/2 C.  roasted peanuts

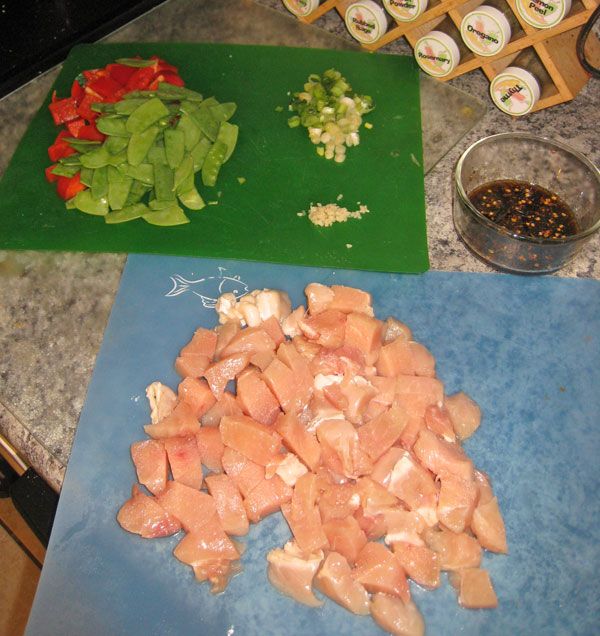
The key to stir frying is to have everything prepped and ready while you heat the oil.  You won’t have time to leave the pan and make the sauce or chop anything else.  Also, practice kitchen safety and don’t cut the veggies on the same mat as the raw chicken.

So, rinse & pat dry the chicken. Cut into 3/4 inch cubes.  Coarsely chop the pea pods. Mince the garlic, slice the green onion. You may either slice the bell pepper or chop in into chunks roughly the size of the pea pods.  In a bowl combine soy sauce, vinegar, chili oil and red pepper flakes.

Heat vegetable oil in wok over high heat (or set Ninja on Stove Top High) Add the garlic and stir fry for 15-20 seconds before adding the other vegetables.

Stir fry for 1-2 minutes until crisp-tender, then remove from pan.

Add 1/2 the chicken to the pan, stir fry 3-4 minutes (chicken needs to be cooked through, not just browned on the outside) and remove.  Repeat with the remaining chicken.  Return all chicken to the pan, add sauce, veggies and noodles.  Stir to coat & heat through.  Sprinkle portions with peanuts to serve.


I'm linking up with...


April's Homemaking

Tuesday, March 18, 2014

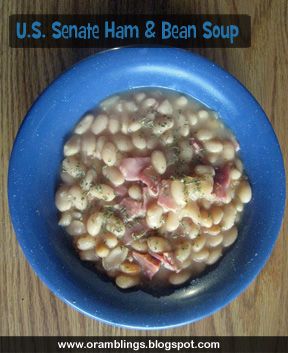
U.S. Senate Bean Soup

It’s wacky weather time – one day in the high 70’s, the next is snowing and we don’t even reach the freezing mark.  And when it’s cold I want the comfort of a thick soup.  This recipe was passed on to me from someone who knows I like freezable dishes.  A version of this soup has been served daily in the Senate dining room for over a century (no political jokes about “hot air” and beans at this time).

U.S.Senate Bean Soup

  • 1 lb. dried great northern beans
  • 1 meaty ham bone
  • 2 large onions, chopped
  • 3 garlic cloves, minced
  • 1/2 C. instant potato flakes
  • salt & pepper to taste
  • parsley or chives  for garnishing 
Place beans in a saucepan and cover with water; bring to a boil and boil for 2 minutes.  Remove from heat and let soak for 1 hour.  Drain and rinse beans.  In a large Dutch oven, place beans, ham bone, and 3 qts. of water. Bring to a boil, reduce heat, cover and simmer for 2 hours.  Add onions, garlic, potatoes, salt & pepper.  Simmer 1 more hour.  Take the bone from the soup, remove the meat, dice meat and return to the soup.  Serve with chives or parsley garnishment.  Makes 2 1/2 qts.
 
 
I'm linking up with...
 

April's Homemaking
 

Wednesday, February 19, 2014

Taco Pizza

Last year I wrote a post about the importance of traditions/consistency to my son called If It’s Tuesday It Must Be Pizza Night.   A year later my son hasn’t changed – sometime around 3 or 4 in the afternoon my son will remind me that it’s time to make the dough for dinner.  And he still wants pepperoni.  Mom and Dad on the other hand are ready to move on to something different.  Since we can’t change the pizza tradition, I can at least start being creative with the toppings.  So here is last night’s creation—a taco pizza.  It really wasn’t that hard once I determined it needed to be built in steps.  If you make pizza at home I’m sure you already have your favorite recipe for dough so we’ll skip ahead…
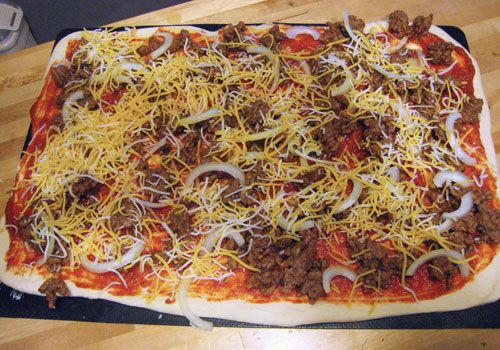
While the dough is rising brown 1 to 1 1/2 pounds of ground beef and season with a packet of taco seasoning using just enough water to incorporate the spices (most envelope directions say to add a cup but that would make for soggy pizza).

Roll out your pizza and cover with sauce.  Distribute the ground beef, sliced onion, and chopped jalapenos if you’re daring.  Sprinkle Mexican blend cheese on top.  Then bake in the oven (I use a pizza stone so it takes about 10 minutes in a 425 oven).

When the pizza comes out, add shredded lettuce, chopped tomatoes, crushed Fritos or tortilla chips, taco sauce or salsa, and sour cream (I actually used plain non-fat Greek yogurt last night and didn’t hear any complaints).  It was a hit!  My husband asked for some in his lunch today.   If you think you’ll have leftovers you may want to hold off on the crushed chips until after you reheat the pizza to keep them from getting soggy in the fridge.

Monday, February 3, 2014

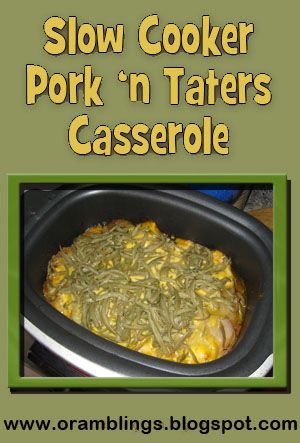
Slow Cooker Pork ‘n Tater Casserole

Last Friday was one of those really good days.  My son and I had our school wrapped up by noon.  We went to a friend’s home for science co-op and then some play time.  Because I had put dinner in the slow cooker before we left, I could let Schnickelfritz play longer and (and I could spend more time with the other moms) without that nagging little voice in my head asking “What’s about dinner?” 
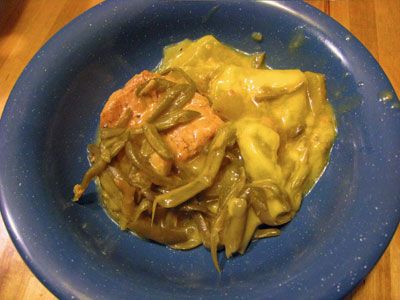
When we returned home, the house already smelled wonderful and I wasn’t running from fridge to pantry trying to assemble something before my husband got home.  Isn’t that one of the most satisfying feelings in the world.  This is one of my husband’s favorite dinners.  I love that there are only  5  ingredients and the instructions. are so simple I don’t need to refer to the recipe card.


Pork ‘n Tater Casserole

  • 6 boneless pork chops (1” thick)
  • 4-5 medium potatoes, peeled and sliced
  • 1 can cream of chicken soup
  • 1 can cream of celery soup
  • 15 oz. can French cut green beans
Since I was using my Ninja 3 in 1 Cooker,  I could brown the pork chops first (nice but not necessary).  Layer the ingredients in your slow cooker in the order listed.  Cover and cook on low 6 hours.  The chops will be fall apart tender so either remove them carefully to serve whole or break apart and stir with a large spoon to make more of a goulash.


 I'm linking up this recipe at

Tuesday, January 28, 2014

Universal Casserole Recipe

What’s for supper?  The question comes up—daily.   If it’s Tuesday I know it’s pizza night.  If I’ve just gone shopping for ingredients for the new recipe I want to try, then that’s a no brainer too.  But there’s many days at about 4:00 when I find myself looking at the contents of my fridge and cupboards and wondering myself what’s for supper.  At this time of day it’s too late to start browsing through cookbooks for something where I happen to have all the ingredients and can manage to use up the leftovers in the fridge.

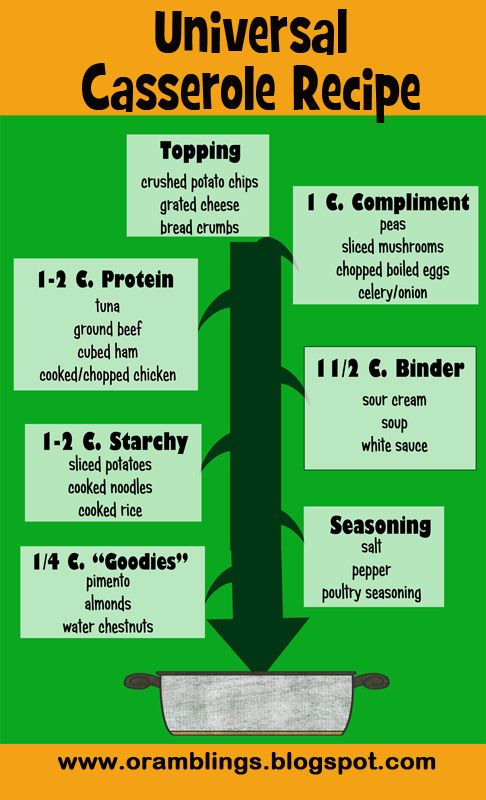
Now I’ve been cooking for a long time so I’ve gotten pretty good at knowing what goes together, but if you don’t know  here’s a generic recipe I got in an old Tightwad Gazette newsletter.  It pretty much sums up what I try to do.

The goodies are optional (these tend to be pricier ingredients).  Learning which seasonings to add is a matter of experience but you should find a list of spices to compliment main proteins in any good cookbook. When you mix everything together you can add up to a 1/2 cup of milk or stock if things seem dry.  Put everything into a greased casserole dish and bake at 350 for 30-45 minutes.

Monday, August 19, 2013

You Can’t Take the Heat and You Can't Get Out of the Kitchen

I don’t want to sound like I’m complaining – we really have had a much cooler summer than last year during our drought.  Still there have been days when the last thing I wanted to do was turn on the oven – especially pizza nights when I crank it up to 425 and need to let the pizza stone preheat.  So last month I asked for suggestions on putting dinner on the table without heating up my kitchen.  Here are some of the responses.

The  one response we’ll skip over was to make ….reservations!  Funny, but let’s assume that’s not an option.  After all, if you can afford to eat out through a long hot spell you can afford to crank the air conditioning. 
Salads and cold sandwiches came up frequently.  If you do buy cold cuts for sandwiches (my husband takes a sandwich to lunch daily) try this money saving tip.  I buy a half ham from the meat dept. and take it to the deli for slicing.  I wait until it’s on sale (last week I got 7 pounds for $2.29/lb.  The same meat in the deli case was $6.98!  I divide up the sliced meat, vacuum seal and freeze what we won’t get to for a while.

Grilling and cooking out is another option.  Yes it involves heat but the heat stays outdoors.  Someday I’m going to learn to make a pizza on the grill, but I’ve read that you shouldn’t use those Pampered Chef pizza stones over an open flame.  We also enjoy Dutch oven cooking (there may be a series coming this fall as my son works on his cooking merit).  Baking in a Dutch oven does have its drawbacks as you have to rotate the oven over the coals and rotate the lid every 15 minutes to keep the heat even.  That means you have to stay close by the fire pit in the outdoor heat.  I’d much rather save campfire cooking for the fall.

By far the most popular answer was using the crock pot.  Everyone knows you can use cheaper cuts of meat in a slow cooker and they still come out moist and tender.   It has the added benefit of being a hands-off cooking method.  I can go about my day—teaching, cleaning, running errands,  and my automated sous-chef takes care of everything.  The one drawback is that if you’ve forgotten to start your meal early enough in the day dinner may be too late or not worth starting at all (then you back to making reservations).

Today,  I’m going to share a recipe I made in my pressure cooker.   Like it’s slow cooking cousin, it’s not going to heat up the kitchen.  I LOVE  my pressure cooker for last minute dinner prep.  In fact you can start out with frozen meat and dry pasta and still put supper on the table in about 15 minutes.  My PC is electric, but nothing fancy—just a pot with a temperature control on the cord.  There a two lines on the pop-up gauge for me to judge high and low pressure (I almost never use the latter).  And there is a quick release valve.  Those are all the features I need.  I figure those models with all the fancy buttons just have that much more that can go wrong with them.  Now on to the recipe, based on one found in Bob Warden’s Great Food Fast.


2 Tbs. oil 3 1/2 C. beef broth
2 lbs. stew meat, cubed 1 Tbs. fresh chopped cilantro or 1 tsp. dried
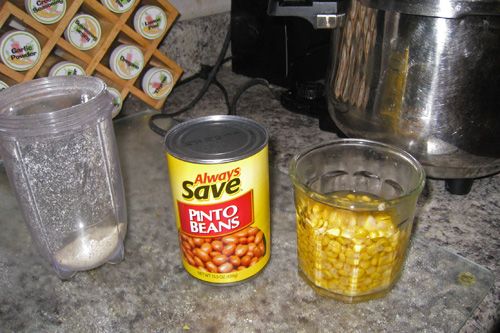
1 red onion, chopped 15 oz. can pinto beans, drained
3 cloves garlic, minced 1 C whole kernel corn
1-2 Tbs. chili powder 2 Tbs. cornmeal
1 tsp. cumin 6-8 oz. can refrigerated biscuits
2 bell peppers, chopped salt and pepper to taste
15 oz. can diced tomatoes with green chilies shredded Mexican cheese blend (optional)


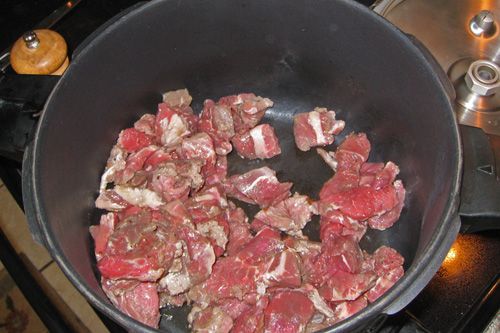
Brown the meat in oil over high heat.  Season it to taste with salt and pepper.


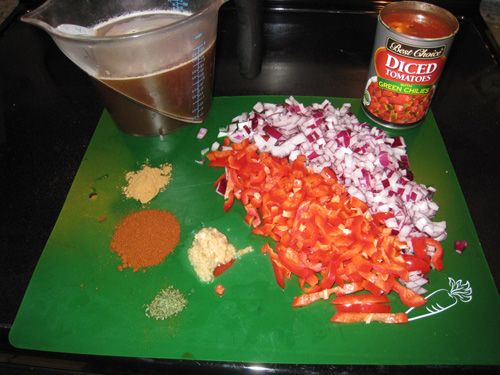
Add onion, garlic, chili powder, cumin, bell pepper, tomatoes, beef broth, and cilantro.  My family prefers red bell peppers but for presentation you may wish to substitute green or any other color available.  Securely lock the pressure cooker lid and cook for 20 minutes on high.


Quick release the pressure.  With the lid off add the beans and corn.  Bring to a simmer over high heat.  Stir in the cornmeal and simmer till thickened ( I make my own cornmeal grinding the grains in my Magic Bullet).


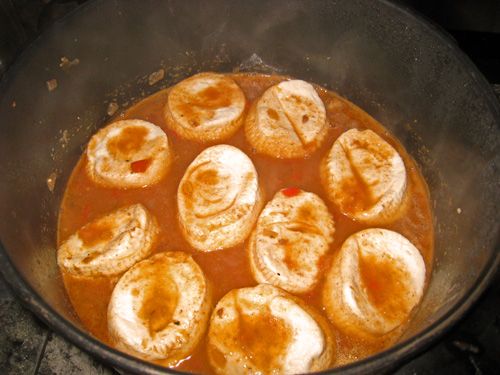
Separate the biscuits and drop in the pot to simmer 10-15 minutes before serving.  Serve in a bowl topped with shredded cheese.

Need some more recipe ideas?  Check out what my Homeschool Review crewmates have to share here (on Aug 20.) 

Thursday, July 11, 2013

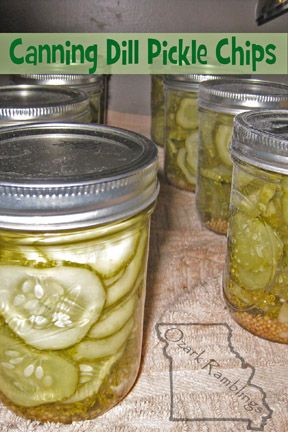
Canning Dill Pickle Chips

One of my favorite memories growing up was staying at the farm where my grandmother grew up and helping my great aunt can her dill pickles.  Actually, eating the pickles was better but canning them was still fun.   I tried  to get my aunt’s recipe – she’d long since forgotten it and neither of her daughters had a copy.  Public Service Announcement:  Save your recipes for your children!   Food memories can be as much of a cherished heirloom as any you leave behind.

Anyway, I ended up using a recipe from the Ball Blue Book for Hamburger Dills.

4 pounds 4-inch cucumbers                                            2 heads fresh dill per pint

6 Tbsp. canning salt                                                         1/2 tsp. mustard seed per pint

4 1/2 cups water                                                               2 peppercorns per pint

4 cups white vinegar (5 % acidity)                                  1 garlic clove per pint (optional)

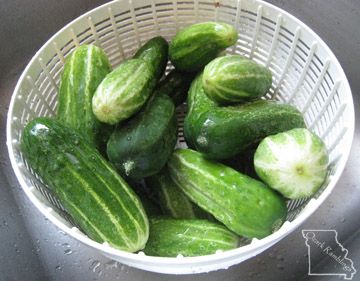
Wash the cucumbers and drain.  Cut them into 1/4 inch slices (crosswise or lengthwise) and discard the blossom ends.  Also start heating the water in the canner.  I put a round cooling rack in the bottom and set my clean jars inside to heat up.  I put the lids in a separate smaller pan to heat as well.

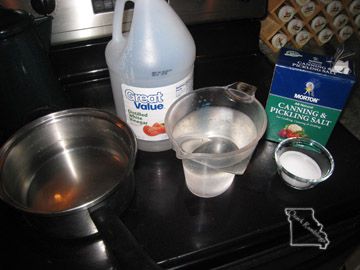
Combine salt, water and vinegar in a large saucepan and bring to a boil. 

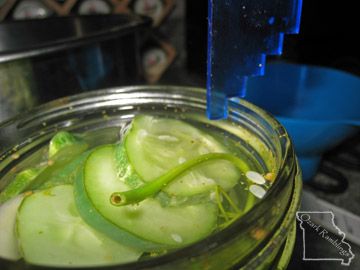
Remove the jars one at a time from the water.  Pack cucumbers leaving 1/2 inch headspace.  Add 2 heads of dill, 1/2 tsp. mustard seed, 2 peppercorns, and 1 clove garlic (if you like) to each jar. Ladle hot liquid over cucumbers leaving 1/4 inch headspace.  Remove air bubbles.  Don’t use a metal knife to remove the air bubbles –use something plastic.  Ball makes a great plastic tool just for this purpose and one end has notches to help you measure headspace.  Adjust the two-piece caps.

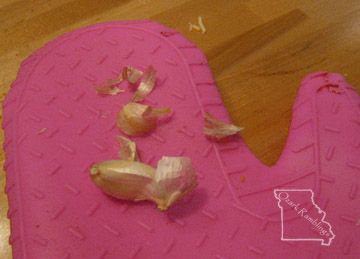
By the way, I found a great way to peel the paper off my garlic.  I just sat it on my silicone oven mitt, folded over the finger area, pushed down and rolled the clove in small circles.

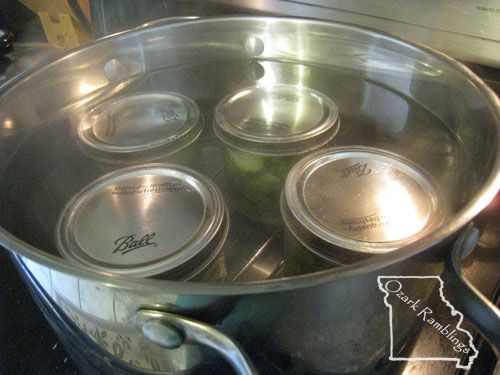
Make sure there’s at least an inch covering the jars in the canner—two inches would be better.  Process for 15 minutes at a rolling boil.

Tuesday, July 2, 2013

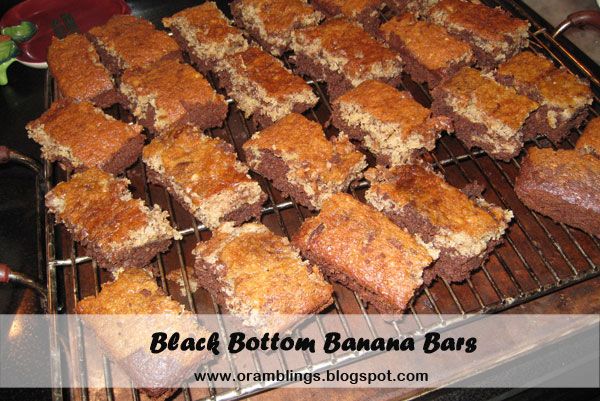
Black Bottom Banana Bars

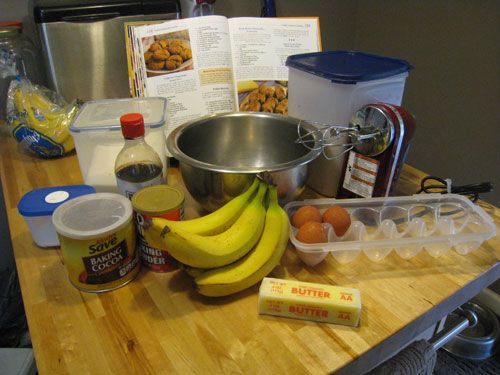
This week the youth at church were having a spaghetti dinner and baked goods auction to raise money for their mission trip.  Here’s what I contributed.

Ingredients

1/2 Cup butter, softened                                                  1 1/2 cups all-purpose flour

1 Cup sugar                                                                       1 tsp. baking powder

1 egg                                                                                   1 tsp. baking soda  

1 tsp. vanilla extract                                                            1/2 tsp. salt

1 1/2 cups mashed ripe bananas                                     1/4  cup cocoa

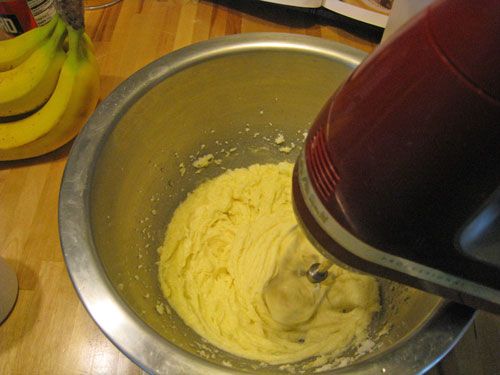
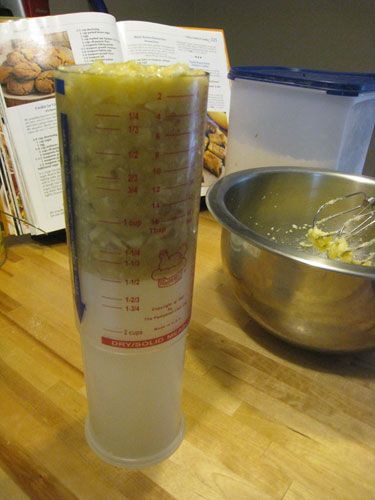
Cream together the butter and sugar, then add the egg and vanilla extract.  Beat until thoroughly combined.   Mash the bananas (approx. 3), but measure them to ensure you have enough.  This measuring cup is great for shortening and sticky things like banana.

In a separate bowl combine flour, baking soda, baking powder and salt.  Add to the creamed mixture.  Remove about 2 cups of the batter and reserve it to the side.  Add the cocoa to the remaining batter.  Spread the cocoa batter into a well greased 9X13 baking pan.  Spoon the reserved batter on top and swirl it with a knife or spatula.   Bake at 350 for 25 minutes or until a toothpick inserted near the center comes out clean.  Cool before cutting into bars.  Yields: 2 dozen.


Tuesday, June 25, 2013

Pork in a Pan

Last month I reviewed Simplified Dinners, a cookbook that was more about teaching cooking processes than giving recipes with specific ingredients and measurements.  I mentioned that I didn’t have a problem with this since I cook on the fly most of the time anyway.  This is one of those dishes—I think I first saw it at a demonstration at the Indiana State Fair.

I begin with thinly sliced boneless pork—I’ve used tenderloin and loin.  If all you have is thicker cuts, pound them until they’re no more than 1/2 inch thick.

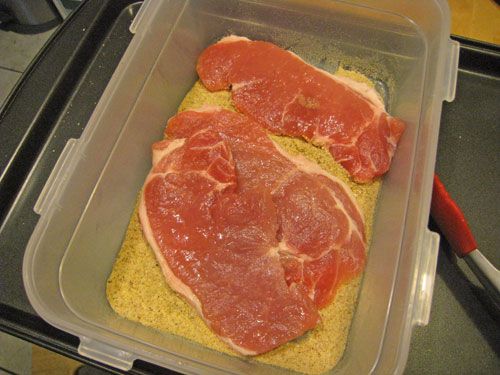
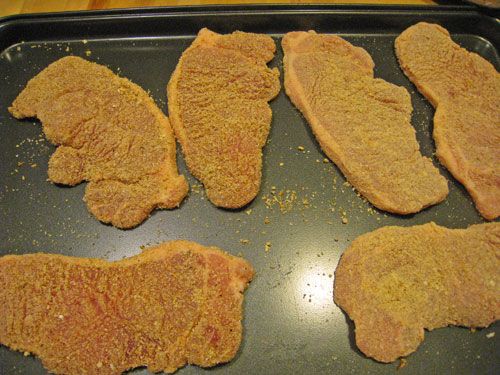
Then I grab a sealable container and fill it with coating ingredients.  For a base I’ve used flour, Wondra, breadcrumbs or Panko.  Then I add onion powder, garlic powder, pepper and salt—this is all done to taste and if you’re watching your sodium you can use salt substitute mixes.  Put in one or two pork pieces at a time and shake to coat.

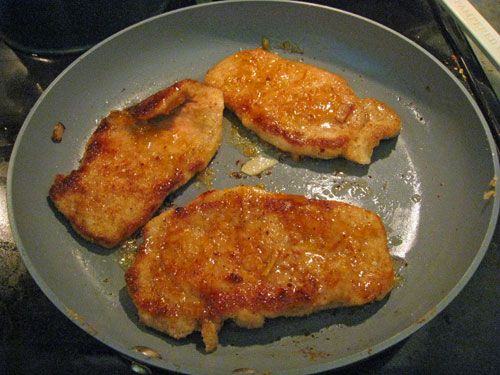
I add a little olive oil to a frying pan over medium high heat.  When the oil starts to scatter around I put in the pork chops (at least that’s what I used when I took these pictures).  Don’t turn the pork until the top side appears to be getting moist.  Then I spoon preserves onto the browned side.  I’ve used orange marmalade, apricot preserves, and peach jam in the past but I’m thinks even raspberry or blackberry would work nice.  The preserves start to melt and I flip the pork again on each side to help the sugars caramelize.

Related Posts Plugin for WordPress, Blogger...