Wednesday, May 11, 2011

Spice Rack Makeover


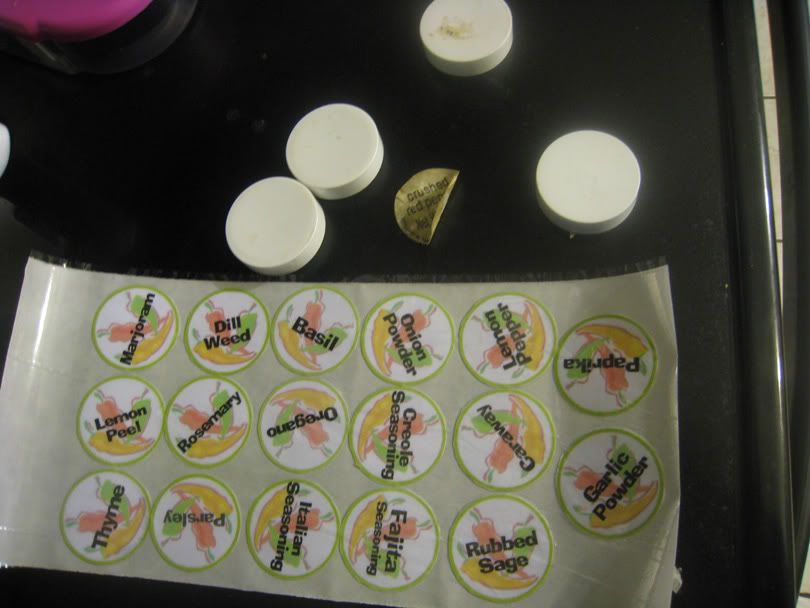
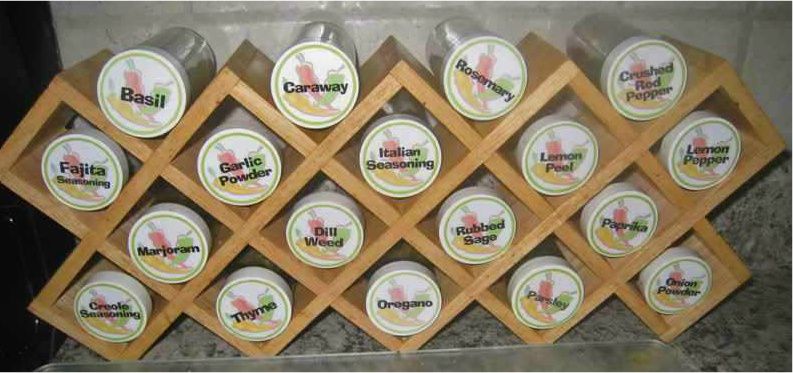
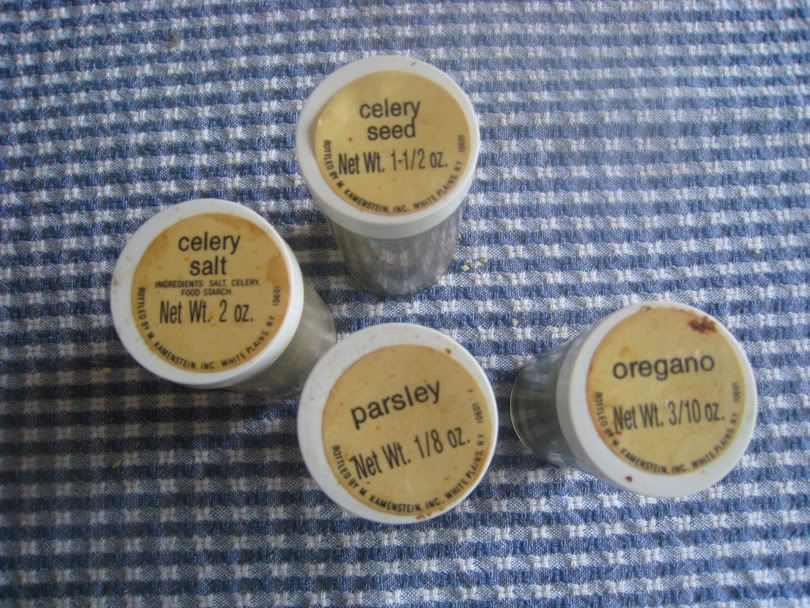
I can't tell you how long I've owned these spices jars but they were certainly showing their age.  For cooking convenience I store them right next to the stove and years of grease splatters and other food spills have not only discolored the labels but some lost their adhesive and just slipped off.  I could have gone the easy route and just purchased a new spice rack but the frugal German in me  decided to scrounge around the house and see what I could come up with.  In the end this worked out better because I could customize the labels and fill them with the spices I use, not necessarily the ones that come in the set (as I worked on the jars I discovered some were still sealed and never been used in at least a decade--a waste of valuable counter space).


 My first thought was the Graphics Toolbox program we reviewed for the Homeschool Crew last year.  I still use it all the time for editing pictures, making lapbook components, etc.   I checked the clip art files on my computer and found a vibrant picture of some chili pepper; cute but a little too vibrant, especially when you want to add the name of the spice over the top.  GT lets you copy an image while adjusting its transparancy so I was able to make a more muted background.   I played around with text color as well--trying all of the colors from the original clip art.  In the end I decided to go with basic black since it just popped out so nicely.  I made hollow circles in the proper size to fit the lids and put them around each picture.  I printed everything on a sheet of photo paper but before cutting out each label I ran the sheet through my Scotch Laminator (to hopefully protect the new labels from grease splatter).  I chose hot lamination over my Xyron because I've learned the hardway that cold lamination doesn't hold adhesive well at all.  


 After cutting out the labels, I ran the circles through my xyron with the permanant adhesive cartridge.  And below you can see my finished results.


Thursday, May 5, 2011

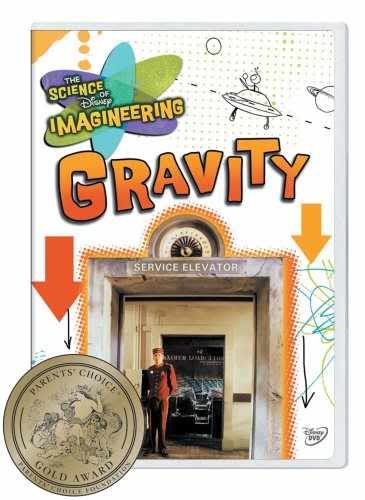
Science of Disney Imagineering: Gravity

What goes up must come down.  We've all heard that saying before but this week we've actually begun to study the concept of Gravity with another Disney educational DVD.  We don't usually think about gravity because we've always been exposed to it.   The imagineers discover ways to mani

Asa's Invention:    Fond memories of watching men tossing and twirling pizza dough lead Asa to create a robotic counterpart for a restaurant in Tomorrowland.  After testing the machine several times he is left with several splotches of goo stuck to the ceiling above him and with time he is dodging the dough-bombs as they fall.

Defined Terms:  gravity, 1 G,  air resistance, friction, freefall, centrifuge, centripical force, Newton's 1st and 2nd laws of motion

Disney Rides and Attractions that exemplify the theme:

At first you may not think of Mission Space as a gravity ride but the imagineers use centripical force to alter our perceptions of gravity.  The backs of our seats begin pushing us towards the axis of the ride (simulating high g's of a launch) and when the spinning motion stops we misinterpret the lack of force as the weightlessness of outer space.  Asa does the famous spinning a bucket of water trick to model the ride.

Next we head to the Matterhorn Bobsleds, the first steel tube track created.  We learn about the need for a lift hill to take the cars up to a point where we can let gravity pull us down along a predetermined course of twists and turns.  "Falling with style" as Sherriff Woody might say.  Asa and another imagineer also discuss Newton's 1st and 2nd laws of motion.  An object in motion stays in motion--and in a straight line.  Because the curves in the track force us out of that straight line we really notice the changes when we go around corners.

Next we see a montage of other Disney coasters: Rockin' Rollercoaster, Expedition Everest, Space Mountain and Califormia Screamin'.  The imagineers discuss the best places to sit to enhance different aspects of the ride.  Everybody is going over the same track but there's something called the long train effect that makes the ride a little different from front to back.  Do you want to esperience the most g's?  Then sit in the front of Rockin' Rollercoaster.  Do you want the greatest speed going down hill?  Then the back seat is your best choice.  (Incidently, this is how I first inticed my son to try his first roller coaster.  We sat in the very front row because I knew we would be halfway down the hill before the train started to pick up speed and momentum).

And of course you know we couldn't leave the subject of gravity without talking about the Tower of Terror.  If the ride just hoisted you up to the top and let you freefall, you would travel at the same speed as your seat and it wouldn't really be that thrilling.  The imagineers attached a cable to the bottom of the car so they can pull it down faster than the force of gravity.  This makes your seat fall out from under you for a heart-stopping moment.

The Quiz:  15 questions

Try It Yourself:  Okay, this time I think the imagineers were a little too ambitious when they give us the instructions for building our own hovercraft.  It's an expensive project and my 8 year old son can't use power tools.  However, we homeschooler have been known to do some pretty crazy labs and experiments.  If your kids know how to handle shop tools I think you could earn cool parent for life points here and be named the best house on the block.


Monday, May 2, 2011

Civil War: Camp Jackson Affair

I almost labeled this post "Why I Like Homeschooling Part 4."  The reason being, since I'm not tied to a scope and sequence I can teach subjects as the opportunity arrives.  In case you're not aware, this is the first year of the 150th anniversary of the American Civil War.  For the next four years we will be treated to re-enactments of most of the battles and skirmishes that resulted in the highest loss of life of any war in American history.  Few people probably know that Missouri was the site of more of these skirmishes than any state but Virginia and Tennessee, the first occurring just eight days after the attack on Fort Sumter.

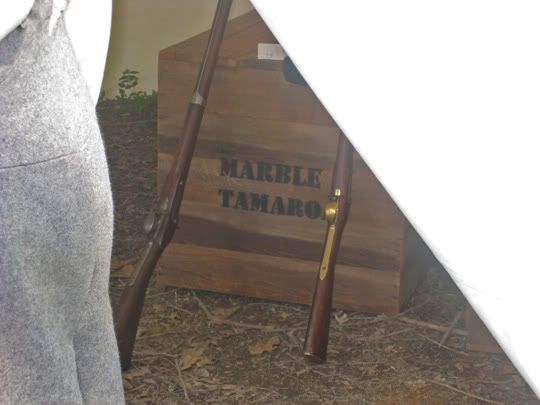
This past weekend was the re-enactment of the first Missouri involvement in the War--the Camp Jackson Affair.  Missouri was considered a "border state,"  one of the few to allow slavery but remain in the Union.   The state legislature had voted against secession, but to remain neutral--providing neither arms nor men to either side.  Governor Jackson was in favor of joining the Confederacy and had correspondence with their new government.    St. Louis had a large arsenal with over 40,000 guns and there was concern that he would give these to the Southern cause.  A shipment of  howitzers, siege guns, rifles, and ammunition was sent from Louisiana to the Missouri militia in hopes that they could seize the arsenal.  The shipment arrived in crates labeled "Tamoroa marble."  Union Captain Nathanial Lyon used a force of 6000 volunteers (mostly newly arrived German immigrants) and army regulars to capture the militia before the plan was carried out.   Sadly as the surrendered militia was marched through St. Louis, the watching crowd hurled rocks and insults at the German volunteers.  Just like the Boston Massacre, no one can say for sure what happened next but the end result was 28 spectators killed and 50-75 more wounded.

Schnickelfritz and I didn't watch the actual re-enactment (women and children were killed) but we enjoyed a morning of period music, cannon fire, education, and espionage!


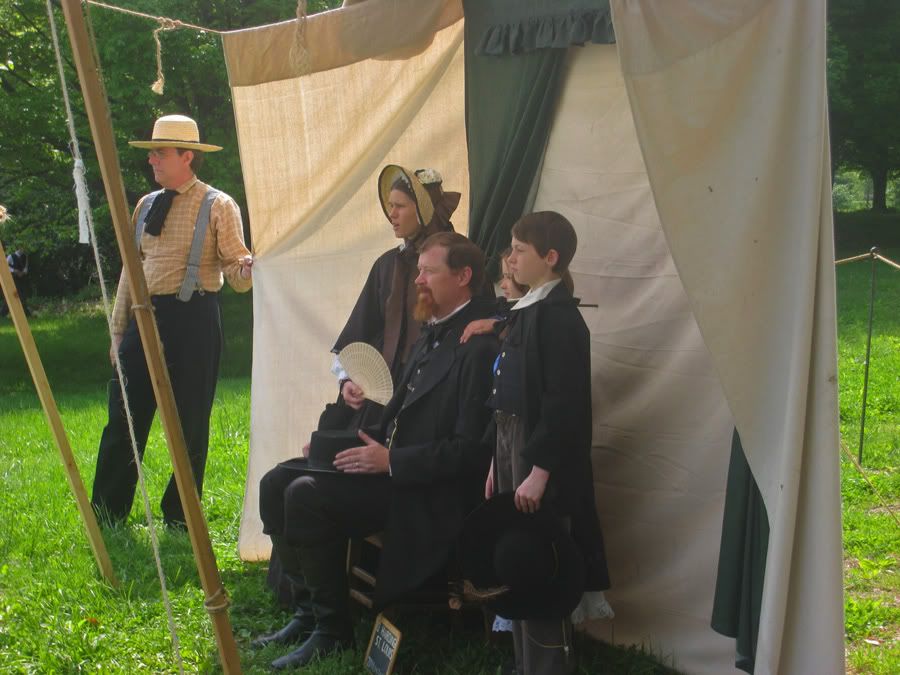
A re-enacting family take time to get a family portrait using real tin-type photography.  You can see the arm of one of the devices designed to help them hold still for the five minute procedure sticking out behind the boy's back.  Thank goodness for instant digitals!


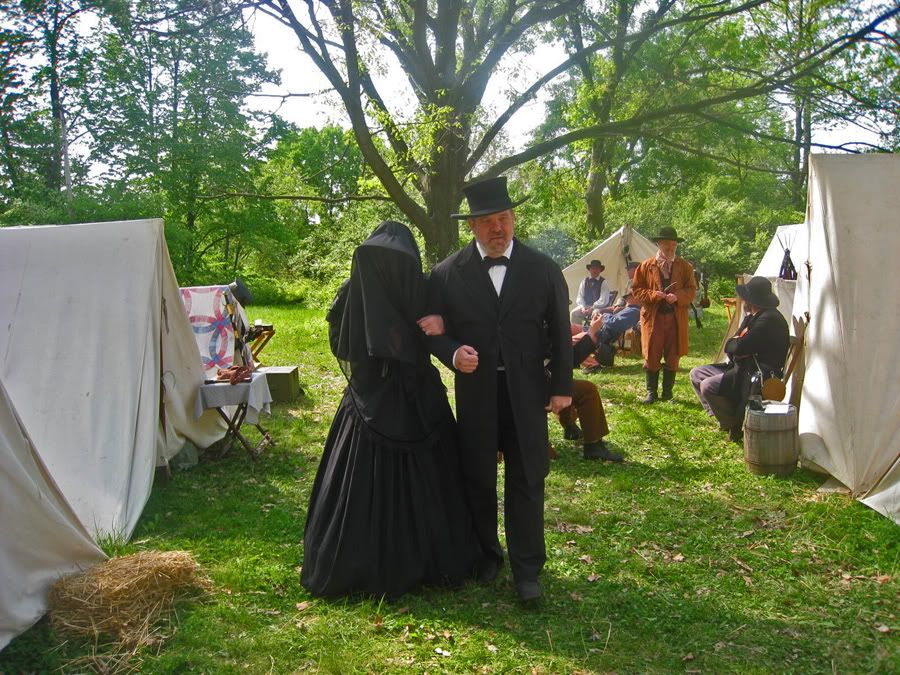
We encountered this "grieving widow" several times on our adventure.  Fritz always hid behind my back when she was near.  At first I assumed this was the same way some kids are frightened by clowns or theme park mascots.  But as I studied her closer I noticed this lady was "packin' heat" and there was a bearded face under the veil.

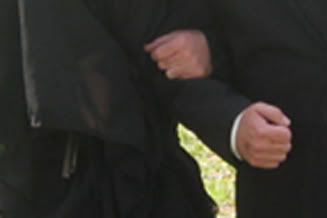
   It seems we'd encountered Capt. Lyon in disguise as he gathered intelligence on the Militia Camp.  Rumors have said that he did disguise himself as a farm woman in order to spy.  His photographs show him with a beard so perhaps he did have to hide his face behind this deep black mourning veil.  I bent down to whisper to Fritz and let him in on the secret and from then on he was intent on following the "Widow" around and see what would happen next.  As the couple walked away from the militia camp my son ran up to ask if it was indeed Capt.  Lyon.  Placing a finger over where his mouth would be, the figure gave a silent nod.  (Note to future spies: if you are going to disguise yourself as a widow, be sure to cover your hairy hands with gloves.  Some of the militiamen thought you had a glandular problem).

The widow and her escort quickly discovered a guarded tent.  They tried to discover why a crate of marble would need such protection.

Such attention to detail.

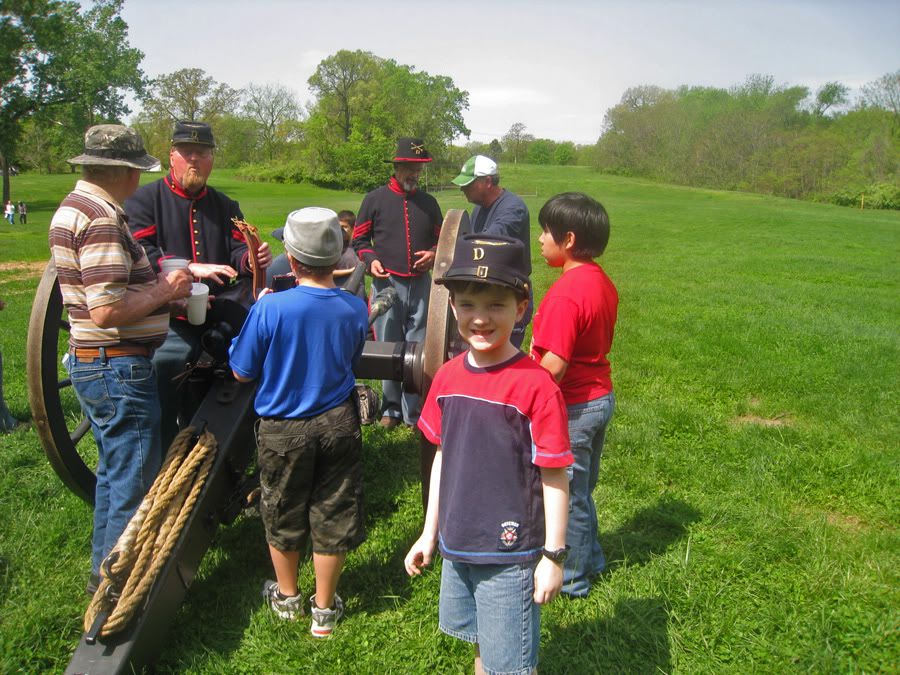
A member of the Illinois Artillery Company D lent Fritz his hat for this picture.  If you take your kids to any event you may want to bring hearing protection as it was quite loud.


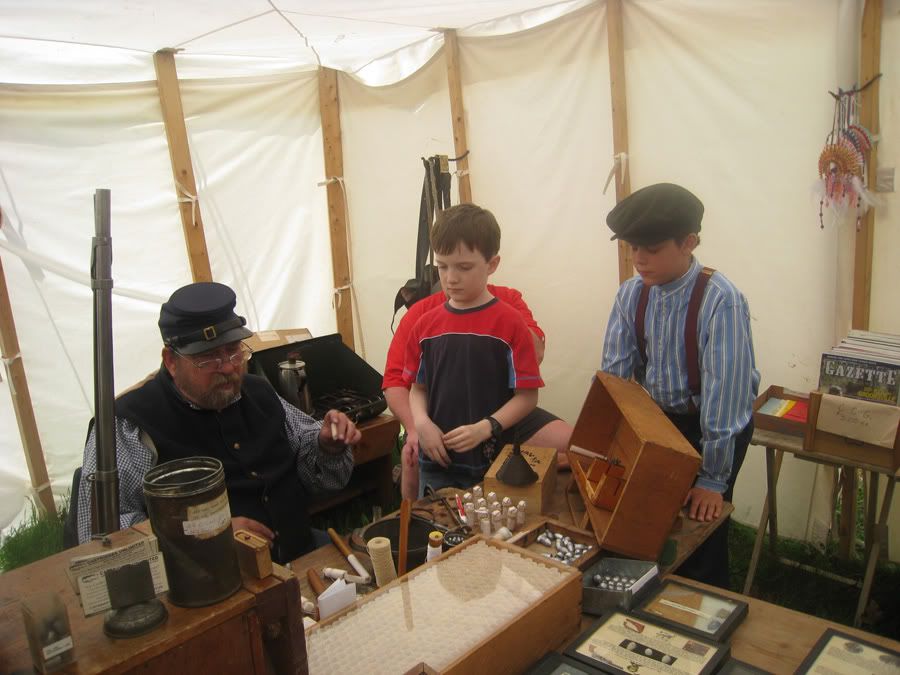
This gentleman is a fine example of the passion and attention to detail that these re-enactors have.  He is giving a lecture on the history of ammunition and creating realistic (but dummy) cartridges for the soldiers to carry in their ammunition cases (that will probably never be seen by the viewing public).

As I said, Camp Jackson is just the start of the conflict so you've got plenty of time to check with your states tourism division and see if there are any Sesquicentennial events in your state.

Friday, April 29, 2011

Review: Greek 'n' Stuff


It has always been my intention for Schnickelfritz to study a foreign language.  He's taken a few co-op classes that give some Spanish vocabulary along with a study of Latin American culture.  Imagine my surprise when we were chosen to do a long-term review of actual Latin.   Greek 'n' Stuff provided us with Level 2 of their curriculum Latin's Not So Tough!  I looked at the title and certainly hoped so.  I had studied French, my husband had picked up some Spanish.  The only family member I knew who had studied Latin received her only F in the class, so she wouldn't be of much help.  Our materials included a student's worktext ($18.95), a CD pronunciation guide ($10),  and an answer key($4).  The material could have also been purchased as a kit for $36.45 and included a set of quizzes/exams and flashcards on a key ring.  We used the pages in the back of the worktext  to cut out and paste our own flash cards.

Although this was our first exposure to Latin, we began with Level 2.    Lesson 1 is intended for VERY young students and only covers the alphabet, diphthongs and special consonants.  All this material is covered in the first four lessons of Level 2.   In the remaining 32 lessons the student will learn 50 vocabulary words, have 5 vocabulary practices and a 2 part final review.

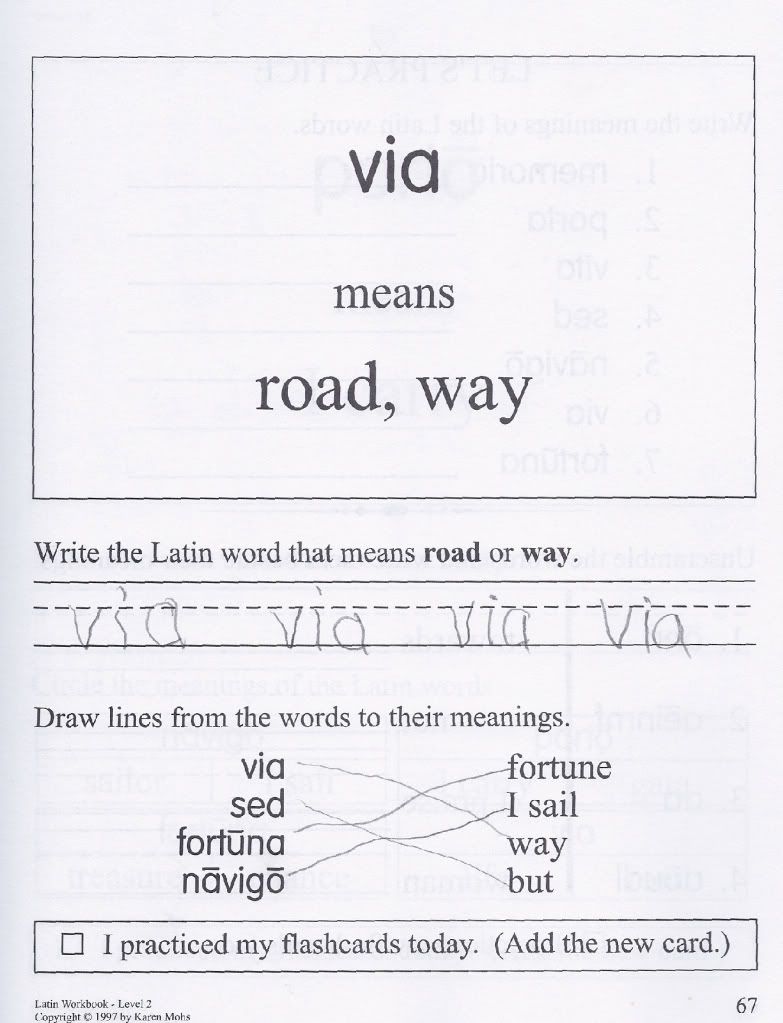
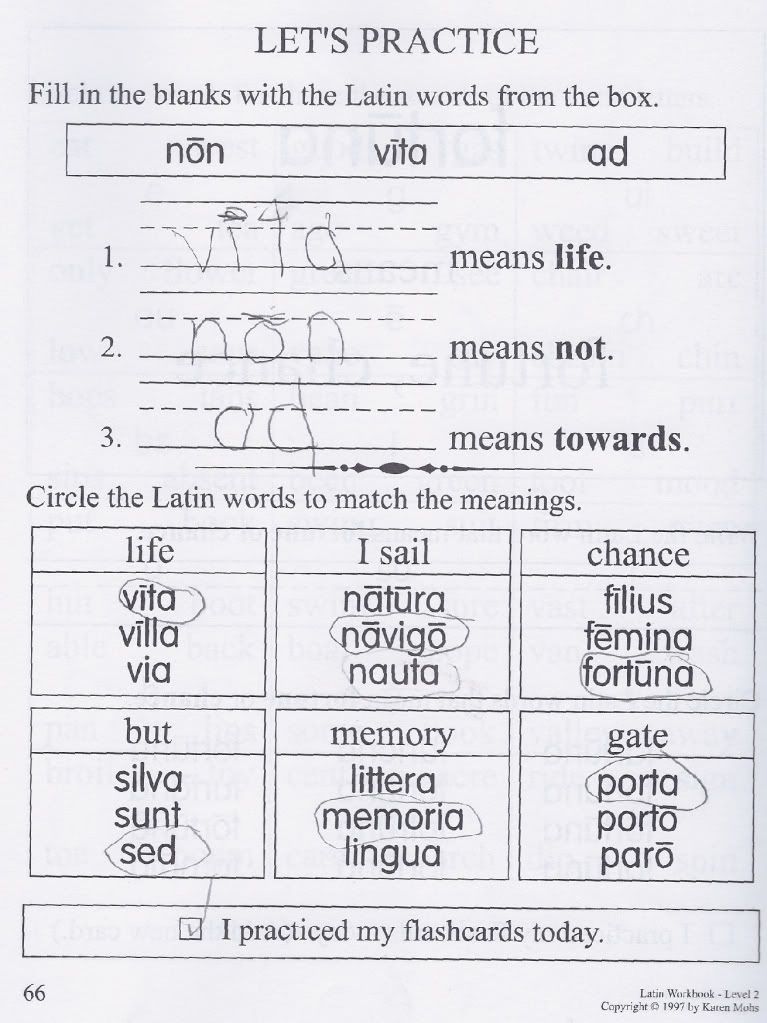
 A typical lesson begins with a half-page box showing the word and its definition.  The student then practices writing the word while repeating it out loud.  The writing space includes a dashed center line common in elementary level penmanship.  Next comes a cumulative review of vocabulary learned.  This may take the form of true/false  questions, drawing connecting lines to words and their definitions,  circling the correct word from a series of similarly looking words.   This process repeats itself with the second vocabulary word of the lesson.  At the bottom of each page is a reminder to practice with the flashcards.
I did appreciate the amount of review built into the program, both the flash cards and review exercises.  In my experience with learning French we would study a list of vocabulary around a theme—say learning the names of food, but after the test for that chapter we’d move on to a new theme and never see the words again until the final exam.  Rather than set up the typical flash card with a word on the front and English translation on the back, we put each component on its own index card.  That way we could play games like Memory.  I might hide the English translations around our basement and then hand Fritz one Latin word at a time.  He would then race around the basement looking for the match.

The course was true to its name, the Latin we learned was not so tough especially at the pace we learned it.  There are 36 lessons so I presume it is meant to cover one year.  Fritz was able to move along more quickly.  The disappointing factor is that after finishing the book, were still not able to form one complete sentence.  It's a good thing the program is designed for elementary students because older children would be very frustrated with the pace.  The nouns we learned jumped from obvious choices (boy, girl, son, daughter, water) to things that would seldom come up in normal conversation (trumpet, sword, sailor)  The lessons don’t teach us any articles (a, an, the) and I don’t even know if they’re used in Latin.  The choice of verbs seemed odd as well (all are taught as the 1st person singular conjugation): I capture, I fight, I seize.

I really had to step back and consider how studying a dead language differs from learning French.  I studied to be able to communicate as an exchange student in Rouen.  I needed to be able to greet people, ask directions, and make my needs known.   Since my son and I will never be traveling to where we need to converse in the language, there’s no need to learn the Latin equivalent of “Ou se trouve les toilettes?”

Since I am not seeking a classical education for my son, where Latin is learned for its own sake,  the only benefit we would have for studying it is to give insight into derivatives of Latin words and prefixes in our own English language.   This made the vocabulary choices of the course make more sense.  I could see that “patria,” meaning “native land” is the basis for our English word “patriotism.”  The text however makes no such mention of the similarities.

If you our interested in the curriculum, you can find sample pages and Tables of Content for all six levels of Latin's Not So Tough on their website.  You may also want to check out their eight levels of Hey Andrew! Teach Me Some Greek or Bible Study Series.  You can see what my fellow Homeschool Crewmates thought of all these Greek 'n' Stuff products by clicking here.
Disclaimer: I received free materials as stated above from Greek 'n' Stuff for the purposes of completing this review.

Thursday, April 28, 2011

The Science of Disney Imagineering: Design & Models

Recently I blogged about a new series of DVD's we've discovered by Disney covering basics in science, mostly physics.  I'd seen some of these movies listed on the Disney Movie Club website but never felt like I could find enough information about them to feel secure in purchasing them.  They have a hefty price tag ($30 for a 30 minute program).  I decided to start writing more thorough reviews for anyone interested in buying the DVD's or at least knowing which one's they might like to acquire through inter-library loan.  Our most recent view is Designs & Models.  The host for all the titles is an Imagineer named Asa.

Asa's Invention:  For the first time Asa is not working on his own quirky invention.  Instead he uses the example of tutu-clad monkeys invading your living room to explain the process of the Engineering Design Process.

  1. Identify a need or problem (you have to get the monkeys out of the house)

  2. Define design requirement & constraints (you don't have any bananas)

  3. Brainstorm Solutions (there are no bad ideas--even the dressing up in yellow and wearing banana scented perfume)

  4. Decide on an approach

  5. Build models (it is much easier to change the design on a small scale first)

  6. Build the final project

  7. 

Defined Terms:  Design, Requirement, Constraint, Scale, Model, Iterative  (there is usually a cartoon accompanying the definition to aid in understanding)


Disney Rides or Attractions that exemplify the Theme:  

 The first is Expedition Everest and it receives the most extensive coverage.  Imagineers determine the need-a thrill ride at Disney's animal kingdom.  Brainstorming ideas include a mythical creature theme, but since it will be placed in the Asia section of the park they settle on the Yeti.  Imagineers travel to Nepal to pick up theming ideas and concept drawings are created.  A model of the mountain is sculpted in progressively larger scales with modifications made.  A Cad-Cam system shows how the track and support structure needs to be place and the stages of construction (at one point it was discovered that a support beam would have shot right through a section of track).  Artistic considerations like lighting and sound design are explained.


Second comes Toy Story Mania.  The original model was actually two folding chairs and a paper towel tube!  They knew what they wanted to do but required a lot of play-testing and redesigning to determine the best kind of shooters for the interactive ride.  The key to this segment was showing that problem solving is a process and requires perseverence.


Finally we saw a brief glimpe of latest attraction being built in California--Cars Land, based on the Pixar movie.  More high tech wizardry:  a machine that build models by adding layer upon layer from a computer representation and a visor that let's you view and walk through a  virtual world.  The imagineers discovered that the mountain range of the Cars ride needed to be higher to block the view of electric power lines from the riders.


 The Quiz:  15 questions

Try It Yourself:  Using soda straws and tape, Asa builds a bridge from which is hanging a paper cup.  He begins filling the cup with pennies but it soon collapses--our model didn't work, time for a redesign.  Then he walks you through the process of buidling a suspension bridge.  This design holds a lot more pennies.  I would have prefered it if we were given the opportunity to brainstorm our own design rather than be handed the answer.  I suppose we can always improve on the improvement.

Wednesday, April 27, 2011

Hank the Cowdog

It's a red letter day in our household.  The library called last night and said the latest book in the Hank the Cowdog series had arrived and was waiting for us.  Hank is truly my son's favorite storyteller.  We listen to audio stories in the car and frequently check out two books at a time from the library.  Last week my son got it in his noggin to read an entire book outloud to me (a reversal of roles).  He started at 11:30 and didn't finish until a little after 5 pm.  He read to me while I folded laundry, worked on dinner, and lay on the couch (I hope he didn't notice the little nap I took through chapter 7).  He is very familiar with the Original Adventures of Hank since we also have the audio version.  Sometimes he would pause in his reading to hum out the music that is usually playing in the background.

This new book (#57 if you can believe it) is The Disappearance of Drover.  Drover gets lost at a cattle auction.  Schnickelfritz had the release date written on his calendar last November.  He's hounded the librarian, who was left to explain that it takes several days for an ordered book to be shipped and processed and the library.  He's the first to get his eyetracks on the pages and we're already up to chapter 5.  Want to know what he did when we took a break for lunch.  He got on Amazon and discovered there's already a listing for #58--The Case of the Mysterious Voice.  It will be out in October.  It's almost like the anticipation is better than holding the book in his hot little hands.

Thursday, April 21, 2011

Review: See The Light


  Every now and then I feel pangs of guilt that I'm not giving my Schnickelfritz a well rounded education.  We cover our state's core requirements  but things like music and art just don't make it on my to-do list.  Perhaps part of the problem is that I don't feel qualified to teach such things.  Art class was never one of my strong suits in elementary school and in middle and high school I never signed up for a single class.  Our co-op's one art leader has taken time off to enjoy her new baby.  I needed to find someone who would do the teaching for me--and now I have.  We received a copy of the first DVD in a series of Art Classes by See the Light .

A second concern for me was the sincere dislike my son has for putting pencil to paper.  Writing is his least favorite schoolwork.  And while he will sometimes draw maps on our whiteboard, his preferred art medium is to create images by laying Jenga blocks on their sides.

Pat Knepley was the instructor for the four lessons on our DVD.  She was enthusiastic and made the whole idea of being able to draw approachable and acheivable.    Most of our lessons could be done with a simple #2 pencil and sheets of typing paper.  I put in the DVD to preview it alone and before it was done, Fritz had gathered his own supplies and was following along--with no coaxing or cajoling.  Now that's a good art teacher.

As the name and subtitle suggest, this is definitely a Christ-centered art program.  Each lesson included scripture reading or a reference to a story from the Bible.  For example lesson one talks about the tools we need to create art and then the discussion turns towards the Genesis account of creation.   Lesson two uses an apple as the subject for studying contours and the Biblical application was the Forbidden fruit in the Garden of Eden (which bothered me somewhat because no where in scripture does it say that Eve gave Adam an apple).   The bonus lesson on the DVD was a chalk drawing featuring the three crosses on Calvary.

The lessons were 9 to 15 minutes in length  (the bonus lesson was longer and featured a different instructor).   The children may attempt to draw along with the DVD or just watch the artist and do their own work later.  Below is my Schnickelfritz doing what was the hardest exercise in the lessons.  If you look carefully at his eyes, they are focus on the contour of the apple and not on his paper.  This is training the hand to follow the eye and even Pat was not able to have the end of her line meet up with the beginning on her first demonstration.  I'm sure this was intentional on her part, but it did help my perfectionist son see that there is a learning/training curve to drawing and we just have to keep trying.


 I'm including copies of MY work for lessons three and four.   Fritz took the whole "need to draw lightly" idea to heart and I could not get a good scan of his drawings no matter how I manipulated the image. As mentioned above,  I never learned to draw well either so I did the lessons right along with Fritz. 

[caption id="" align="aligncenter" width="716" caption="Apples and image depth"][/caption]

[caption id="" align="aligncenter" width="716" caption="My Shoe"][/caption]

 The Art Classes videos can be purchased as a set of DVDs (36 lessons on 9 DVDs) for $99.99 or viewed online through a monthly subscription.  Each month would cost $10 and you would receive access to 4 lessons each month (retaining access to prior lessons).  If you are wondering if your family would enjoy the Art Series, you may access the first three lessons online for free.  You can also click on the Curriculum tab to learn what is covered in each lesson of the other DVDs.   I would say the lessons are geared towards elementary students although I certainly never felt "talked down to"  so you may be able to use it with older students who have never received art instruction before.

You can read whatfellow Homeschool Crewmates have to say about Art Classes by See the Light by clicking here.
Disclaimer: I received a free DVD of Art Class Volume 1 for the purpose of completing this review. 
Related Posts Plugin for WordPress, Blogger...