Showing posts with label Blog Cruise. Show all posts

Tuesday, January 21, 2014

5 Essential Homeschooling Tools Day #2: A Chalkboard


Forty something years later, I still have memories of my grandparent’s house—the planes flying over from the nearby airport, bouncing balls with my cousins down the narrow stairway, and a small chalkboard in the sunroom where my cousins and I would draw pictures and play tic-tac-toe.  Come to think of it, both my grandmothers kept chalkboards.  My Gram in Massachusetts used to keep hers in the kitchen with a space reserved for phone numbers at the top and a place to write shopping lists below. I wasn’t allowed to play on that one, but Gram would occasionally wipe off the grocery list so she could keep track of scores when we played cribbage or dominoes.

The first summer after we moved to Missouri I saw a garage sale ad that mentioned lots of homeschooling supplies.  When we drove up I noticed four large chalkboards leaning up against trees and the garage.  These were much larger than the ones my grandmas had kept.

It seemed the seller’s church had upgraded to whiteboards and thought as a homeschooler she might have use for and be able to find good homes for this “old technology.”  When the lady heard that I was also a homeschooler, she gave me one for free!  I had to send my husband back with the pick-up truck to collect it and had him mount it in the basement. You can see it in the background of our homeschool room.
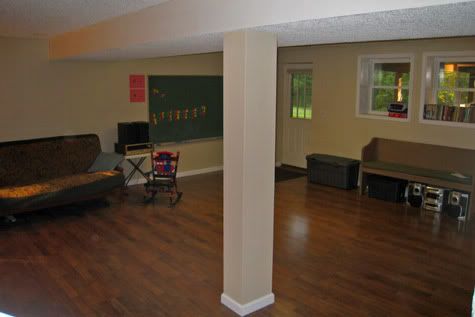
What makes a chalk board so great?  Well I’ve known from the start that my son was a kinesthetic learner—that is, he needs to have something moving in order to take information in.  He’s not one to sit at a table for math or spelling.  See that rocking chair under the chalkboard?  He literally used to stand on it and write his math problems on the board. 

It also appears in this picture that we were using our Melissa and Doug magnetic alphabet letters.  Schnickelfritz could shuffle letters and spell things for hours, but if I tried to make him write those same words he’d complain of hand cramps after two minutes.  Now the letters proudly proclaim the name of our homeschool at the top of the board.  In the picture below you can also see our simplified schedule for the day.  There’s a picture for each subject.  Bible always comes first but I let my son arrange the other lessons to suit his fancy in the upper left corner.
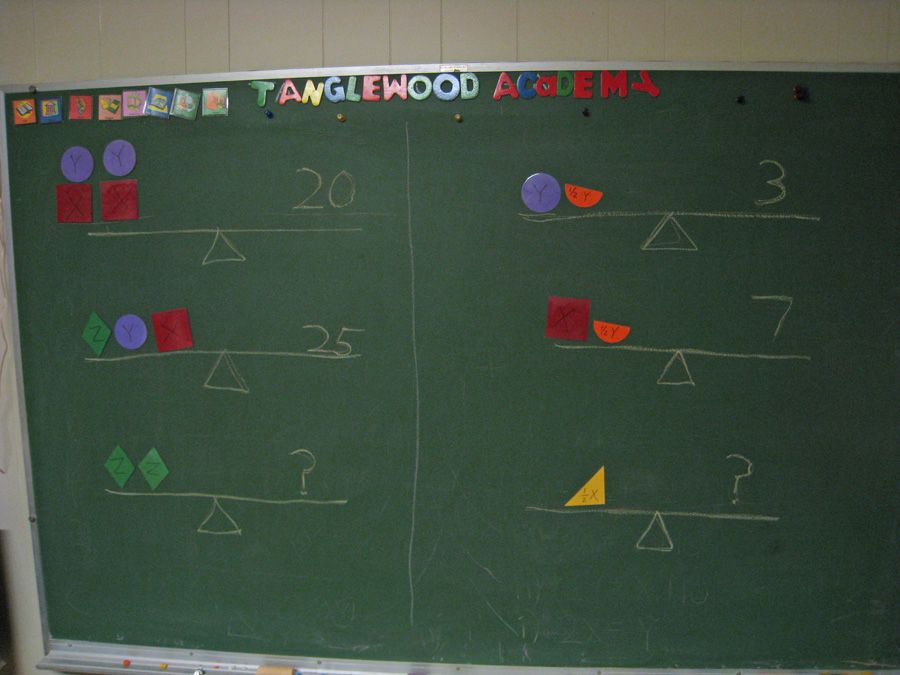
Here we are working on algebra of all things (we were using Critical Thinking Company’s Balance Math).  I cut out shapes to represent X,Y, and Z (you can also see 1/2 X and 1/2Y if you look closely) and added magnets to the back.  Now Fritz could move symbols around and erase and rewrite numbers as he applied math functions to both sides.  Yes, it could have been done on paper, but didn’t you hear me say he needs to be moving to learn?

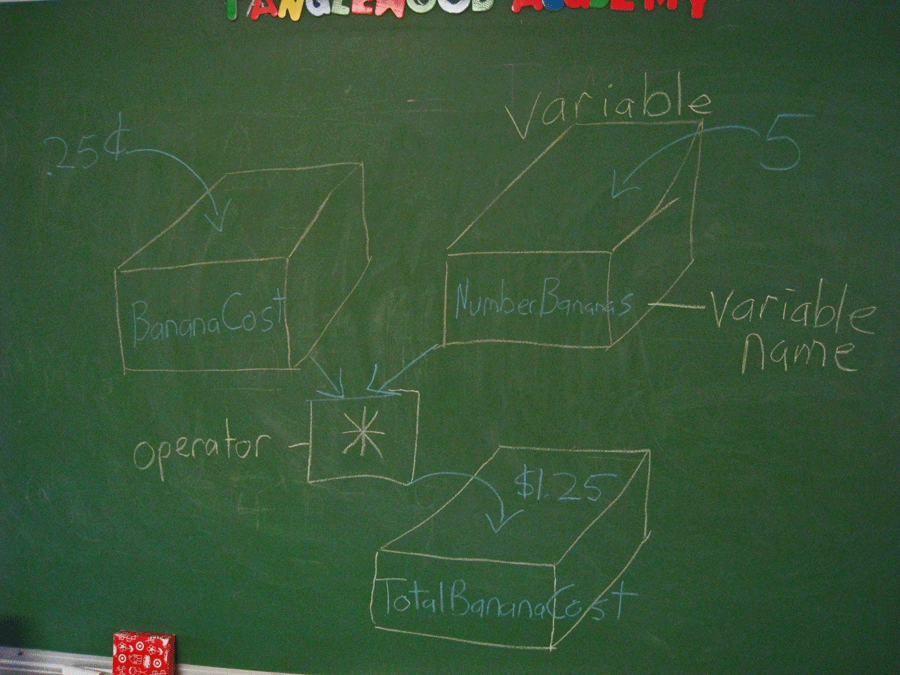
Sometimes I’m the one who needs the big board.  Last year I was trying to explain some computer programing terms to Fritz and I found it easier to do on the chalkboard.  We’ve also used if for timelines and to diagram sentences.
When school is out the chalkboard still gets used – for hangman and tic-tac-toe games,  to write giant “Happy Birthday” messages, or just as an artist’s canvas (we buy sidewalk chalk on clearance at the end of the summer).  To conclude, the chalkboard is not just for the schoolhouse—sometimes it’s an essential for the house (home)school.

You can click the button below to see what all the others on the Review Crew found to be Homeschooling Essentials but here are a few posts to get you started.

1. Marcy @ Ben and Me

2. Lisa @ Golden Grasses

3. Tess @ Circling Through This Life

4. Victoria @ Homemaking with Heart

5. Kayla @ The Arrowood Zoo

6. Joelle @ Homeschooling for His Glory

7. Deanna @ His Treasure Seekers

8. Melissa @ Grace Christian Homeschool

9. Rebecca @ Raventhreads


5 Days of Homeschooling Essentials

Monday, January 20, 2014

5 Essential Homeschooling Tools Day 1: Binding Machine


We’re starting off 2014 and a new season of the TOS Review Crew with a blog hop--- 5 Days of Homeschooling Essentials.

There’s so many ways to interpret this subject.  I could go with character qualities: patience, curiosity,  organization, creativity, and a sense of humor (trust me, you’ll need one).  Or there are essential subjects: In my state of Missouri we’re required to have at least 600 hours in the core subjects of math, science, social studies, language arts, and reading.  Or maybe I could go more specific with curricula within those subjects.  I’d be devastated to homeschool with Apologia’s Elementary Science series. 

Instead I think I’ll focus on tools…those handy little helpers that stay in the background of our homeschool.  They’ll never play the starring role –like a math book, but I wouldn’t want to try and homeschool without them.  That makes them essential in my book. 

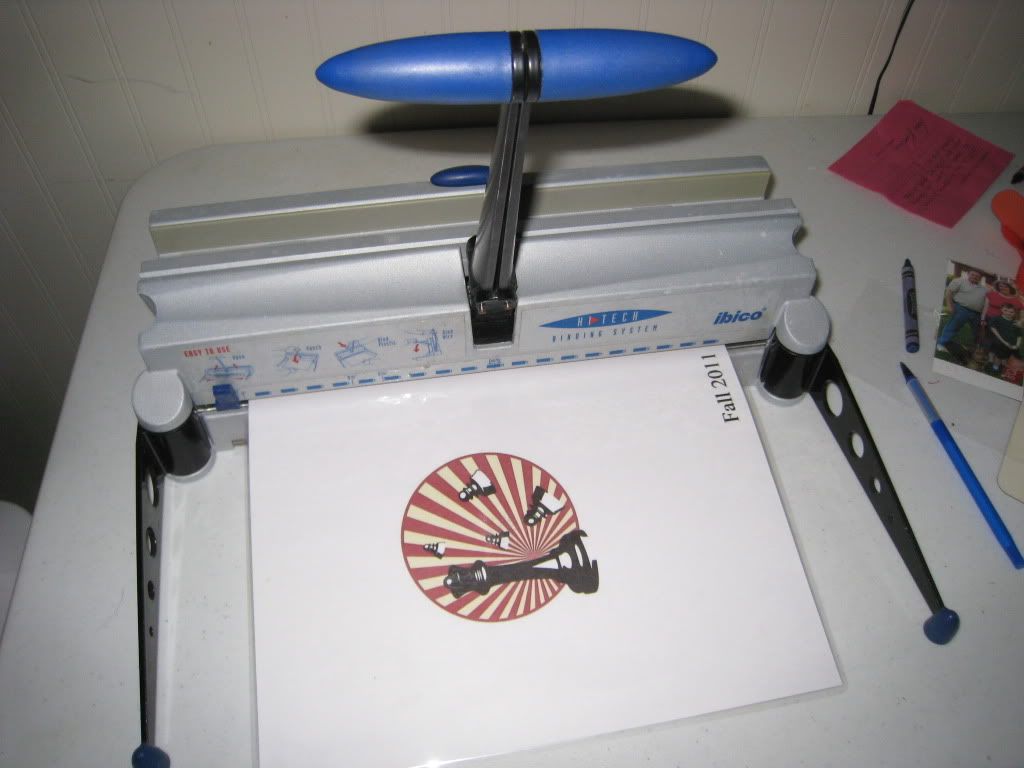
My first tool (and really I used it this morning) is my binding machine. Two years ago I had been watching a crafting gadget demonstration on one of those shop at home channels and drooling over a wire-binding machine. Drooling but not buying. I headed over to eBay to see what bargains I could find. In the end I found a model that can use both plastic combs and o-wire--that way we can fill and re-arrange books throughout our school year and change them to a permanent binding when they're complete. Every time I visit Office Max I check the clearance section of Office Max  for plastic combs ( I usually score 25 1/2 inch combs for $2) .

And what do I use it for?  Everything!  Just look below…..

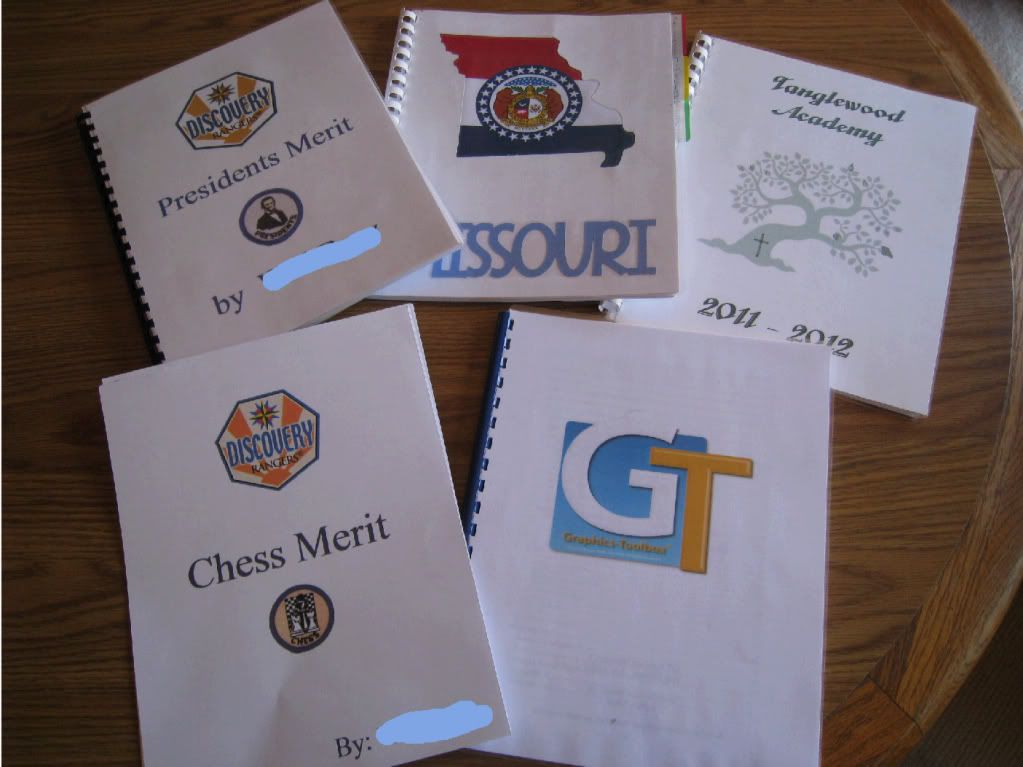
My son works on Royal Rangers Merit badges at home as well as in meetings (and I get to count it as homeschool hours—don’t you love it?)  We’ve done Presidents, Sign Language,  Weather, Insect Study, Pioneer Lore, etc.  I bind up all the material so he can show it to his Commander and then keep it as samples of his work for homeschool.  The Missouri title is from a state history course I developed and made printables for Schnickelfritz to fill out. You can also see a copy of my planner (We call our school Tanglewood Academy)  for 2011-2012. I keep a calendar, print outs from my EduTrack record keeper, lists of books read, field trips taken etc.    The GT booklet is the manual for a Graphics Design program –have you noticed how many homeschool vendors are switching to eBooks for manuals?  I need to be able to read directions and look at the screen at the same time so I print and bind just about everything.

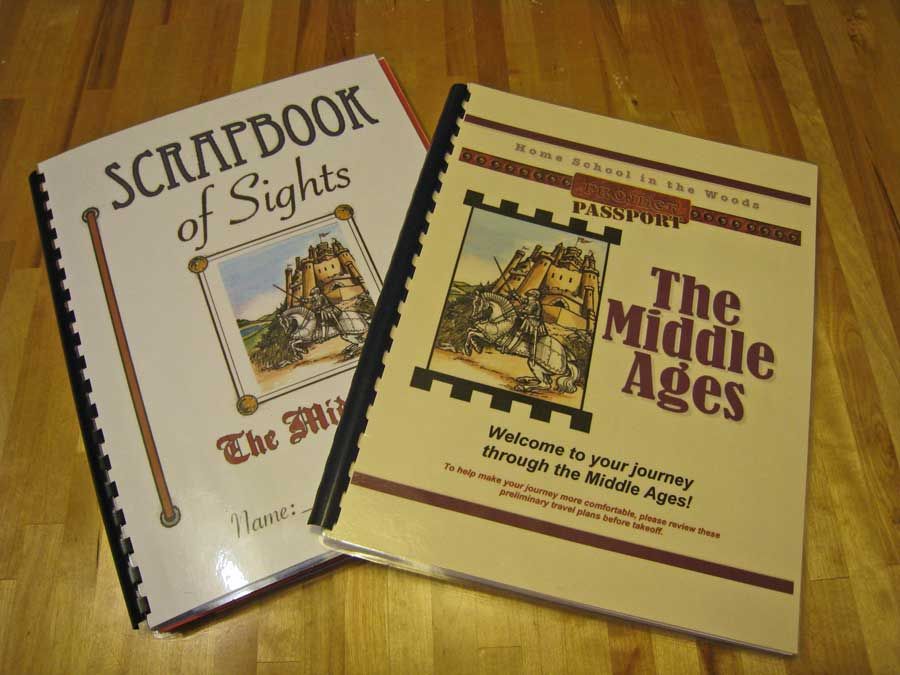
In the picture above, one book is the teacher’s manual with lesson text and project instructions and the other is the book my son assembled with timelines, etc.  You can see samples of his work in my Project Passport post.

Outside of school, I’ve bound handouts from the food preservation class I took through the extension office.  For Christmas I made my mother a bound collection of pressure cooker recipes to go with the lessons I’m giving her on using the cooker. 

To protect the book and make it last longer I laminate the front and back (oops, just gave away another Homeschooling Essential) before I punch the holes and bind the booklet.

If you’re a list maker/paper keeper like me having a way to organize and bind those papers is essential!

You can click the button below to see what all the other Crew Members think are Homeschooling Essentials, but here are a few links to get you started

1. Marcy @ Ben and Me

2. Lisa @ Golden Grasses

3. Tess @ Circling Through This Life

4. Victoria @ Homemaking with Heart

5. Kayla @ The Arrowood Zoo

6. Joelle @ Homeschooling for His Glory

7. Deanna @ His Treasure Seekers

8. Melissa @ Grace Christian Homeschool

9. Rebecca @ Raventhreads


5 Days of Homeschooling Essentials

Tuesday, December 31, 2013

Consistency is Key (Word for 2014)


Word for 2014
 
 
 I have to say I gave up the idea of New Year's resolutions a long time ago.  Just take everyone's favorite -- losing weight:  I guarantee the gyms and health clubs will be packed on January 1st but it won't take long till there's no line for the elliptical machine anymore.  The best time to buy used exercise equipment is in February -- just a month after everyone swore "I'm really going to stick to it this time."  I can however buy into the idea of a Word for the Year --  a lens through which to view my thoughts and goals,  a guide in deciding my course of action, a focus.  The word for this year is....


The idea came to me as I read the Discover Orienteering book I got for Christmas.  In the training section the author shares a snippet about his experience with Hill Reps (just what it sounds like--repeatedly running up and down a hill to build stamina). 
 
" Once while working out with the ... cross country team,my running mate and I were left far behind on the first hill rep because the many inexperienced runners ran much too fast the first time.  On the second repetition we moved up to second place...and stayed there behind the best runner for the remaining nine hill reps. Few of the new runners completed even four reps....The lesson is to run at only 80 percent of your best pace to start, and if you cannot keep that up for three times in a row, run slower.  Hill reps build stamina..."
 
I do a lot of things in life like those inexperienced runners-- and find I can't keep up the pace:  I'll read the books of Genesis and Exodus in under a week but burn out slogging through Leviticus,   I'll walk 4 miles a day, but when the scales haven't moved by Saturday I'll quit in frustration.  I'll whip myself into a frenzy trying to straighten, organize and clean every room in the house at once. You know how you start to put one thing away in a different room and while you're there you find new closets to organize and you don't get back to your original task.  Suddenly you've run out of energy and every thing has been pulled out and piled up, waiting for its turn to be put in its proper place. 
 
 I need to learn to set lower daily goals and stick with them (the 80 percent rule) and then worry about stepping it up, if that's even necessary.   Better to meditate on a few verses daily  and find a way to apply them in my life than attempt to read the Bible in a year (not that that isn't a worthy goal for others).  Before I tackle rearranging all the cupboards in the kitchen, let me develop the habit of not leaving dirty dishes in the sink overnight --I believe that's the first item on Fly Lady's housekeeping tasks.
 
There's a second quality to consistency and that's in my relationship with my son.  Last spring I sat in on a workshop by Kirk Martin of Celebrate Calm at our local homeschool expo and ended up throwing my plans out the window so I could listen to him all day.  The key to his program in dealing with kids who are wired differently from the norm (if there really is such a thing) is to meet needs rather than punish behavior.  My son has a real need for consistency.  I wrote about this in my post If It’s Tuesday, It Must Be Pizza Night.
 
Okay, for my son's sake we try our best to follow the same routine every day but there's still something he's exposed to all the time and he never knows what it will be like from day to day ......ME!  Will I be in a good mood or grouchy (fortunately since my hysterectomy I don't have those monthly mood swings)?  Did I get a good night's rest or will I be needing a mid-afternoon power snooze.  Will I be worried, bitter, carefree, excited?  My son doesn't have a thing in the world to do with my frustration when the scale hasn't moved dispite my best efforts but he has to live with my sulking about it right along with me.  
 
The Celebrate Calm lectures helped me understand the draw of video games to kids like my Schnickelfritz--the game reacts the same way day in and day out.  It won't let you advance for no reason when its having a good day and it won't kill your avatar and make you start over just because it couldn't balance the checkbook last night.   So for my son's sake, I need to work on keeping an even keel.  I don't normally agree with democratic politicians but I found a great quote from the governor of Rhode Island.
 

So that's my word for 2014.  But there are many other inspiring words in the dictionary.  You can check out what other Review Crew members chose for their focus word at 2014 Word for the Year Round Up.  (link will go live 1/1/14)
 
 
 Don't miss a thing! Subscribe to Ozark Ramblings and get my posts in your inbox.

Monday, September 23, 2013

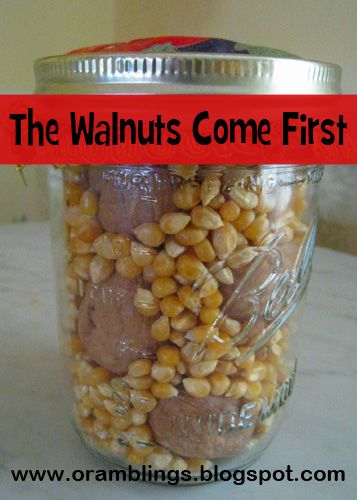
The Walnuts come first

In my mother's home sits a mason jar filled with walnuts and popcorn.   It's not meant to be eaten, but serves as a visual reminder about the need to prioritize.  You see at one time the jar was empty and it was my mother's task to stuff everything inside.  If she started with the popcorn she'd never have space for the much larger walnuts at the top.  The walnuts had to go in first and the smaller grains would fill in the gaps and cracks.  So when I have a busy day ahead, I always make sure the walnuts of life are taken care of first.

School is important to be sure but sometime even school gets trumped -- I have to take my husband to the surgery center,  I've got a bushel basket of persimmons that need to be processed,  the car needs to be serviced.  This past Friday I needed to 1) pack for our weekend trip to Mansfield, 2) process 10 pounds of tomatoes which wouldn't last till we got back, 3) puree a basket of persimmons, 4) finish a product review, 5) grind flour and feed my sourdough (already two days passed its normal feeding) and 6) make sure my husband had meals while we were gone. Fortunately, my son is old enough now to do a lot of his own reading and work unsupervised.  We brought schoolbooks up from our basement and set him up at the dining table.  I was nearby in the kitchen for any questions.  Later he did his online work and then I took over the computer to complete my review post.  We didn't get all the schoolwork I had planned, but we managed better than 75 percent.  The rest we'll make up this week.

Here a few of my best tips for busy moms.


1.  Unlike the yellow bus crowd, we aren't tied to an 8-3/M-F schedule.  There have been days my son was at school at 6:30 in the morning.  Perhaps we'll save some subjects until after the supper dishes are done.  Take off a Monday and have a brief school day Saturday Morning. 

2.  Be realistic about what you can get done.  Last year we participated in a weekly co-op and because I wasn't going to waste the trip, we stopped and some of the grocery stores in the area.  That meant we were going to be gone 6 hours.  The only subjects I kept for our homeschool were Bible, Math and Science.  All other subjects I planned for a 4 day/week schedule with co-op day being our light day.

3.  Take school with you.  Our first year in Missouri I didn't really know anyone well enough to leave my son with when I had to say get the oil changed in the car or take my husband to out-patient surgery.  Since my Schnickelfritz was having to come with me, we might as well bring some schoolbooks too.  I read aloud to him in the waiting areas and we discussed the materials (often science).  Fritz was also very talented at math and could solve word problems in his head if I read them to him. You know what--we never got any complaints from the other people and often they stopped reading their magazines to listen to our conversation.  We were ambassadors for home schooling, and without bragging I think we made a pretty good first impression.

4. Think outside the textbook when logging hours.  If your day is busy with something, can you figure out a way to make that something count as school?  Processing tomatoes --sounds like Home Ec. to me.  Give my son a map and see if we're above or below 1000 ft. and explain how that's make a difference in the pressure canner.  Math can be multiplying fractional cups of ingredients by the number of batches we're making.   Need to drive across two states to Grandma's?  Pull out the maps and teach them navigational skills.  Have them calculate the gas mileage when you fill up.  Stop at the rest areas and pick up the state's tour guides--they usually list famous people and events, there's your history lesson.

5. Let your kids have a turn being the teacher.  Okay I only have one, but isn't the goal to help them learn how to acquire information on their own and not wait to be spoon-fed?   If you've got several kids, let the older ones help the younger one with subjects they've already mastered.  (don't do this too long or without supervision though--one of Fritz's friends still couldn't read by second grade because mom thought the older daughters were taking care of this and they obviously weren't).

Photobucket


Don't miss a thing! Subscribe to Ozark Ramblings and get my posts in your inbox.

Monday, August 19, 2013

You Can’t Take the Heat and You Can't Get Out of the Kitchen

I don’t want to sound like I’m complaining – we really have had a much cooler summer than last year during our drought.  Still there have been days when the last thing I wanted to do was turn on the oven – especially pizza nights when I crank it up to 425 and need to let the pizza stone preheat.  So last month I asked for suggestions on putting dinner on the table without heating up my kitchen.  Here are some of the responses.

The  one response we’ll skip over was to make ….reservations!  Funny, but let’s assume that’s not an option.  After all, if you can afford to eat out through a long hot spell you can afford to crank the air conditioning. 
Salads and cold sandwiches came up frequently.  If you do buy cold cuts for sandwiches (my husband takes a sandwich to lunch daily) try this money saving tip.  I buy a half ham from the meat dept. and take it to the deli for slicing.  I wait until it’s on sale (last week I got 7 pounds for $2.29/lb.  The same meat in the deli case was $6.98!  I divide up the sliced meat, vacuum seal and freeze what we won’t get to for a while.

Grilling and cooking out is another option.  Yes it involves heat but the heat stays outdoors.  Someday I’m going to learn to make a pizza on the grill, but I’ve read that you shouldn’t use those Pampered Chef pizza stones over an open flame.  We also enjoy Dutch oven cooking (there may be a series coming this fall as my son works on his cooking merit).  Baking in a Dutch oven does have its drawbacks as you have to rotate the oven over the coals and rotate the lid every 15 minutes to keep the heat even.  That means you have to stay close by the fire pit in the outdoor heat.  I’d much rather save campfire cooking for the fall.

By far the most popular answer was using the crock pot.  Everyone knows you can use cheaper cuts of meat in a slow cooker and they still come out moist and tender.   It has the added benefit of being a hands-off cooking method.  I can go about my day—teaching, cleaning, running errands,  and my automated sous-chef takes care of everything.  The one drawback is that if you’ve forgotten to start your meal early enough in the day dinner may be too late or not worth starting at all (then you back to making reservations).

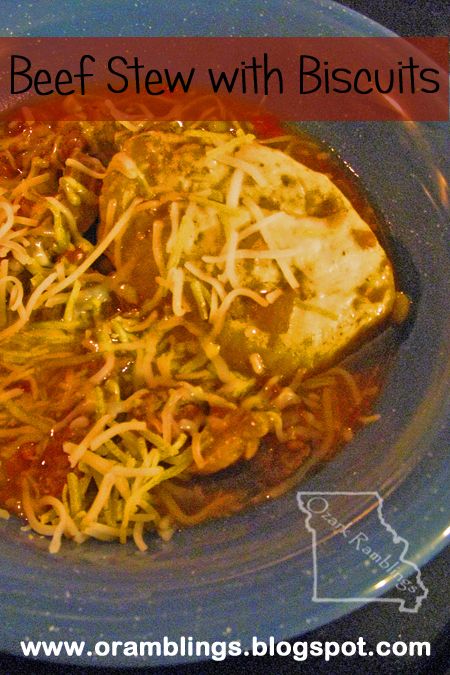
Today,  I’m going to share a recipe I made in my pressure cooker.   Like it’s slow cooking cousin, it’s not going to heat up the kitchen.  I LOVE  my pressure cooker for last minute dinner prep.  In fact you can start out with frozen meat and dry pasta and still put supper on the table in about 15 minutes.  My PC is electric, but nothing fancy—just a pot with a temperature control on the cord.  There a two lines on the pop-up gauge for me to judge high and low pressure (I almost never use the latter).  And there is a quick release valve.  Those are all the features I need.  I figure those models with all the fancy buttons just have that much more that can go wrong with them.  Now on to the recipe, based on one found in Bob Warden’s Great Food Fast.


2 Tbs. oil 3 1/2 C. beef broth
2 lbs. stew meat, cubed 1 Tbs. fresh chopped cilantro or 1 tsp. dried
1 red onion, chopped 15 oz. can pinto beans, drained
3 cloves garlic, minced 1 C whole kernel corn
1-2 Tbs. chili powder 2 Tbs. cornmeal
1 tsp. cumin 6-8 oz. can refrigerated biscuits
2 bell peppers, chopped salt and pepper to taste
15 oz. can diced tomatoes with green chilies shredded Mexican cheese blend (optional)


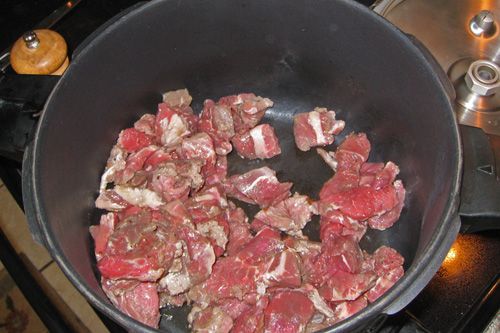
Brown the meat in oil over high heat.  Season it to taste with salt and pepper.


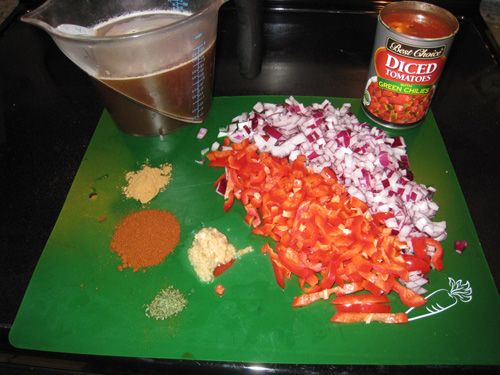
Add onion, garlic, chili powder, cumin, bell pepper, tomatoes, beef broth, and cilantro.  My family prefers red bell peppers but for presentation you may wish to substitute green or any other color available.  Securely lock the pressure cooker lid and cook for 20 minutes on high.


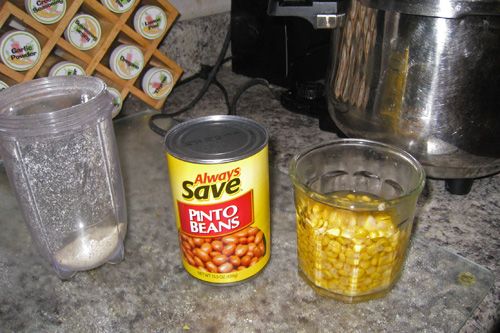
Quick release the pressure.  With the lid off add the beans and corn.  Bring to a simmer over high heat.  Stir in the cornmeal and simmer till thickened ( I make my own cornmeal grinding the grains in my Magic Bullet).


Separate the biscuits and drop in the pot to simmer 10-15 minutes before serving.  Serve in a bowl topped with shredded cheese.

Need some more recipe ideas?  Check out what my Homeschool Review crewmates have to share here (on Aug 20.) 

Friday, August 9, 2013

Day 5: Photoshop Elements for Classroom Posters

Day 5 copy
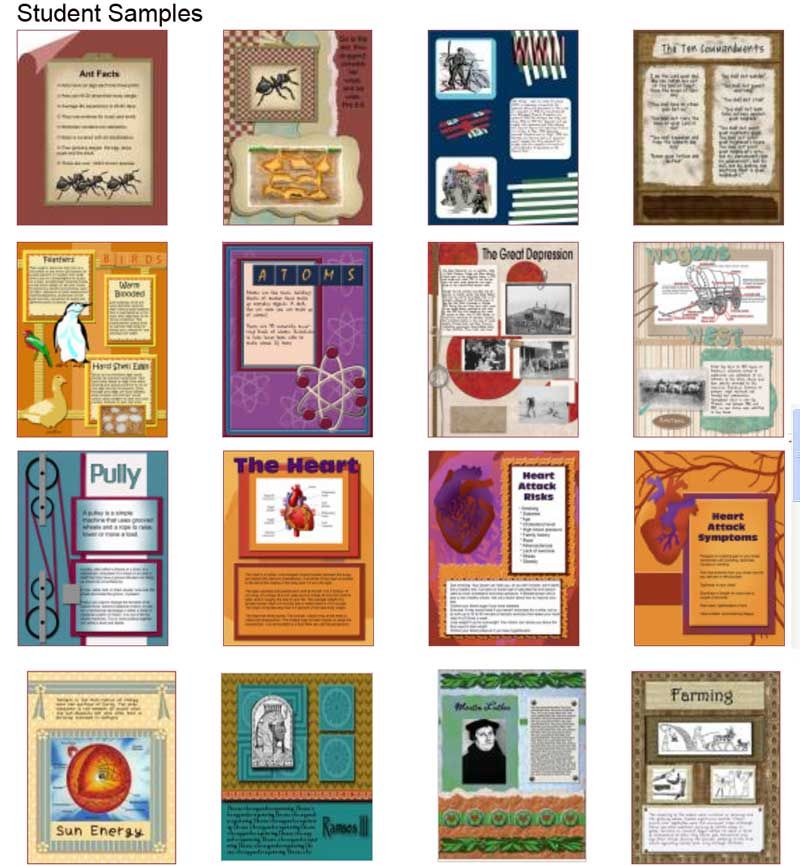
Welcome the last official day of 5 Days of Photoshop Elements for School (but come back next Thursday for a tutorial on making shape books ).  Ironically, we’re really going back to the beginning of my whole interest in digi-scrapping for school. It started last year when I read the post Faster than a Lapbook, More Fun than a Book Report! at Heart of Wisdom.   There were plenty of student samples to look at as well—covering science concepts, biographies, events in history, Bible stories and more.

Used with permission from Heart of Wisdom

At the time Fritz was studying Mystery of History and had 12 dates to memorize.  I really wanted to make those dates stand out in his mind so rather than just highlight a little timeline figure, I made  page-sized posters to put above our timeline on the wall.  When we were done, we attached the posters as extra flaps in our quarterly lapbooks.

I made the posters 8 1/2 by 11 so I could print them at home (my printer allows for edge to edge printing).  This really isn’t a bad size for a homeschool room – it’s not like I’m trying to show it to 30 kids at once.

MOmama_album's Dates to memorize slideshow album on Photobucket


 If you’ll look at the sample images, you’ll see that instead of framed pictures, I have objects like the scroll and the Vandal warrior appearing to be placed directly on the image background.  I did that through a process called selecting and extracting, which is the focus of today’s tutorial.  There are several ways to accomplish our task so lets start with one of the easiest.

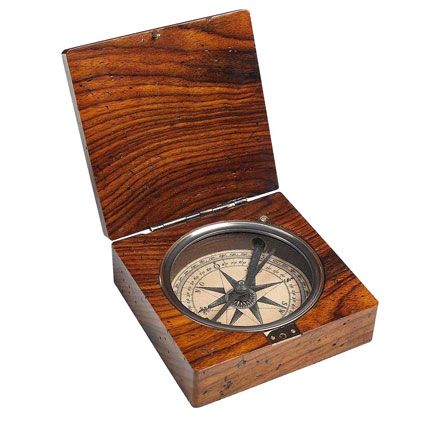
For our first example let’s see if we can extract the Lewis & Clark compass from this image.

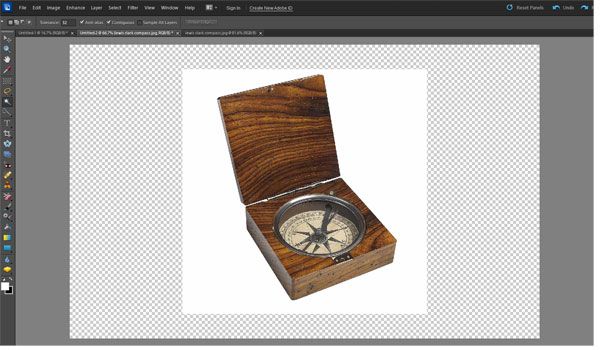
We are very fortunate that the background is all one color—there’s not even a shadow from the compass.  We can make PSE do most of the work for us.  After opening the image in the Editor, I’ll make a new blank file but this time I want the background color to be transparent so I click that box in the pop up window.  If I know the size of my image I can make the blank file the same size, if not, I can always crop it down later.  Next I’ll open my file of the compass and drag it from the Project Bin onto my blank file.


Now I’ll verify that the layer with my compass image is active and I’ll choose the Magic Wand tool from the left hand side.  It does look like a wand lit up at one end.  The mouse changes to a sparkly wand as well.  Now I click somewhere in the white background of the compass image. 
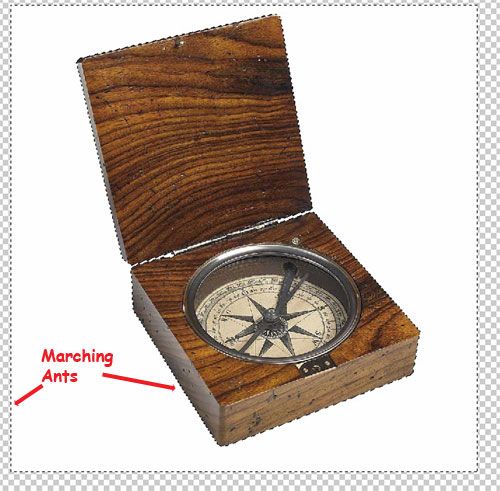
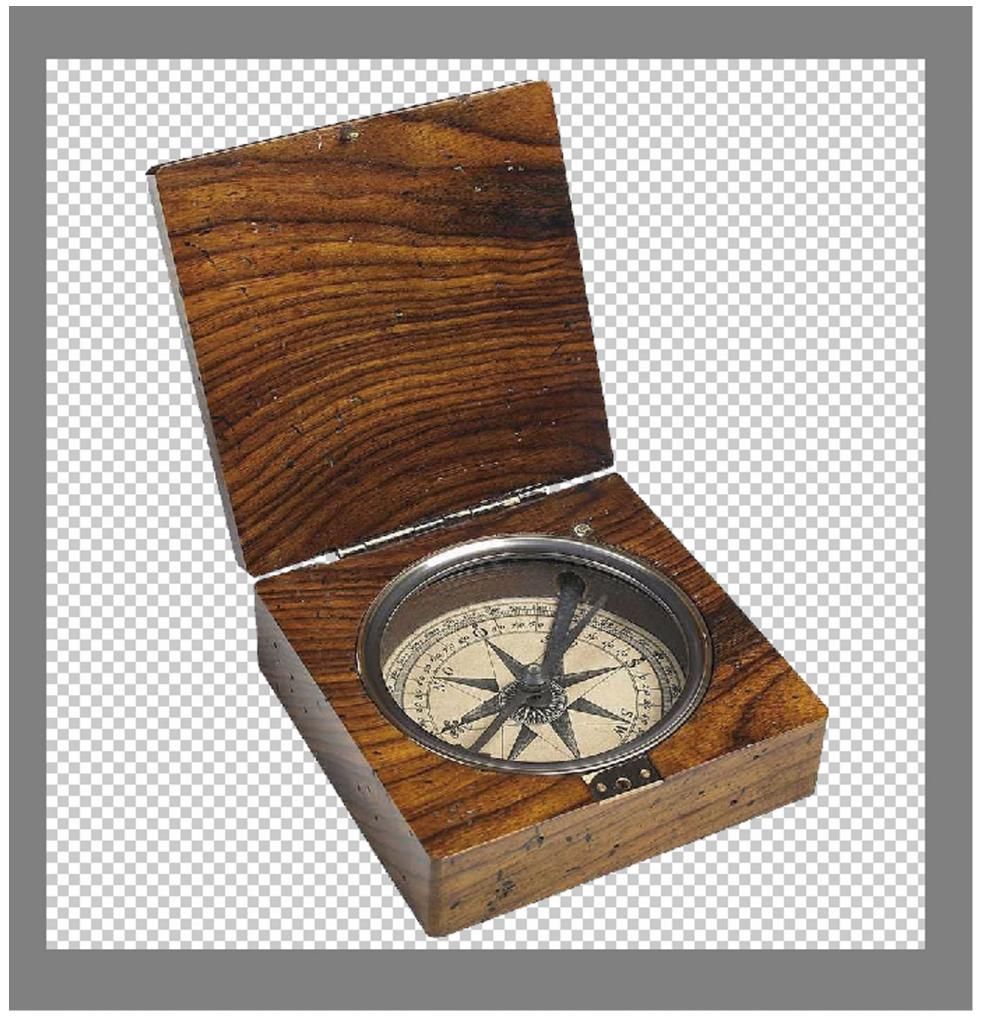
Around the outside edges of the white square and around the compass are little marching ants. 


Then it’s just a matter of hitting the Delete key.  I can save the compass with the transparent background for later or drag the thumbnail from the Project Bin onto the Lewis & Clark Poster I’m working on.


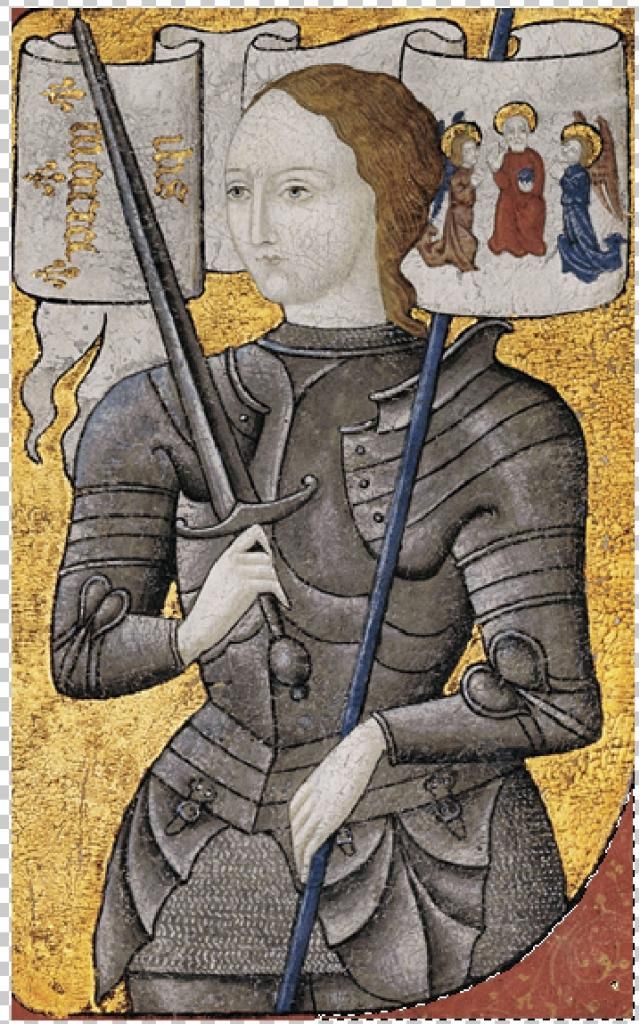
Of course, there are a lot of images that aren’t that cut and dried—like this image of Joan of Arc.
 
 
I’d like to just use Joan and her banner but leave out the distracting  gold background.  In this case the background isn’t a solid color so the Magic Wand won’t work. I’m still going to let PSE do most of the work, it just needs a little more guidance in what parts should stay and what should go.  I start a new blank file with transparent background and drag my Joan image onto it.

Now I’m going to select Image>Magic Extracter.   Joan’s image appears on a new work surface with it’s own set of tools.  I’m only going to mention the first two tools today.  There's a lot more detail like changing brush size, zooming in, getting back portions you didn't want removed, etc. but I'll save the details for another tutorial.


When I finish coloring over my image I use click on the Preview button and change this …..

 Magic extraction
To this!
joan-transparent
 
Which I can then drag onto my Date to remember poster.

I hope you enjoyed these 5 Days of Photoshop Elements for School and I hope you've learned something!  Come back next Thursday for a tutorial on making lapbooking shape books.

Summer Blog Hop

Thursday, August 8, 2013

Day 4: Photoshop Elements for Lapbooking

Day 4 copy
Perhaps you’re like me and have a kid in the house (probably a boy) who’d rather play with Jenga blocks than write.  I discovered that filling in mini books for a lapbook seemed far less intimidating and time consuming to his mind.  I shared last fall that I’d purchased a PDF file with lapbooks for the four quarters of Mystery of History because I was intimidated to create one on my own.  I wasn’t pleased with the images for the lap book pieces.  I wanted color images, etc.    I ended up using the files as a template but substituted more colorful images I found on the web.  As a bonus I could add dates for every person and event and add arrows and descriptions like in the Masada picture in the bottom row.  Photoshop Elements makes lapbooking a snap.

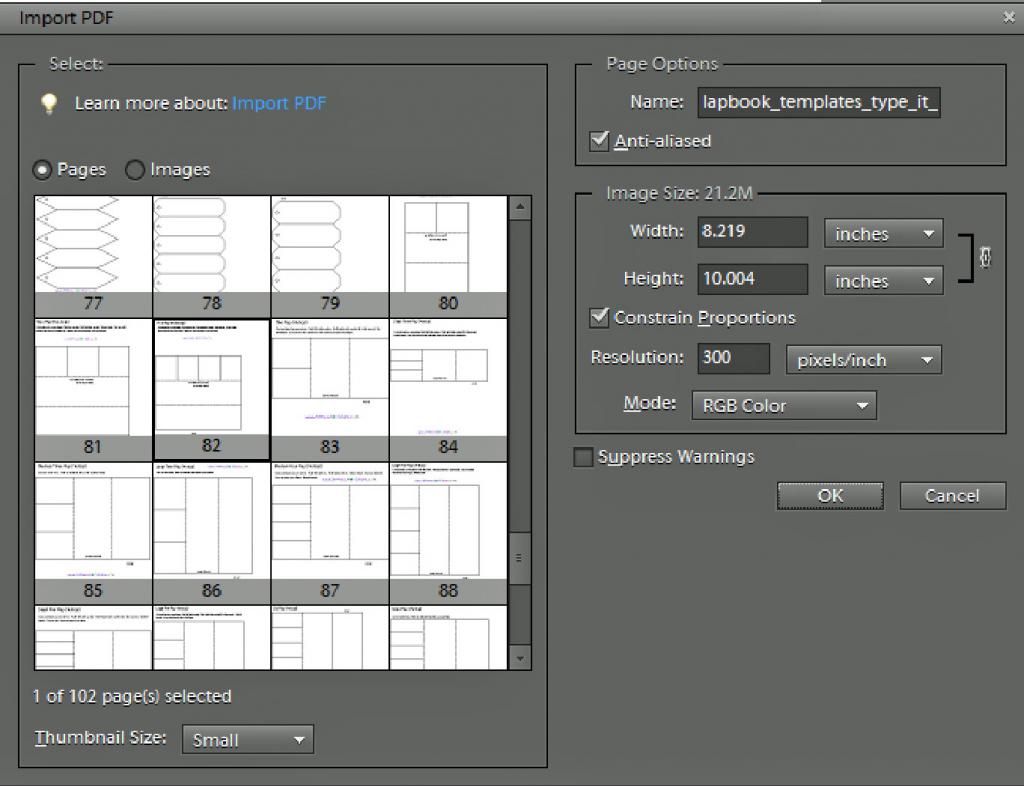
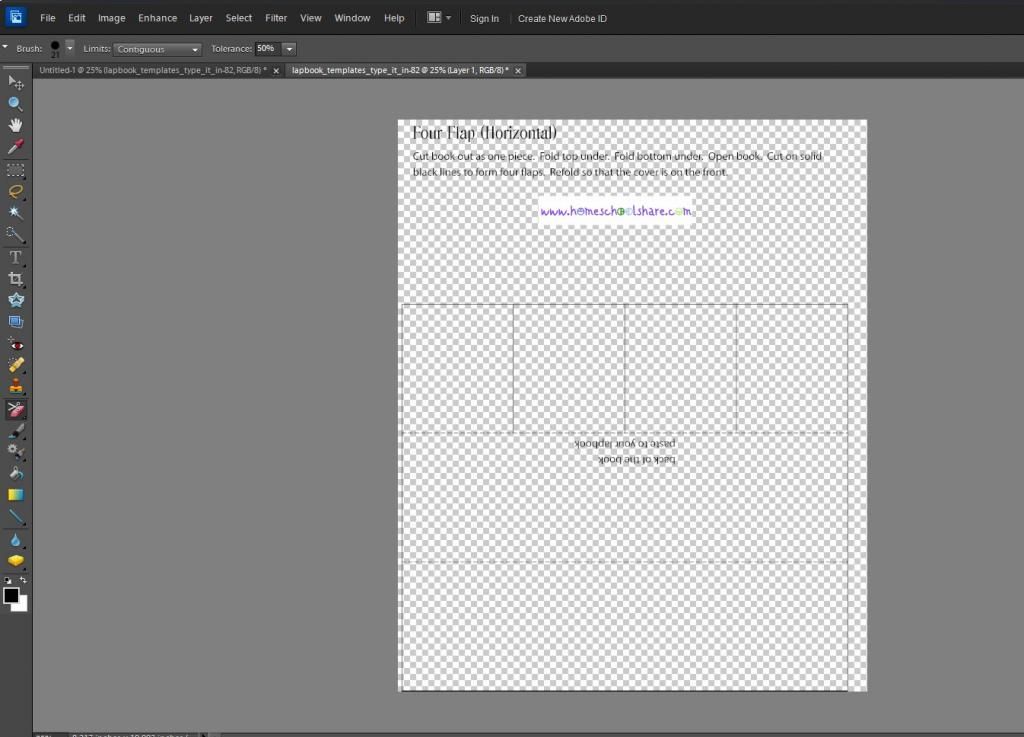
For this tutorial, I’m starting with a gift from HomeschoolShare.com for those who signed up for their emails—100 Pages of Templates You Can Type On. I’m not sure if this freebie is still available.  I’m going to be using the Four Flap (Horizontal) template on page 82 to make a life cycle of a butterfly mini book.

Begin by clicking File > Open and then the file with your lapbook template PDF.  In this case the file has many pages so a new window pops up so I can select the page I want.

 
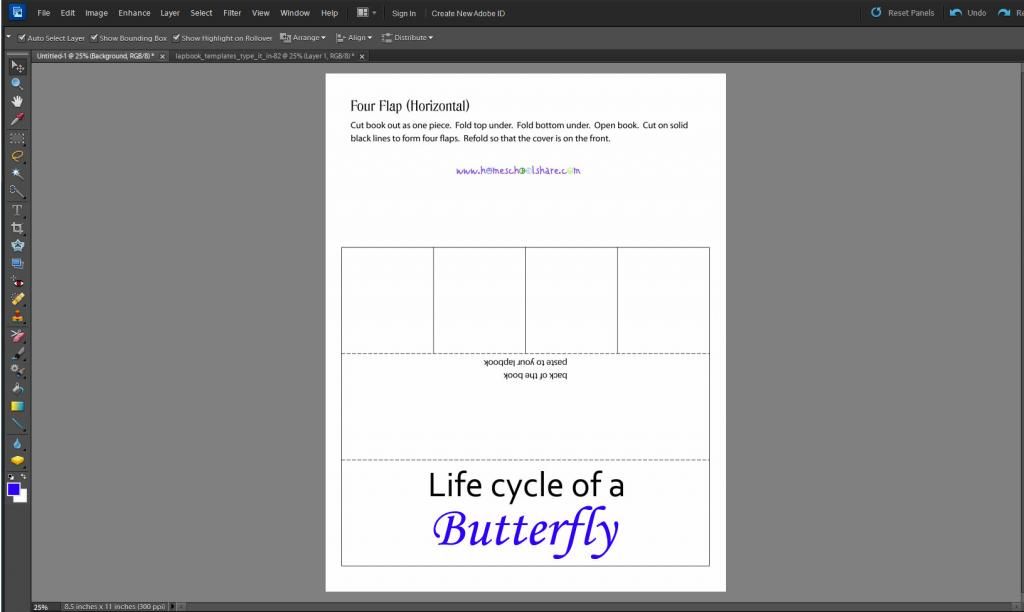
When the image first appears, you’ll notice the background is a gray/white checkerboard pattern indicating transparency.  It will print just fine, but I find it difficult to look at while I’m working so I started  a new blank file (8.5X11) and drag the template onto it.  (You can review this step from Day One)


I started by adding text to the large flap on the bottom.  Remember you can change fonts and colors in the same layer.  (The lesson on text was Day Three)


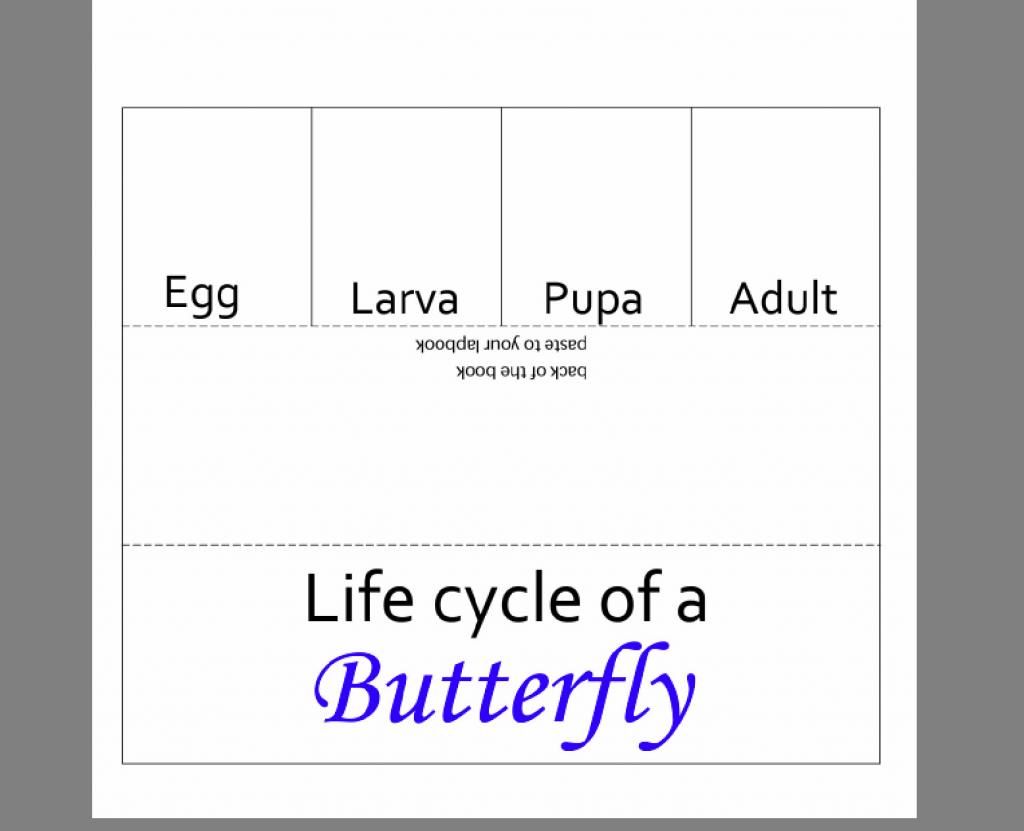
Before I go on I should tell you that I didn’t score very well on those IQ tests where they show you a flat image of a box and you have to guess how it would look folded up in three dimensions.  I thought I needed to flip the text and images on the four small flaps so they would be right side up in my mini book, but I didn’t.  However there may come an occasion when you do need to flip and rotate so I’m going to show you the steps (since I’d taken the screen shots) even though they weren’t necessary for this mini book.  But there’s a lesson to learn from my mistake--until you’re sure your work is perfect, consider saving it in .psd format.  That keeps everything in it’s layers and you can come back and flip and rotate as necessary.  Saving in .jpg saves file space but it merges all the layers together and you can’t correct any errors.

I started by typing the words Egg,  Larva, Pupa, and Adult, each in its own layer in the four boxes.


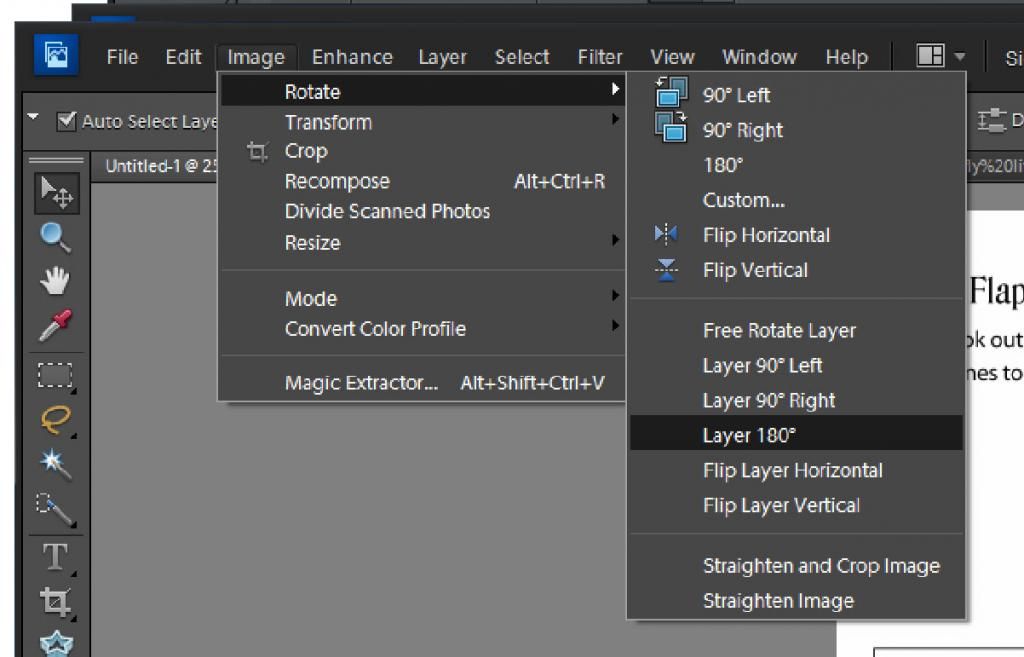
Then I switched from the text tool to the Move tool and clicked on one of the words.  This put it in the broken line box where I could resize the word.  Then I clicked on Image > Rotate > Layer 180.  Make sure you choose Layer 180 and not the plain 180.  I did this for each word.


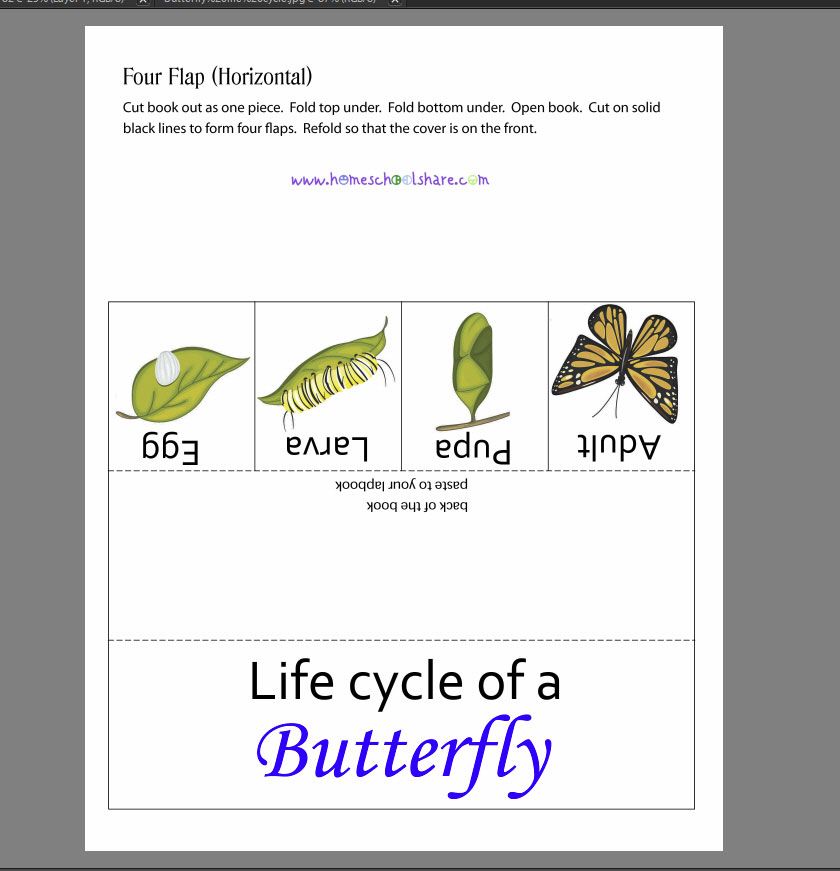
I had previously found clip art for each stage of a butterfly’s life.  I saved each image and opened the appropriate files in PSE’s editor. I dragged each picture onto my work area, resized it and then followed the same procedure to flip the image—ending up with this.


I know my introductory image also shows an apple-shaped mini book, but I’m going to save that lesson for my first weekly PSE Tutorial so check back next Thursday.  We’re ending the week tomorrow with a lesson on making homeschool classroom posters.  Please be sure and leave a comment on how you're finding these tutorials or what you'd like to learn to do. 
 

Have you checked out what the other Crew Member’s have been sharing this week?  Just click on the image below.
 
Summer Blog Hop

Wednesday, August 7, 2013

Day 3: Photoshop Elements for Flashcards & Organizing

 
Welcome to Hump Day in our 5 Days Of….. blog hop.  As parent/teachers we know that homeschooling isn’t always great, messy experiments in the kitchen or field trips to the Children’s Museum.  A lot if it is knowing which box holds the extra index cards and glue sticks or having a way for kids to know their assignments without constantly asking you “What’s next.”  In the same way Photoshop Elements isn’t always altering images to make it look like I’m standing on the Great Wall of China even though I’ve never traveled to the country.

A picture may be worth a thousand words, but sometimes you just need to add words to or in place of the pictures.  And believe it or not, this photo editing software can do a lot to make words pop. One word of caution—it cannot spell check or notify you of grammar errors the way a word processor can so proof read, proof read, proof read.  Today we’re going to cover some of the basics of the Type tool and how we can use it to make labels and bookmarks, flash cards, etc..


The Type icon looks like a capital T in the toolbar type icon.  If you right click on it you can see all the sub menus.
 

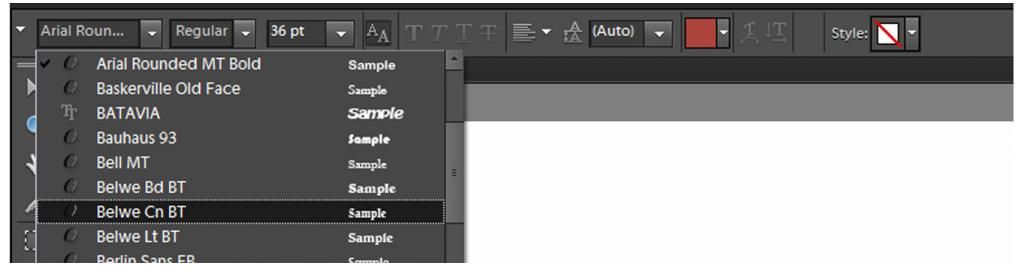
In most cases I simply use the Horizontal Type Tool—this allows me to type on the image from left to right just like word processing—although it will not “wrap” text when you come to the edge of the image, you must hit the enter key to start a new line.   We also have access to all the fonts on the computer.  With the Text tool active you can see an options bar like this. 


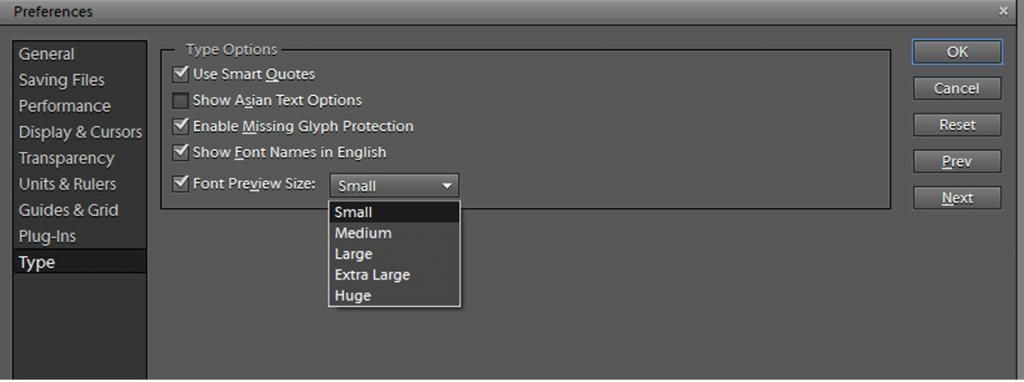
The first drop down menu allows you to select your font family.  PSE has a nice feature letting you see a sample of the font next to the name but the default view (like the picture above) makes the letters so small it’s nearly impossible to tell one font from another.  You can fix that by clicking Edit>Preferences>Type.  When the Type Options window pops up change the Font Preview size to Extra Large or Huge if you need it and click OK.


The second drop down menu allows you to select different styles of your font family—condensing the letters, adding italics or boldness.  The default will say “Regular.” Not all fonts have these styles available but you may still be able alter their appearance with the Faux buttons (all with the letter T in different styles). If the font family you’ve selected doesn’t come with bold type or italics, Photoshop Elements can create a fake one for you.
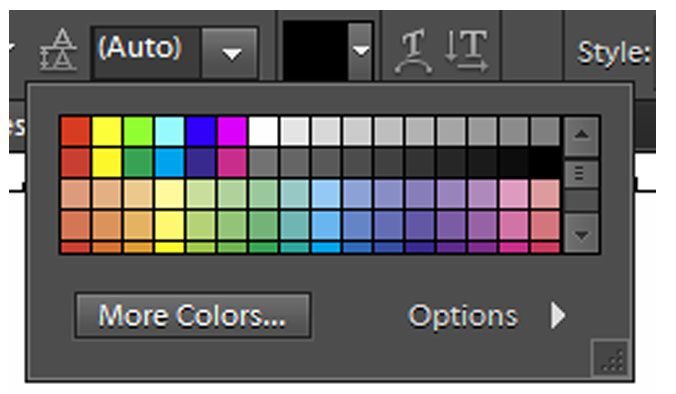
The third drop down menu is font size.  Pick something you believe is close to your needs, but you can always make your text larger or smaller by switching to the move tool and dragging at the corners of the text layer.

The box with the two A’s has to do with keeping the letters from looking too pixelated at larger sizes.  It’s official name is Anti-Aliased.  The default setting is on.  Do yourself a favor and leave it that way.  The next drop down menu with the lines lets you pick left, center, or right justification of your text.  The icon with the two A’s on top of one another let’s you select the spacing between lines of text. 

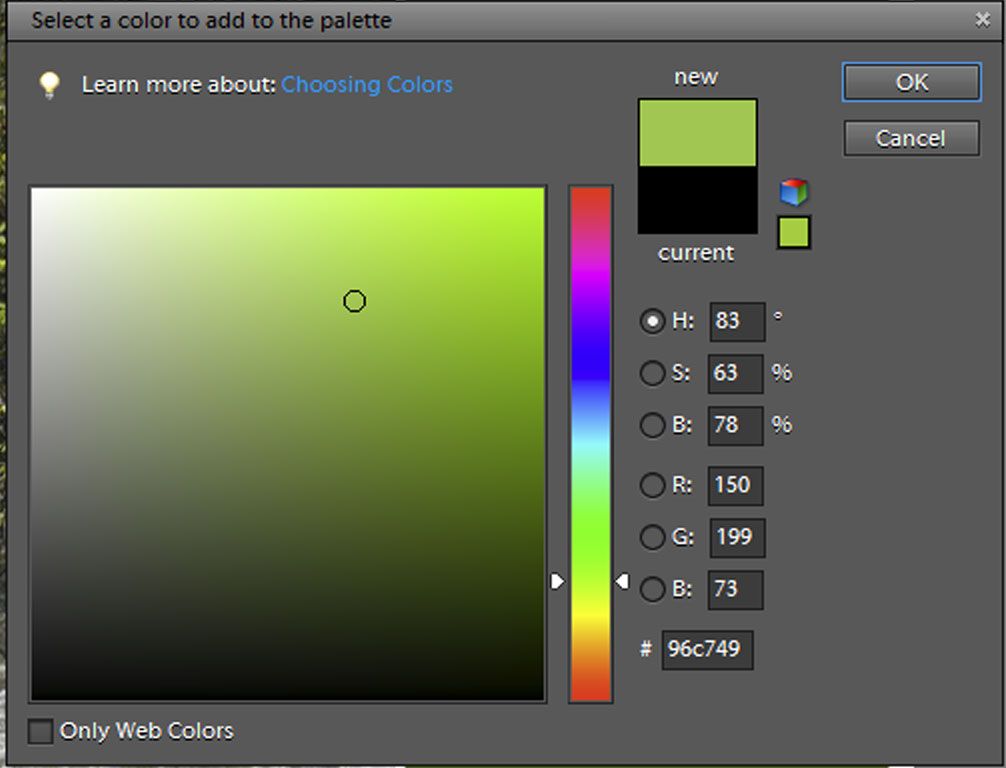
The last icon we’re going to worry about today is the color box.  Click the down arrow once and you’ll see a selection of standard colors.

Click on the box that says more colors and a new window opens.


If you hold your mouse over the rainbow column and click you’ll bring up all the hues of that color in the large square (I’m obviously in the green family).  When you hold you mouse over the square a circle will appear and you can click to select your color.  On the other hand, if you’re trying to match a color in a picture hover the mouse over the image itself.  It will look like a little medicine dropper.  When the tip of the dropper is over your desired color left click the mouse to select it.

play-with-font

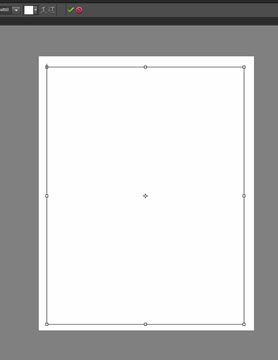
Now let’s see some type tools in action.  This week I’ve been making flash cards for our upcoming history lessons.  I start with a blank new file 2.75 X 3.5 inches in size.  I’m going to use the horizontal type tool, but I don’t want the words to scroll off the page in a straight line.  After selecting the type tool, but before I begin typing I click and drag the mouse from the top left corner to the bottom right corner over the white background.  This creates a bounding box so what I type will automatically wrap around to a new line when it reaches the edge.  You can choose if you want the text justified to the left, right or centered in the box.


After I typed the historical information in, I dragged this the thumbnail of this box onto a larger 8.5 X 11 background.  Doing this makes PSE treat it as an image not a text box so I won’t be able to edit what I’ve written.  I move the box where I want it on the page and I outline it by choosing Edit>Stroke (Outline) Selection.  I can fit 9 flash cards on a page (notice that I kept the center open till last because images dragged onto files always appear dead center).

Explorer-match-up-cards-2

In this particular case, I’m making flashcards for a Memory type matching game so the other side will remain blank.  If I wanted to put the portraits on the reverse side I would flip my image over Image>Rotate>Flip Horizontal to ensure an exact mirror image when printing and then I would arrange the pictures over the backwards text.

Let me show you some of my other projects where Text features a prominent role.
new-workbox-labels
We organize our school materials in Workboxes, but rather than label them with numbers I keep one specifically for every subject with a spare one for pencils, glue sticks, index cards etc. 

I begin with the Shape tool to make rectangles and fill it with Gradient tool color (I can see I’ve got more than 5 days worth of Photoshop Elements to share—maybe I’ll start a weekly tutorial).  Then I added my pictures and text. 

Normal fonts can only get so big before they start to appear pixelated.  If you need really big letters you may want to try an Alpha set.  In this case each letter is it’s own  high resolution .psd file and you can resize it just like a picture without it appearing to blocky.  (There’s another future tutorial).

bookmarks
I always make a set of bookmarks for each subject as well.  Not only does it help us find our place in each book, each day but I laminated them so I can write each day’s assignment on them in case I’m not available when my son finishes one subject and is ready to move onto the next. 

Although the words appear down the length of the side, this is not an example of Vertical Type. I typed the words “Today’s Assignment” using the same Horizontal Type tool and the rotated the words with the Move tool. 


We’ve just scratched the surface of the Type tool.  Adding text on a shape or following a custom path (a new feature of PSE 10 and above) helps make great mini-books for lapbooking.  Speaking of lapbooks, that’s the subject of tomorrow’s tutorial so you’ll want to check it out.  Have you learned anything new this week?  Do you have any ideas for future tutorials?  Leave a comment.


Click on the image below to see what other Crew Members are sharing.

Summer Blog Hop
Related Posts Plugin for WordPress, Blogger...