Thursday, April 4, 2013

Review: Computer Science for Kids


You know those news stories that come out saying that kids graduating today don't know why we say "dial" a telephone or that at one time we had to get up and cross the room to change the TV to one of the other 5 stations we received?  I realize that my son has never known life without a computer.  His favorite activity is studying Google maps or watching YouTube videos of roller coasters.  But to get ahead in life, I want him to learn to see the computer as a tool, not just an entertainment device.  So I was excited to get a chance to review a programming course from Computer Science for Kids.    The beginning course is available in both a Secular and Christian format.  The first ten chapters (learning to use Microsoft Small Basic) is the same, but the games/programs differ.   We received Computer Bible Games For Microsoft Small Basic with Bible themed games such as Noah's Ark,  the Lost Coin, and Bible Scramble.


We received a .zip file with Word files for each chapter of the text book (26.5 MB). You can see the Table of Contents online.  Our monitor is wide enough that we could have had the text file and the Small Basic open side by side, but I found it easier to read the text aloud to my son, sometimes even dictating code keystroke by keystroke.


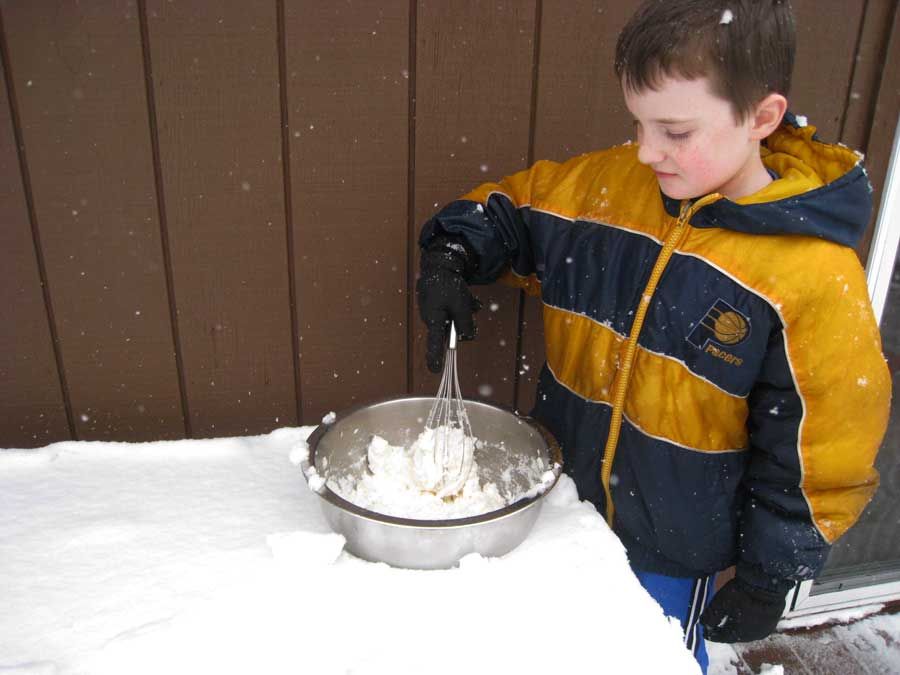
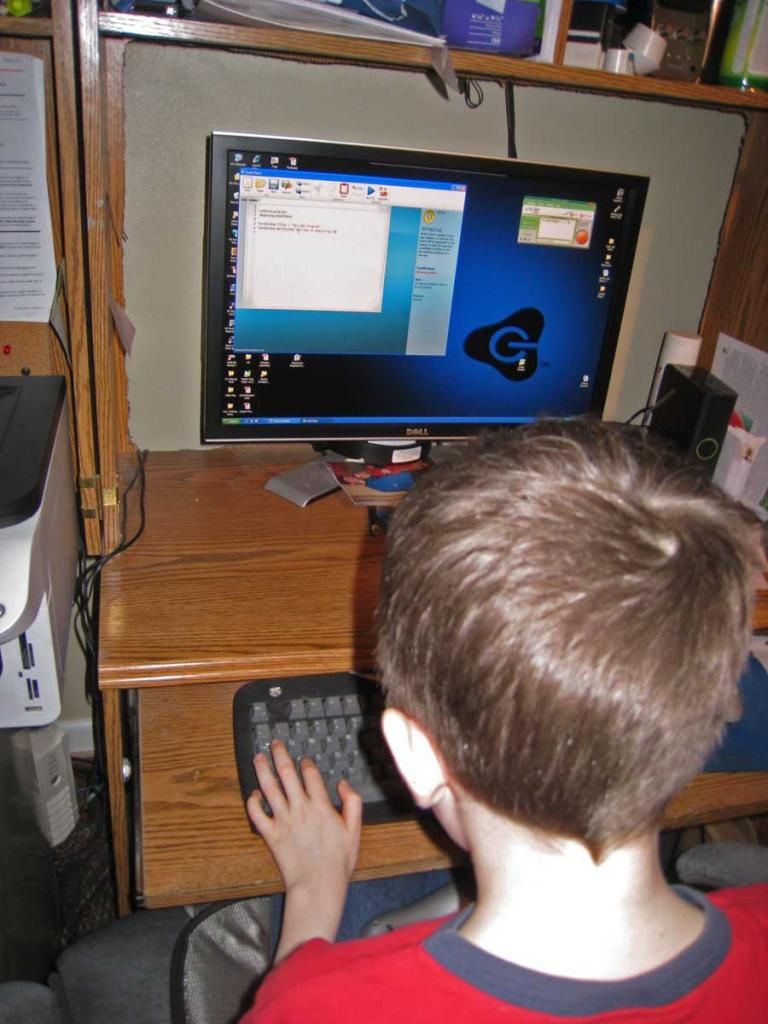
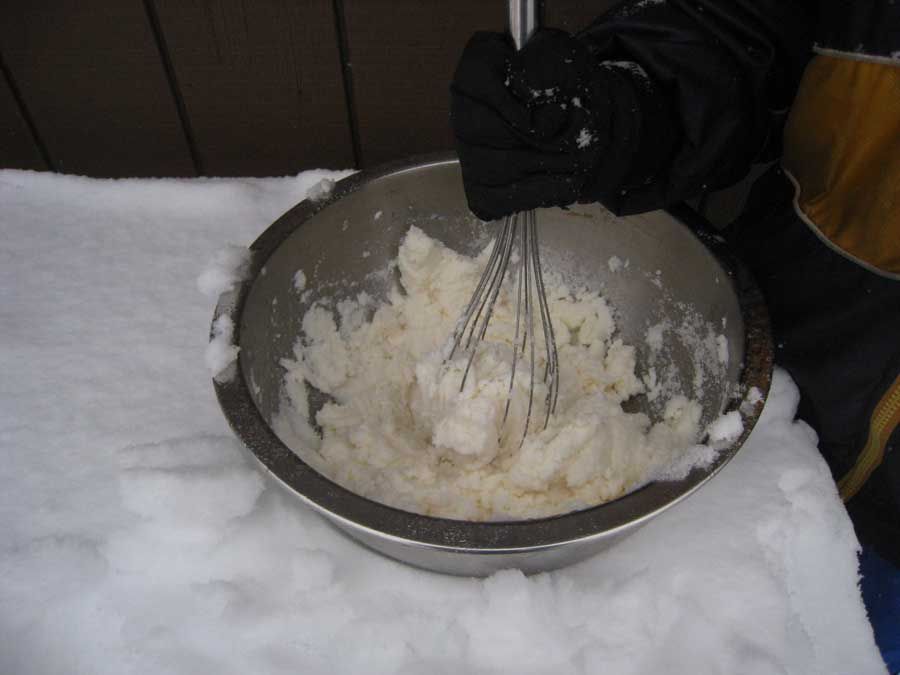
Typing while I dictate
 I ended up printing each chapter as we reached it and adding it to our binder.  There are over 500 pages of material and if you'd rather not print it out yourself, a preprinted copy is available.

The website suggests a chapter per week and that older students can work independently--they will obviously need good keyboarding skills.  Schnickelfritz is at the low end of the suggested age range (10 and older).  With all the technical information to cover and the necessity for accuracy we went slightly slower ( 4 lessons in 6 weeks).   I would try to read ahead on my own before covering the information with Fritz.  My only experience with computer programming was the original BASIC language on a TRS-80 computer, but I didn't find anything too difficult to understand.  When I read with my son I made sure to share the screenshot images with him (he's such a visual learner) or I'd devise visual aids like this chalkboard with labeled boxes to represent variables.


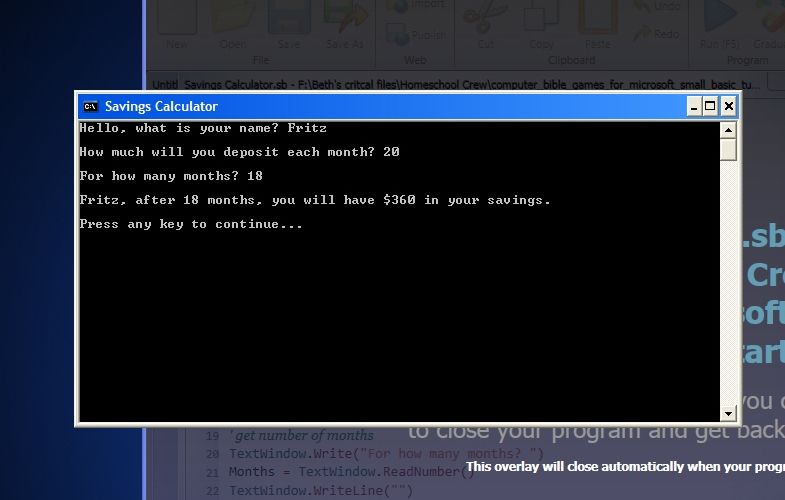
We haven't actually gotten to programming any of the Bible games yet, but the download includes coding for all the graphic elements and working copies of the games themselves so Fritz could see (and play) what we're working toward.  The games are nothing mind blowing, especially to a boy who's played Xbox, but there is a great deal of satisfaction in seeing a program run that you've entered yourself.    In Lesson 4, we built a program that calculated savings and we had to go back and find three typos before it would work--mistakes in our keying, not mistakes in the text book.  There was almost an Easter Egg hunt feeling to it as we scoured through the code for our errors.


The paperback version of Computer Bible Games is available for $59.95 with free shipping the Digital eBook version is normally the same price but is on sale for $34.95 until July 4th.


Photobucket


Wednesday, April 3, 2013

Della's Dinovite Challenge


Last month I introduced our dog, Della.  Isn't she a sweetie?  I tease that if I have time during the rapture, I'm grabbing the dog!  She does have issues though....constant shedding, itching all the time, etc.  Last week I had talk radio on in the car (usually we have audiobooks) and I heard a commercial for Dinovite--a nutritional supplement for dogs with the same issues we've been dealing with.  I visited the website and found a list of 7 signs that your dog might need a supplement.

  1. Itching & Scratching -- Yep, we've got that in spades.
  2. Dry, Flaky Skin  -- Yes, while combing her out the other day I thought she should sign up for a Head & Shoulders commercial.  It's doubly obvious with her black fur.
  3. Recurring Ear Infections -- She's always scratching her ears, though the vet has never prescibed anything for an infection. My husband, whose nose is more sensitive than mine, sometimes complains that her ears smell bad.
  4. Paw Licking--I've seen her do that occasionally.
  5. Stinky smell 
  6. Excessive Shedding-- Yes!  I could make a stuffed pillow with all the hair I collect.  I've always attributed it to her breed (part German Shepherd) and having an undercoat, but this says dogs should shed twice a year, not year round.
  7. Lethargy --  Yes,  she lays around and sleeps a lot of the time.
Okay we've got 4 symptoms in a big way and 2 more at a more moderate level, so I thought we'd better give this a try.     I'm going to share our experience with anyone interested.  I've always been a little leery to believe testimonials on a vendor's website--did someone in the office write them?  Did they just delete the bad reviews?  I purchased the Dinovite myself and I have nothing to gain or lose by sharing my honest opinions.

I called (there's no toll free number) and spoke to a nutrition coach with a concern about adding water to her dog food (to get the product to adhere) in our humid climate.   He assured me it wouldn't be a problem and I actually learned I could get by with a smaller size box based on Della's weight.  Because of her excessive itching, I also bought two tubes of their LickOChops fish oil.

The good news is Della likes the stuff!  I had some concerns because there are several articles and videos on the site to help your dog acclimate to the taste.  The inside of the box gives a schedule for starting and increasing the portions over 12 days.  It mentions that changes in diet can cause tummy troubles, so I'm sticking with their plan even though she doesn't mind the taste.

The instructions suggest adding water to dry dog food to help the Dinovite adhere when you mix it in.  Della's dog bowl sits out all day and she eats when she feels like.  Since we live in a humid climate, I don't want to wet down her food and risk mold.  Instead, I blend it with a little bit of raw cream for her special treat.

Stayed tuned!  I'll let you know when I notice any changes.

Monday, April 1, 2013

Vitamix Smoothie #2

We made a second green smoothie last week but but we made it at my mom's house and I forgot my camera.  It was it was good enough that I made it a second time at home (where my camera was sitting on the counter).  This recipe came from Green Smoothie Magic: 132+ Delicious Green Smoothie Recipes That Trim and Slim.


Beet This!


1 Cup water
1 kiwi, peeled
2 cups greens (kale. spinach, and/or romaine)
1/2 Cup beet, chopped
1 Cup blueberries
1 orange, peeled
a nub of ginger (optional)
ice

It's important when using hard veggies like carrots or beets to process them first with the water and then add the other ingredients (that's why the liquid is so red in the picture above).  We didn't add the ginger and used kale and spinach for the greens.  The recipe is really flexible--at home I didn't have blueberries so I substituted dark grapes and was just as satisfied.  The picture below is with the grapes (the original was more purple in color).  You can see it made nearly a quart.


The Verdict

Everyone liked this one better than our first (Full Disclosure: After I'd gone home from Smoothie #1, Papa told Dida "I didn't want to say anything in front of her, but it tasted like there were vegetables in there).  This time Papa knew there were some veggies but nothing stood out and overwhelmed the fruits.  He had a small cupful.  Schnickelfritz ate his spoonful again and said it was good but didn't want more.  He doesn't like the thickness of the drink.  I'm wondering if I could freeze it like popsicles?

The Cost:

My mother supplied the blueberries so I don't know their cost.  Of course, we'll soon be getting to blueberry season so the price should go down.  We have a nice U-pick farm nearby where we by a lot to freeze.  Everything else is available at Aldi's (I don't know about the optional ginger). 

Alkaline/Acid

Kiwi               high acidic
Spinach          med. alkaline
Kale               high alkaline
Beet               med. alkaline
Blueberries     low acidic
Orange           low acidic

Monday, March 25, 2013

Snow Ice Cream

Well the weather forecasters got it wrong again.  Two weeks ago they were predicting 4-8 inches and we barely had enough snow to turn the ground white.  The same 4-8 inches were predicted for yesterday and we ended up with 14!  


Normally we don't have "snow days" in our home school, but this was an event.  Not since the "great blizzard of '82" have we received so much in one day.  We made snow men, we went sledding,  we're shoveled the deck twice because I was afraid the weight of the snow would damage it.  And then it popped into my head that we could make ice cream with it!  Before we cleared of the patio table I ran inside to pour the ingredients into a large bowl.  You can find recipes that use sweetened condensed milk or whipping cream out there.  The great thing about this one is it uses milk (and everyone runs out to buy bread, eggs, and milk when they hear a winter storm is coming, right?).

1 Cup sugar
1 Qt milk  (I had actually separated some cream the day before so I had half cream/half milk)
1 T vanilla


Then start scooping in snow and mixing (I don't have to remind you to avoid the yellow snow do I?).  Eventually it will start to thicken up on you.  I probably added 5-6 qts of snow volume-wise.

 
What a simple winter treat.

Tuesday, March 19, 2013

Vitamix Smoothie #1:

My fellow Homeschool Crewmember, Marcy has been inspiring some of us to pursue a more nutritious lifestyle with her 40 day juice fast.  You can get recipes and follow her progress at JuicingMomma.com.  One of my goals this year was to get my family to eat more fruits and vegetables, especially those leafy and green ones.  Reading Marcy's blog is giving me the kick in the pants to get started.  While she is juicing, I will be making smoothies.  I don't want to debate which is better than the other, I just happen to already own a Vitamix blender and I'm going to work with what I have.

Joining me on this adventure will be Schnickelfritz (who at least has to taste each concoction) and his grandparents, Papa and Dida (they live just two minutes down the road).  Dida and I will be preparing the drinks, so we'll know what they contain.  Papa and Fritz already have anti-veggie predispositions so we'll keep the ingredients hidden from them until after their taste tests.  We're shooting for three new smoothies each week (usually for breakfast), but we may branch out into raw veggie soups and non-dairy ice creams--all made in the Vitamix.

Today's Recipe comes from 155 Healthy Smoothies and contains mango, banana, lime and (whisper) broccoli.  We'll review it for taste, cost, and alkaline/acidity.


I loaded the Vitamix with:

1 Cup cold water
2 Cups chopped broccoli florets
1/2 Cups frozen chopped mango
1 peeled banana
1/2 small peeled lime

Papa does not like broccoli so I made sure to run the blender until even the fine little green balls had been pulverized (maybe 90 seconds?).  Since I'd started with refrigerated water and frozen fruit the drink was still cold (the power of the Vitamix can actually heat soup if you run it long enough).  Here's our finished glass in the bright morning sunshine....


The Verdict:  There was enough for Dida and me to both have full glasses while Papa and Fritz both tried a few spoonfuls.  Fritz immediately called for more sugar, but gave it another go when I added a little Stevia and rated it an 7.  Papa never recognized the secret ingredient.  He rated the drink a 6 and said he would drink it again.  Dida would prefer the drink to be a little less thick.  She added some water to the Vitamix to get out the very last drops and then used it to dilute her glass.  I thought the broccoli had been well hidden by the other ingredients and felt it was on the verge of being like a nice, albeit thick lemonade (especially with the Stevia).  Perhaps a whole lime next time.

The Cost:  All the ingredients are available at Aldi's although frozen mango is only there occasionally. If you don't mind cutting your own mango, it's usually in the produce section.  I bought a 4 pound bag of frozen mango at Sam's Club for $7.98.   The total cost for all the ingredients in this smoothie comes to $1.31--cheaper than breakfast at McDonalds.

Alkaline/Acid:  A lot of the health issues we face today can be attributed (at least in part) to a pH imbalance.  A healthy body should be alkaline, but the typical American diet is made up of mostly acids.


From MindBodyGreen.com
 Our bodies are constantly trying to restore balance and that can mean stealing minerals (like calcium, sodium, potassium, and magnesium) from our bones and vital organs to neutralize the acid.  According to NaturalHealthSchool.com mild acidosis can cause such problems as:
  • Cardiovascular damage, including the constriction of blood vessels and the reduction of oxygen.
  • Weight gain, obesity and diabetes.
  • Bladder and kidney conditions, including kidney stones.
  • Immune deficiency.
  • Acceleration of free radical damage, possibly contributing to cancerous mutations.
  • Hormone concerns.
  • Premature aging.
  • Osteoporosis; weak, brittle bones, hip fractures and bone spurs.
  • Joint pain, aching muscles and lactic acid buildup.
  • Low energy and chronic fatigue.
  • Slow digestion and elimination.
  • Yeast/fungal overgrowth.
So how does our drink rate?  Only the lime is extremely acidic and it was the smallest ingredient.

                     pH
Mango          4.8
Banana         5.2
Lime             2.8
Broccoli        9
Water           7

Monday, March 18, 2013

Review: Essentials in Writing


Whenever the Crew is given the opportunity to review a Writing program, I usually jump on it.  This time, when the vendor Essentials in Writing popped up, was no exception.

Like Diogenes in search of an honest man, I have been on a never-ending quest to find a writing curriculum to meet our family's needs.  The issue is two-fold. First (and worst): my son hates to put pencil to paper.  Second:  Writing is something I think I can do, but haven't figured out how to teach.   I can explain punctuation and capitalization rules or how to diagram sentences, but I cannot think how to teach crafting words into entertaining and thought-provoking passages.    The Grade 4 curriculum ($40) actually covers both grammar and (formal & informal) writing. 

We received two DVDs with 58 lessons and a PDF download of the corresponding student worksheets and an answer key.  Following the suggested approach we would watch the video for each new lesson and complete the first worksheet.  Each following day we would work on the next worksheet in the lesson.  Most lessons had two worksheets but some had 1 to as many as 9.  Just completing one worksheet per day, the grammar portion would take 72 school days. 
We usually have about six weeks in which to used products before writing our reviews.  The vendor requested we spend half our time on the grammar portion and half on the writing portion.  I chose to go back and forth from grammar to writing because I didn't want three weeks of whining about writing, but I wouldn't suggest you do it my way.  The writing lessons tend to build upon one another (organizing, drafting, revision, edit, etc.)  so the break while we did a grammar lesson upset the flow. 

And the truth was, I didn't get a lot of whining.  Schnickelfritz had no problems watching the video or doing the grammar exercises.  The writing lessons were broken down into bite sized pieces that he could swallow without complaint.  Some didn't even involve a writing on his part.  Lesson 32 involved matching writing process terms with their definitions.  Lesson 38 involved underlining the best opening sentence among three choices.

Essentials in Writing definitely overcame our issues--my son didn't complain about writing time and I didn't have to worry about teaching because it was all done on the video.  Still, I am concerned that we weren't doing enough writing to log it as an hour of work.  The video lessons are only 3-7 minutes long and the longest Fritz took on any of the worksheets was 15 minutes.  I am planning on continuing to use this course for the rest of our school year.  Maybe I'm running out of steam, but it's nice not having to plan lessons or argue over the need to do writing today.  I'd rather have Fritz write two well-constructed sentences than fight and cajole for half an hour and end up with a paragraph of mush. 

I must say a word or two about the production quality of the DVD's.  The audio sounds "tinny: like an old time radio show and there are no closed captions available.  You can see a sample lesson here.


Photobucket
 
Disclaimer: I received a free copy of this product through the Schoolhouse Review Crew in exchange for my honest review. I was not required to write a positive review nor was I compensated in any other way. All opinions I have expressed are my own or those of my family. I am disclosing this in accordance with the FTC Regulations.

Friday, March 15, 2013

PVC Pipe Bow & Arrows


All good things must come to an end, and we've reached our last day of the 5 Days of Teaching Creatively: Hands-On Projects.

This past weekend the Baptist Association of our county hosted the annual Truth and the Outdoors event.  The attendance figures last year were over 10,000-- nearly triple the population of the town.  There were hunting and fishing vendors of all sorts, pony rides and a petting zoo, but perhaps the longest lines every year are for the kids wanting to make bow and arrow sets from PVC pipe, pool noodles, and dowel rods.  If you're studying the Middle Ages, Native Americans, or just looking for some outdoor fun check these out.


By "deconstructing" our bow and looking at various Internet sites, I think I've been able to come up with instructions to build your own.

You'll need:

1/2 inch PVC pipe
1/4 inch wood dowels
pipe insulation (look in the plumbing dept)
Pool Noodles
Thin Nylon string
Electrical or Duct Tape

Tools
hack saw
hot glue gun
a serrated knife or electric knife (like you use to carve turkey)

Cut the PVC pipe to a suitable length.  Ours happens to be 40 1/2  inches but I've found instructions on the Internet for lengths from 38" to 50 ".

Using a hack saw, cut a 1/2 inch notch in both ends of the pipe.

Cut a piece of foam insulation to be a hand grip (about 4 inches) and wrap it around the center of the pipe.  You may hot glue it in place as ours is, or tape it tightly with electrical tape. 


Cut the string shorter than the pipe--for our 40 1/2" pipe the string is 36 inches between knots.  The shorter the string the more force will be needed to draw back the arrow (and the more force it will launch with--keep this in mind for younger kids or shooting indoors).  You'll need to thread the string in the pipe notches with the knots to keep it secured.  Some instructions have you place the knot inside the pipe and secure it with electrical tape or a PVC pipe cap.  By leaving ours outside you can remove the string and let the bow rest in a straightened position.


You can decorate the bow with markers, colored tape or paints.  For the Baptist event, volunteers helped the kids apply tape to tell the Gospel message (like the old "wordless books").  Black : sin, Red : Christ's blood, White : white as snow, Blue : baptism, Green : spiritual growth,  Yellow : the streets of gold in Heaven.


Now onto the arrows.

Our dowel rods are cut to 18  inches, again notched at one end with a hacksaw.


Cut the pool noodle into 1 1/2 inch wide sections with a serrated knife (an electric knife goes through like butter if you're planning on a quiverful of arrows).

Poke the dowel through one side of the "donut" created by the pool noodle, through the empty center and into the opposite side.  Don't let the dowel penetrate the second side completely!  You can then fix it in place with the glue gun. 


These are very lightweight arrows and when Fritz and some of his friends were playing on a windy day, I notice the arrows completely turned around in flight, pointing back from where they came.  Some instructions on the Internet suggest adding a bolt to the dowel before embedding in the noodle (in the center of the donut). You would then hot glue this in place up against the noodle.  This may help stabilize the arrow in flight.

The arrows from the event had round heads just like a noodle cross section.  When we got home it was easy to make them more arrow-shaped by cutting the foam with a serrated knife.  I drew my lines first.  You don't want to make it too pointed and cut into the area where of the dowel rod end.

The timing for this project couldn't be more perfect.  We've just been reading about Robin Hood and the Crusades in our Mystery of History Vol 2.  Now my Schnickelfritz can act out his favorite passages.  Hands-on projects and activities is where homeschooling can really shine.  Check out these other blogs for more ideas.


Related Posts Plugin for WordPress, Blogger...