

Perhaps you’re like me and have a kid in the house (probably a boy) who’d rather play with Jenga blocks than write. I discovered that filling in mini books for a lapbook seemed far less intimidating and time consuming to his mind. I shared last fall that I’d purchased a PDF file with lapbooks for the four quarters of Mystery of History because I was intimidated to create one on my own. I wasn’t pleased with the images for the lap book pieces. I wanted color images, etc. I ended up using the files as a template but substituted more colorful images I found on the web. As a bonus I could add dates for every person and event and add arrows and descriptions like in the Masada picture in the bottom row. Photoshop Elements makes lapbooking a snap.
For this tutorial, I’m starting with a gift from HomeschoolShare.com for those who signed up for their emails—100 Pages of Templates You Can Type On. I’m not sure if this freebie is still available. I’m going to be using the Four Flap (Horizontal) template on page 82 to make a life cycle of a butterfly mini book.
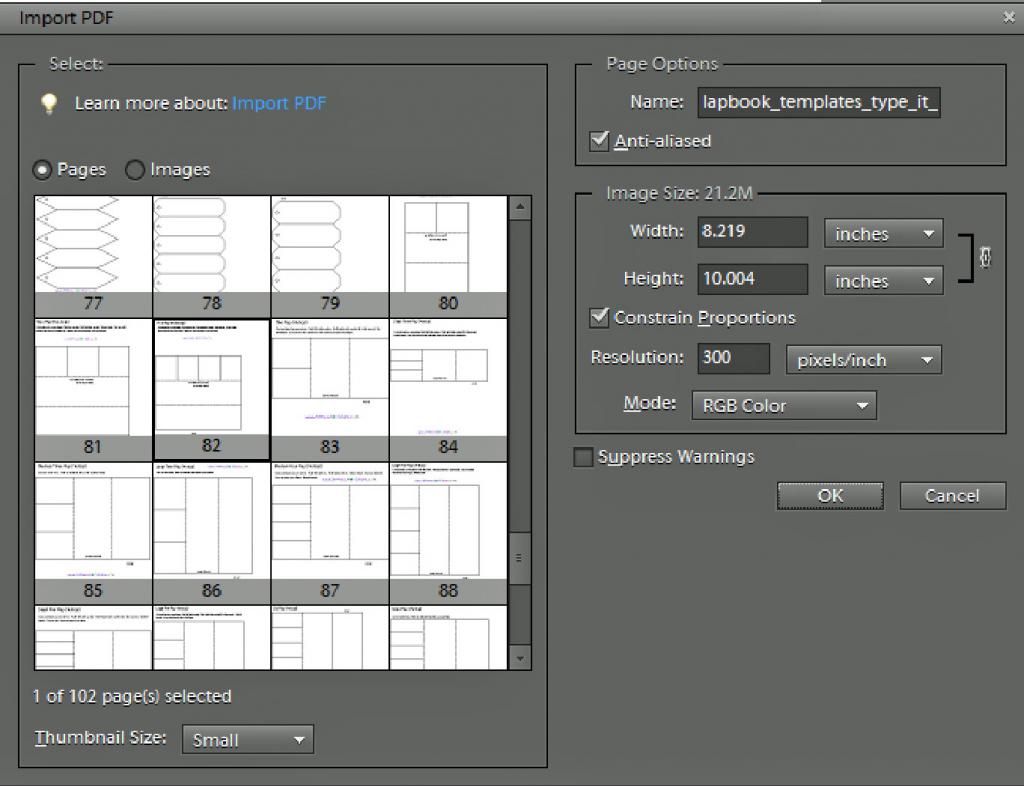
Begin by clicking File > Open and then the file with your lapbook template PDF. In this case the file has many pages so a new window pops up so I can select the page I want.
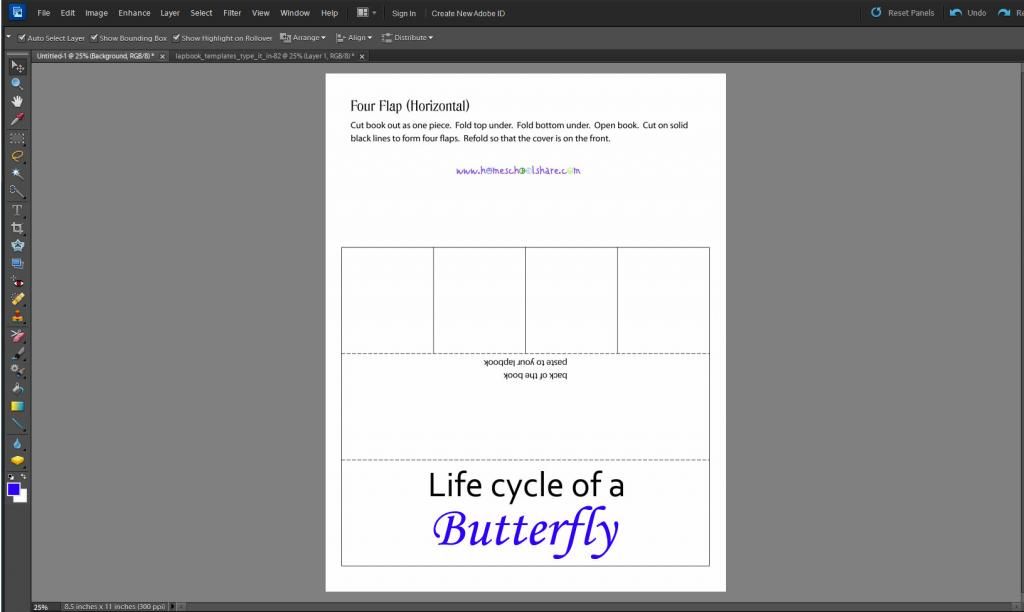
When the image first appears, you’ll notice the background is a gray/white checkerboard pattern indicating transparency. It will print just fine, but I find it difficult to look at while I’m working so I started a new blank file (8.5X11) and drag the template onto it. (You can review this step from Day One)
I started by adding text to the large flap on the bottom. Remember you can change fonts and colors in the same layer. (The lesson on text was Day Three)
Before I go on I should tell you that I didn’t score very well on those IQ tests where they show you a flat image of a box and you have to guess how it would look folded up in three dimensions. I thought I needed to flip the text and images on the four small flaps so they would be right side up in my mini book, but I didn’t. However there may come an occasion when you do need to flip and rotate so I’m going to show you the steps (since I’d taken the screen shots) even though they weren’t necessary for this mini book. But there’s a lesson to learn from my mistake--until you’re sure your work is perfect, consider saving it in .psd format. That keeps everything in it’s layers and you can come back and flip and rotate as necessary. Saving in .jpg saves file space but it merges all the layers together and you can’t correct any errors.
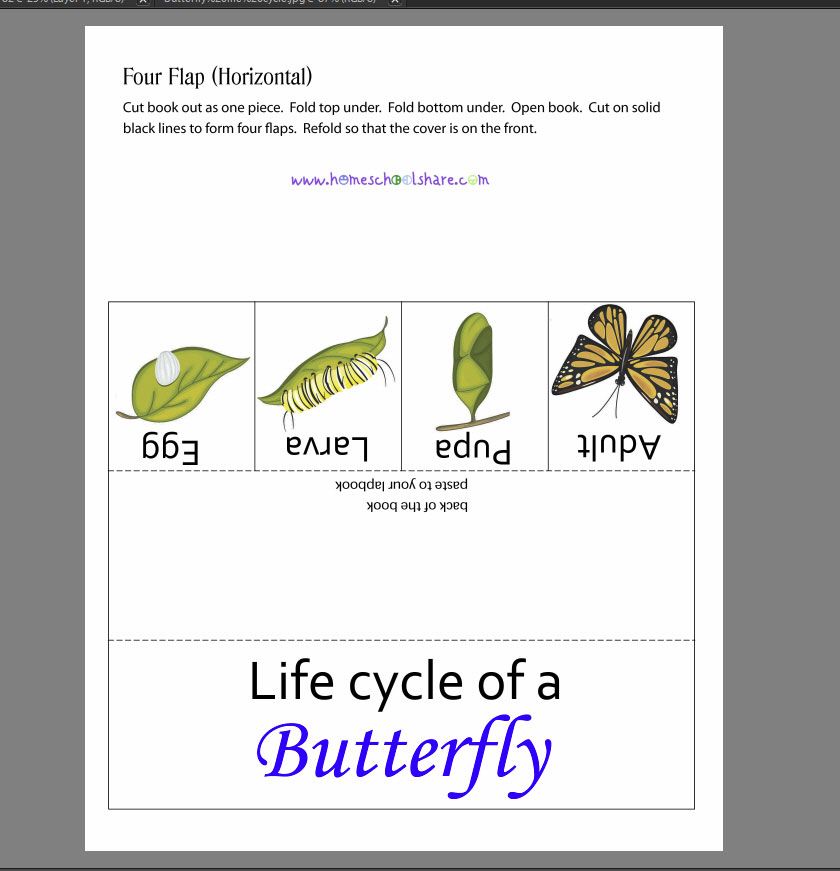
I started by typing the words Egg, Larva, Pupa, and Adult, each in its own layer in the four boxes.

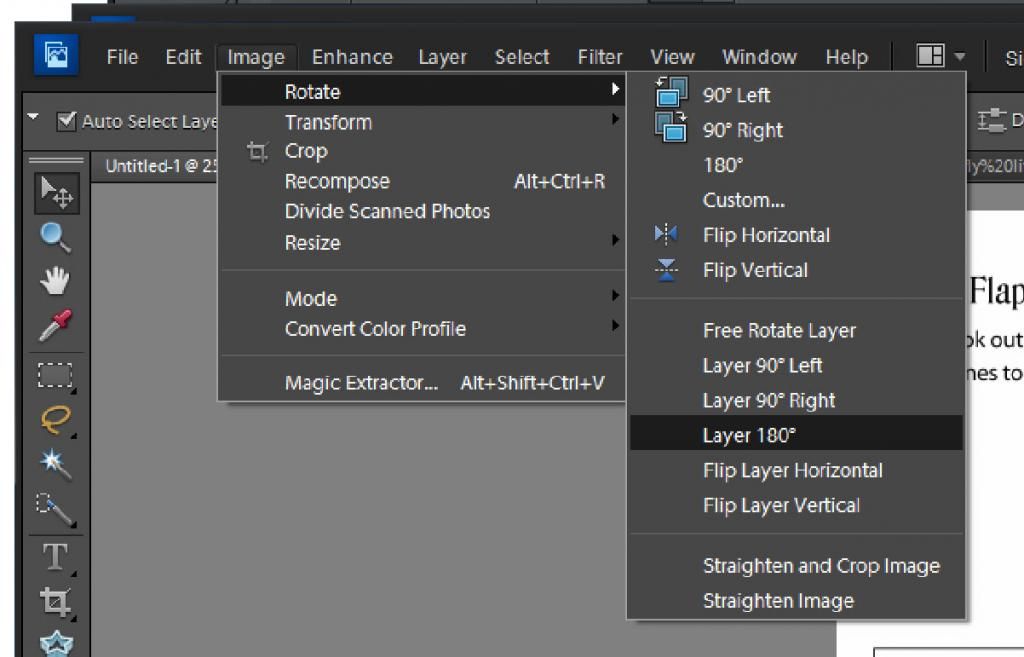
Then I switched from the text tool to the Move tool and clicked on one of the words. This put it in the broken line box where I could resize the word. Then I clicked on Image > Rotate > Layer 180. Make sure you choose Layer 180 and not the plain 180. I did this for each word.
I had previously found clip art for each stage of a butterfly’s life. I saved each image and opened the appropriate files in PSE’s editor. I dragged each picture onto my work area, resized it and then followed the same procedure to flip the image—ending up with this.
I know my introductory image also shows an apple-shaped mini book, but I’m going to save that lesson for my first weekly PSE Tutorial so check back next Thursday. We’re ending the week tomorrow with a lesson on making homeschool classroom posters. Please be sure and leave a comment on how you're finding these tutorials or what you'd like to learn to do.
Have you checked out what the other Crew Member’s have been sharing this week? Just click on the image below.

2 comments:
Nice, thank you for the hard work you have put into this, very useful!!
This series is one of the best i've seen yet.
Post a Comment